Connecting the Canon 5D Mark IV to Your Mac
The Canon 5D Mark IV is a full-frame DSLR that’s been a workhorse for wedding, portrait, and commercial photographers since its release. It has USB 3.0, Wi-Fi, and NFC, giving you multiple ways to move files to your Mac. Whether you’re dumping a day’s worth of wedding photos or shooting tethered in a studio, here’s how to set it up.
USB Connection
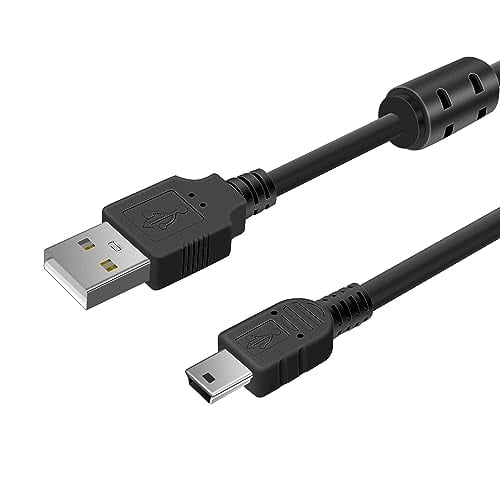
The 5D Mark IV uses a USB 3.0 Micro-B port (the wider connector that looks like a regular Micro-USB with an extra section). You’ll need a USB 3.0 Micro-B cable. For Macs with USB-C or Thunderbolt ports, get a USB Micro-B to USB-C cable, or use a USB-A to USB-C adapter with a standard Micro-B cable.
Communication Settings
Before connecting, check the camera’s communication settings:
1. Press the Menu button and go to the wrench (setup) tabs.
2. Find Communication Settings (or USB Connection on some firmware versions).
3. Make sure USB is set to allow photo transfer, not PTP/IP or similar network modes.
Connecting to Mac
1. Turn off the 5D Mark IV.
2. Plug the USB cable into the camera (port is on the left side under the rubber cover) and into your Mac.
3. Turn the camera on.
4. macOS should recognize the camera within a few seconds.
5. Image Capture or Photos will offer to open. You can also find the camera in Finder under Locations.
Image Capture is the simplest route for pulling specific files. Select the images you want, choose a save location, and click Download. The Photos app works better if you want everything imported into your Apple Photos library.
EOS Utility for Mac
Canon’s EOS Utility 3 is a free download that gives you much more control than the built-in macOS tools. As of 2026, EOS Utility supports macOS Ventura, Sonoma, and Sequoia.
After installing:
1. Connect the 5D Mark IV via USB.
2. Open EOS Utility from your Applications folder.
3. The software detects the camera and presents options: download images, remote shooting, camera settings.
4. Click “Download images to computer” to browse and select files on the camera.
EOS Utility also supports remote live view and remote shutter release, which is useful for tethered sessions. It can sort your downloads by date, file type, or rating.
Wi-Fi Transfer with Canon Camera Connect
The 5D Mark IV has built-in Wi-Fi and NFC. The Canon Camera Connect app handles wireless transfers to phones and tablets, but for Mac transfers, you’ll use EOS Utility over Wi-Fi.
Setting up Wi-Fi on the camera:
1. Go to the Wi-Fi menu on the 5D Mark IV (the wireless icon in the menu tabs).
2. Select Connect to a computer.
3. Choose Camera access point mode to create a direct connection, or Infrastructure mode to connect through your existing network.
4. Follow the on-screen steps to establish the connection.
5. On your Mac, open EOS Utility. It should find the camera on the network.
Infrastructure mode (connecting through your router) is more reliable and lets you keep your Mac’s regular internet connection active. Camera access point mode creates a direct link between the camera and Mac, which can be useful in locations without a Wi-Fi network.
NFC makes the initial pairing faster if your Mac supports it (most Macs don’t have NFC, so this feature is more useful with phones and tablets).
For Canon 5d mark iv wedding photography settings, being able to review shots wirelessly on a larger screen during the reception can help you catch issues before they become problems.
Card Reader Method
The 5D Mark IV has a dual card slot: one CompactFlash (CF) and one SD card slot. This means you can use almost any card reader to transfer files.
1. Turn off the camera and remove the card you want to transfer from.
2. Insert it into your card reader (most USB card readers support both CF and SD).
3. Connect the reader to your Mac.
4. The card appears in Finder. Open the DCIM folder and copy your files.
If you shoot with both card slots (for example, RAW to CF and JPEG to SD), you can transfer from whichever card has the files you need. A USB 3.0 card reader will be considerably faster than transferring through the camera itself.
The 5D Mark IV is a popular choice among Canon DSLR cameras, and its dual card setup is one of the reasons professionals trust it for important jobs.
Tethered Shooting on Mac
Tethered shooting is where the 5D Mark IV really shines in a studio setting. Every shot appears on your Mac’s screen within seconds, letting you check focus, exposure, and composition on a large display.
Options for tethered shooting:
– EOS Utility 3: Canon’s own software. Connect via USB, open EOS Utility, select Remote Shooting, and you’re set. You get live view on your Mac screen and full control over camera settings.
– Adobe Lightroom Classic: File > Tethered Capture > Start Tethered Capture. Photos go straight into your catalog.
– Capture One: Reliable tethering with on-the-fly adjustments and live view.
USB tethering is more stable than Wi-Fi for continuous shooting. Use a longer USB cable (3 to 5 meters) if you need the camera further from your workstation.
Canon Webcam Utility for Mac
Canon offers a free Webcam Utility that turns the 5D Mark IV into a premium webcam. Install it from Canon’s website, connect the camera via USB, and select “Canon Webcam” as your camera source in Zoom, Teams, Google Meet, or any video conferencing app.
The full-frame sensor and your existing Canon lenses give you dramatically better video quality than any built-in laptop camera. A 50mm f/1.8 creates a natural background blur that makes you stand out on calls.
Troubleshooting
Camera Not Showing Up on Mac
Check the USB cable first. The 5D Mark IV uses USB 3.0 Micro-B, which is different from regular Micro-USB. Make sure you have the right cable. Then check Communication Settings on the camera and verify that USB is set for photo transfer.
EOS Utility Can’t Find the Camera
Make sure you have the latest version of EOS Utility installed. Older versions may not work with newer macOS releases. Also quit any other apps that might have locked the USB connection (Image Capture, Photos, Lightroom). Only one app can control the camera at a time.
Wi-Fi Connection Drops
If the Wi-Fi connection is unstable, switch to Infrastructure mode and make sure the camera and Mac are on the same network. The camera’s Wi-Fi antenna isn’t the strongest, so staying within 10 to 15 meters of the router helps. For reliability, USB always wins.
macOS Privacy Permissions
On macOS Ventura and later, go to System Settings > Privacy & Security and make sure EOS Utility, Image Capture, and any other photo apps have access to Files and Folders and Removable Media. This step trips up a lot of Mac users after a system update.