When you purchase through links on our site, we may earn an affiliate commission. Here’s how it works.
Chromebook for Beginners
Google introduced Chromebooks in 2011. Since then, Google has released multiple editions for different types of consumers.
Chromebooks are becoming increasingly popular because of their excellent reputation in the market.
Chromebooks are easy-to-use and anyone can get started with them.
Google has upgraded its ChromeOS for Chromebooks, which now offers better compatibility and great features to explore web-based applications.
Today’s Chromebooks are more powerful and capable of handling almost all the tasks a standard PC can do. The upgraded ChromeOS is designed for all types of users.
If you have just bought a new Chromebook and are trying it for the first time, this article is worth bookmarking. It covers everything you need to know about the Chromebook.
The Chromebook for Beginners guide would help beginner users to understand the Chromebook and its functionality.
How to Set up a Chromebook for the First Time?
As noted above, Chromebooks run on Google’s ChromeOS, user-friendly operating system familiar to everyone.
Anyone can use this device, as it doesn’t require special skills. ChromeOS acts as a web browser, allowing users to browse the web and run web-based applications easily.
The following steps will help you set up your Chromebook for the first time. If you have just pulled out your Chromebook, follow these steps to start.
Note: Make sure that your Chromebook is fully charged. Even if it is charged enough, consider plugging it into the charging port while setting up for the first time to complete the setup process without interruptions.
1. Pull out the Chromebook from the bag and open the lid to turn it on.
2. you will be asked to enter your Google Account on the front screen. Type in your email Id and click the next button. (follow basic instructions such as selecting the language, your country, etc.)

Chromebook for Beginners – How to Set up a Chromebook for the First Time
3. The next page will ask you to enter your email account’s password. (If you have enabled two-way authentication, confirm the login process from the other device.)
4. After confirming the login process, you will be presented with a message that lets you see what things will be synced on this Chromebook.
5. Tick mark “Review sync options following setup” and then click the Accept and Continue buttons.
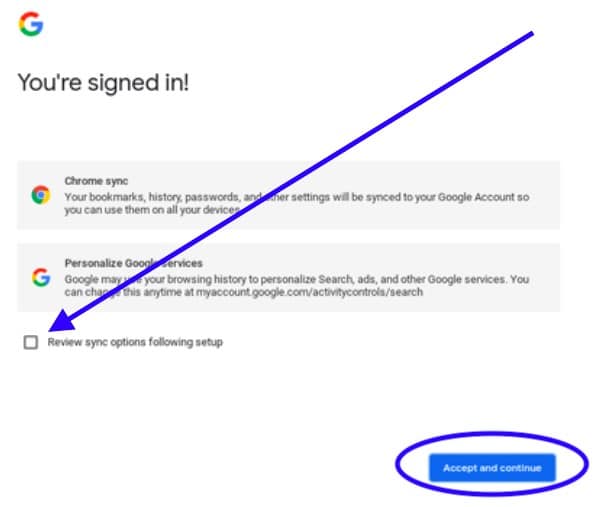
signed in
6. The Google Play apps and services window will appear on your screen. Read the terms and conditions carefully. Click the More button to follow the guidelines.
7. The location option can be disabled to prevent apps and third-party sources from using your current location.
8. At last, select the Accept button to finish the setup.
After completing the Chromebook’s setup, you will be asked to take a tour to improve your user interface.
You can click the X button from the upper right corner to close this window. If you don’t want to take the tour, click the X button.
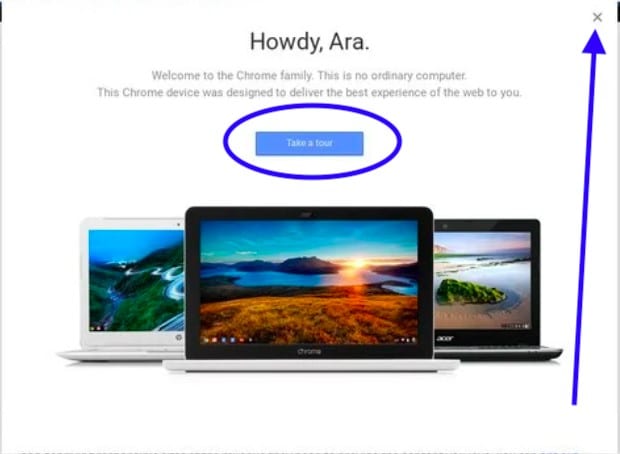
Chromebook for Beginners – take a tour
That’s all you must do to set up the Chromebook for the first time. All the extensions and applications associated with your Google Account will be installed automatically on the Chromebook.
If you look closely at the lower right corner, you can see the clock that lets you adjust the time and date.
If updates are available, you can open the notification panel in the bottom right corner. Select the Update All button to update all the apps for a fresh start.
Furthermore, we have listed some more tips for using the Chromebook like a pro.
How to Screenshot on Chromebook?
There are two ways a Chromebook user can take a screenshot on Google’s Chromebook.
We have listed both methods here. You can follow and use any of them according to your preference.
Method 1. Take a Screenshot of the Full Screen on a Chromebook
If you want to capture the entire screen as a screenshot, then there’s a shortcut to do so. Press and hold down the Control Key and Switch Key from the Keyboard. These keys are located on the top raw.

How to take a screenshot on a Chromebook
If you own a Chromebook with a 360-degree hinge, you can quickly take a screenshot by pressing the Power and Volume Down buttons.
Method 2. Capture a part of the Screen on a Chromebook
There comes a time when you need to capture just a tiny part of the screen, not the entire one. In this situation, you need to follow the combination of the keys given to you by your keyboard.
To capture a part of the screen on a Chromebook, press and hold the Control, Shift, and Switch Window keys.

Capture a part of the Screen on Chromebook
As soon as you press these three keys, the cursor of your mouse will be changed to a crosshair that lets you select the part from the current screen.
Once your screenshot is captured, a pop-up notification will appear on the screen, and it will be automatically saved to Google Drive.
You can view the screenshots from the Downloads folder of your Chromebook.
How to Type Math Symbols on Chromebook?
The Chromebook keyboard is different from other PCs. For that reason, you can’t type math symbols or we can say special characters easily.
The easiest way to get the math symbols or special characters is by simply searching for them on the Google Chrome browser to copy and paste them.
You can insert special characters and math symbols with Unicode on Google Chrome. You can use Google Unicodes to insert special characters using Google Chromebook’s keyboard.
While typing the math symbol or any other unique character from the Unicode, you must press and hold the Control+Shift+Unicode to insert the unique character in the document.
The best way to get the math symbol is to add an extension called Virtual Math Keyboard.
This add-on allows you to use the virtual keyboard on your Chromebook. It is the simplest way to access special characters, such as math symbols.

How to Type Math Symbols on Chromebook
Get a Virtual Math Keyboard
How to Use Speech-to-Text Chromebook Feature?
As a Google Product, Chromebooks allow users to use the unique speech-to-enter text feature. To enable this feature on your Chromebook, follow the below steps.
The dictation feature needs to be enabled by the user from the Chromebook’s Accessibility settings.
1. Go to Chromebook Settings and search for the Accessibility option in the search box.
2. Select Manage accessibility features from this page.

Chromebook for Beginners – How to Use Speech-to-Text Chromebook Feature
3. Scroll down the page and select the Keyboard and text input section.

text input section
4. you will see Enable dictation (speak to type) option here. Click the toggle button to enable this feature.

Enable dictation
To enable the speech-to-text feature, click the search field. A microphone symbol will appear beside the window.
Click the icon and speak. The system will type in what you talk automatically.
How to Use Text-to-Speech (Select-to-Speak) Chromebook Feature?
Google Chromebook’s built-in feature lets you hear parts of the current page. With this text-to-speech feature enabled, users can now select the words from the page to read aloud by the system.
Follow these steps to enable this feature on your Chromebook.
1. Select the Time option from the bottom right corner of your Chromebook.
 Chromebook Feature")
How to Use Text-to-Speech (Select-to-Speak) Chromebook Feature
2. From here, select the Settings option or Keyboard option. You can also launch Accessibility by clicking on the Accessibility option. (See above image)
3. Scroll down the page and then select the Advanced option.
4. Select the Accessibility option, and then click Manage Accessibility features. (You can open this page right from the built-in Chrome Browser on your Chromebook.)
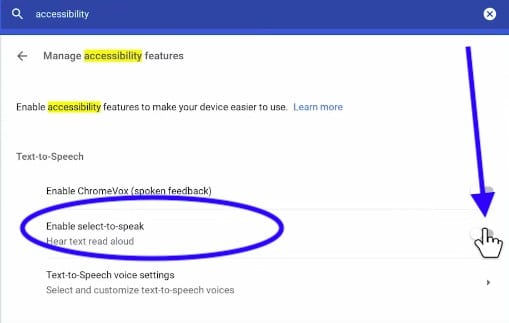
Chromebook for Beginners – Enable select to speak
@youtube
5. Turn on the toggle button of Enable Select-to-Speak, which is given under the Text-to-speech option.
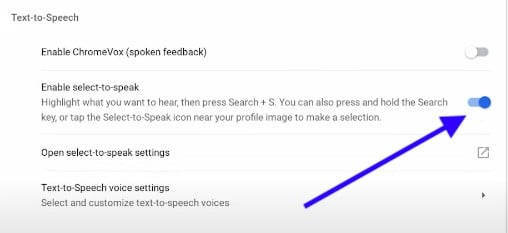
Chromebook for Beginners – select to speak
You can tweak this feature further by adopting different functions on the accessibility page.
You can also turn on the page reader feature, which automatically reads the page. From the Accessibility Settings, you can enable or disable this feature at any time.
Conclusion:
This is how you can set up the newly bought Chromebook and use its different features and functions.
As soon as you use the Chrome browser, there will be no issues with the Chromebook interface.
You can use Chromebook for work and personal use by connecting it to multiple monitors via docking stations.
You can easily open the Settings tab from the lower right corner of the page and start using the standard Chrome browser’s various features and functions.
Chromebook’s ChromeOS is relatively easy. Explore more of its features to know more about the features and functions of the Chromebook.
See Also