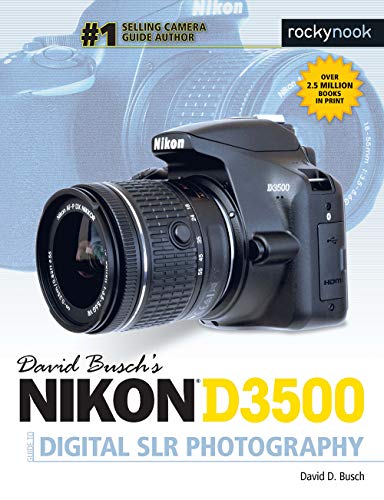
The Nikon D3500 is one of the best entry-level DSLRs ever made. Released in August 2018, it’s still a popular pick for beginners who want to learn photography with a real interchangeable-lens camera. At just 365 grams, it’s the lightest Nikon DSLR ever produced, and its 1,550-shot battery life puts most competitors to shame.
This guide walks you through every setting and feature you need to know. If you just unboxed the camera or bought one used, the steps below will help you start shooting better photos and videos right away.
What Makes the Nikon D3500 a Good First DSLR
Nikon designed the D3500 from the ground up for people picking up an interchangeable-lens camera for the first time. They stripped away the complexity found in higher-end models and replaced it with a streamlined control layout that stays simple without sacrificing image quality.
For shutter speed settings, check our D3500 shutter speed guide.
The 24.2-megapixel APS-C sensor delivers sharp, detailed images that hold up well for large prints and aggressive cropping. The sensor doesn’t have an optical low-pass filter, which means you get slightly more resolved detail compared to cameras that include one. Paired with the EXPEED 4 image processor, the D3500 handles everyday shooting with confidence.
One standout feature is Guide Mode. This on-screen tutorial system, unique to the D3x00 series, walks you through settings step by step right on the camera’s rear LCD. Instead of digging through the manual, you can learn aperture, shutter speed, and ISO while you shoot.
The camera connects to your phone through Bluetooth using Nikon’s SnapBridge app. You can transfer photos wirelessly and add GPS data from your phone to your images. There’s no built-in Wi-Fi direct, but the Bluetooth connection handles transfers well enough for sharing on social media.
Battery life is another major strength. The EN-EL14a battery is rated for 1,550 shots on a single charge, far above most entry-level cameras in its class. You can spend an entire day shooting without worrying about running out of power.
Nikon discontinued the D3500 in 2022, making it the last DX-format DSLR the company produced. There’s no direct replacement. Nikon shifted to Z-mount mirrorless cameras like the Z50 and Z30. Despite being discontinued, the D3500 remains widely available on the used market at attractive prices in August 2026.
Nikon D3500 Specs and Features
Before adjusting any settings, it helps to know what the camera can and can’t do. The table below lists the most important specs.
| Specification | Nikon D3500 |
|---|---|
| Sensor | 24.2 MP APS-C (DX) CMOS, no low-pass filter |
| Image Processor | EXPEED 4 |
| ISO Range | 100 – 25,600 |
| Autofocus System | 11-point AF (1 cross-type center point) |
| Continuous Shooting | 5 frames per second |
| Video | 1080p Full HD at 60/50/30/25/24 fps |
| LCD Screen | 3-inch fixed, 921K dots, no touchscreen |
| Connectivity | Bluetooth (SnapBridge), no Wi-Fi direct |
| Stabilization | None in body, relies on VR lenses |
| Battery | EN-EL14a, rated 1,550 shots |
| Weight | 365g body only |
| Card Slot | Single SD (UHS-I) |
| Microphone Input | No |
| Headphone Jack | No |
| Kit Lens | AF-P DX NIKKOR 18-55mm f/3.5-5.6G VR |
A few things stand out from this spec sheet. The D3500 has no touchscreen, no articulating screen, no microphone input, and no headphone jack. It also lacks in-body image stabilization, so you’ll want lenses with Nikon’s VR (Vibration Reduction) technology for handheld shooting. The single command dial on the rear controls most settings; there’s no front dial like on higher-end Nikon bodies.
How to Set Up the Nikon D3500 for the First Time
If you just took the D3500 out of the box, follow these steps to get it ready. This initial setup takes about five minutes.
- Charge the EN-EL14a battery fully using the included MH-24 charger. The charging light turns off when the battery is full.
- Open the battery door on the bottom of the camera and insert the battery with the contacts facing inward. The orange latch locks it in place.
- Insert an SD card into the slot on the right side of the camera (behind a small door). Push it in until it clicks. Use a UHS-I card rated at least Class 10 for smooth performance.
- Attach the lens by aligning the white mounting dot on the lens with the white dot on the camera body. Rotate the lens counterclockwise until it clicks.
- Turn the power switch (surrounding the shutter button) to ON.
- The camera will ask you to set the language. Use the multi-selector (the round directional pad on the back) to choose your language and press OK.
- Set the time zone, date, and time when prompted. Getting the date right ensures your files are organized correctly when you transfer them to a computer.
- Format the SD card by going to the Setup Menu (wrench icon), scrolling to “Format memory card,” and selecting Yes. This prepares the card for the camera and erases any existing data.
- Set the image quality. Go to the Photo Shooting Menu (camera icon) and select “Image quality.” Choose JPEG Fine for everyday use, or RAW if you plan to edit your photos on a computer.
- Set the image size to Large for maximum resolution.
Your D3500 is now ready to shoot. Set the mode dial on top of the camera to Auto (the green camera icon) if you want the camera to handle all exposure decisions while you get familiar with the controls.
Best Photo Settings for the Nikon D3500
The D3500 gives you full control over image quality, ISO, white balance, and several other settings through the Photo Shooting Menu. The right settings depend on what you’re photographing. The table below provides recommended starting points for common shooting situations.
| Scenario | Mode | ISO | Aperture | Shutter Speed | White Balance |
|---|---|---|---|---|---|
| Outdoor Portraits | A (Aperture Priority) | 100 – 400 | f/4 – f/5.6 | Auto | Auto |
| Landscapes | A (Aperture Priority) | 100 | f/8 – f/11 | Auto | Daylight |
| Indoor / Low Light | S (Shutter Priority) | 1600 – 6400 | Auto | 1/60 or faster | Auto |
| Action / Sports | S (Shutter Priority) | 800 – 3200 | Auto | 1/500 or faster | Auto |
| Night Photography | M (Manual) | 100 – 800 | f/4 – f/8 | 2 – 30 seconds | Auto |
| Street Photography | P (Program Auto) | Auto (100 – 6400) | Auto | Auto | Auto |
A few additional settings worth adjusting in the Photo Shooting Menu: Active D-Lighting, Picture Control, and metering mode. Active D-Lighting helps preserve shadow detail in high-contrast scenes. Set it to Normal for most situations. Picture Control lets you adjust the look of your JPEGs; Standard works well for general shooting, while Vivid adds more saturation for landscapes.
For metering, the D3500 offers Matrix, Center-weighted, and Spot metering. Matrix metering evaluates the entire frame and works best for most scenes. Switch to Spot metering when your subject is backlit or when you need precise exposure on a small area.
The D3500 also includes Long Exposure Noise Reduction and High ISO Noise Reduction in the shooting menu. Long Exposure NR is useful for night photography with shutter speeds of one second or longer. It takes a second “dark frame” after each shot to subtract noise. High ISO NR reduces grain at higher ISO values but can soften fine detail, so keep it at Normal rather than High.
How to Use Guide Mode on the Nikon D3500
Guide Mode is one of the D3500’s most useful features for beginners. It turns the camera’s rear screen into a step-by-step tutorial that explains what each setting does and how changing it affects your photo. No other Nikon DSLR lineup outside the D3x00 series offers this.
- Turn the mode dial on top of the camera to the GUIDE position (marked with the word “GUIDE”).
- The screen displays two main options: “Shoot” and “View/Delete.” Select “Shoot” and press OK.
- Choose the type of photo you want to take. Options include “Easy Operation” and “Advanced Operation.”
- Under Easy Operation, you can select from modes like Auto, No Flash, Distant Subjects, and Close-Up Subjects. The camera adjusts settings automatically based on your choice.
- Under Advanced Operation, you get access to options like “Soften Backgrounds” (aperture control), “Freeze Motion” (shutter speed control), and “Show Water Flowing” (slow shutter). Select one and press OK.
- The camera shows a description of the setting along with a visual preview. Use the command dial on the rear to adjust the value. The screen updates in real time so you can see how your changes affect the image.
- Press the shutter button halfway to focus, then press it fully to take the photo.
Guide Mode is an excellent way to learn the relationship between aperture, shutter speed, and the final image without memorizing technical details first. Once you’re comfortable with these concepts, move on to the semi-automatic and manual modes on the mode dial.
How to Shoot in Manual Mode on the Nikon D3500
Manual mode gives you full control over aperture, shutter speed, and ISO. It’s the best way to learn exposure because you make every decision yourself. The D3500 has only one command dial (on the rear), so you’ll use the exposure compensation button to switch between controlling shutter speed and aperture.
- Turn the mode dial to M (Manual).
- Look through the viewfinder or at the rear LCD. You’ll see the exposure meter at the bottom of the display showing whether your image will be overexposed, underexposed, or correctly exposed.
- Rotate the rear command dial to change the shutter speed. Turning it to the right increases the speed (shorter exposure), and turning it to the left decreases the speed (longer exposure).
- To adjust aperture, hold down the exposure compensation button (the button with the +/- symbol near the shutter button) and rotate the rear command dial at the same time.
- Set the ISO by pressing the “i” button on the rear of the camera, selecting ISO sensitivity, and choosing a value. Start at ISO 100 in bright light and increase only as needed.
- Watch the exposure meter as you adjust these three settings. When the indicator sits at the center (0), the camera considers the scene correctly exposed. You can intentionally shift it left (darker) or right (brighter) for creative effect.
- Set your focus mode to AF-S (Single Servo) for still subjects or AF-C (Continuous Servo) for moving subjects. Press the “i” button and select Focus Mode to change this.
- Half-press the shutter button to lock focus, then press fully to capture the image.
The key to shooting in manual mode is adjusting one variable at a time. Start by setting your aperture based on how much depth of field you want. Then set your shutter speed based on how fast your subject is moving. Finally, raise or lower the ISO until the exposure meter reads correctly.
If the exposure meter is blinking at one end, it means the scene is too bright or too dark for the current combination of settings. Either adjust one of the three exposure variables or add/remove light from the scene.
How to Record Video on the Nikon D3500
The D3500 records 1080p Full HD video at frame rates up to 60 fps. It’s not built for professional video work (it lacks a microphone input, headphone jack, and articulating screen), but it can produce solid footage for YouTube vlogs, family events, and short clips.
To start recording, press the red button with the movie camera icon on the rear of the camera. The camera begins recording immediately regardless of which mode the dial is set to. Press the same button again to stop recording.
Before filming, adjust your video settings in the Movie Settings menu. Go to the main menu, select Movie Settings, and configure the following options. Set frame size and frame rate to 1920×1080 at 60p for smooth motion or 24p for a more cinematic look. Set movie quality to High for the best results.
The built-in microphone picks up audio automatically. You can enable wind noise reduction in the Movie Settings menu if you’re filming outdoors. Since there’s no external microphone input, consider recording audio separately with a portable recorder if sound quality matters to your project.
Autofocus during video uses contrast-detection AF, which is slower than the phase-detection AF used for still photos. The camera may hunt for focus during recording, especially in low light. For smoother results, switch to manual focus before you start recording by flipping the AF/MF switch on the lens barrel to M.
Keep in mind that continuous video recording is limited to approximately 20 minutes per clip due to file size restrictions. The camera stops recording automatically when it reaches this limit, and you need to press the record button again to start a new clip.
How to Transfer Photos from Nikon D3500 to Phone
The D3500 uses Bluetooth and Nikon’s SnapBridge app to transfer images to your smartphone. There’s no Wi-Fi direct built into the camera, so SnapBridge handles all wireless transfers. The app is available for both iOS and Android.
- Download the SnapBridge app from the App Store (iPhone) or Google Play Store (Android) and install it on your phone.
- On the D3500, go to the Setup Menu (wrench icon) and select “Connect to smart device.”
- Select “Start” when the camera asks whether to begin pairing.
- Open the SnapBridge app on your phone and tap “Connect to camera.”
- Select “D3500” from the list of available devices in the app.
- A pairing code will appear on both the camera’s LCD and your phone screen. Confirm that the codes match and tap “Pair” on your phone.
- Once connected, the camera can automatically transfer low-resolution (2 MP) copies of every photo you take to your phone in the background.
- To transfer full-resolution images, open the SnapBridge app, tap “Download pictures,” select the images you want, and tap “Download.”
SnapBridge maintains a low-power Bluetooth connection between the camera and your phone. This means photos can transfer even when the camera is turned off (as long as Bluetooth is enabled in the setup menu). The automatic transfer feature sends 2-megapixel versions by default, which are sized well for social media posting.
If you prefer to transfer photos using a cable, connect the D3500 to your computer with the included USB cable. The camera appears as a removable drive, and you can copy files directly from the SD card.
Nikon D3500 vs D5600: Which One Should You Buy
The D5600 sits one tier above the D3500 in Nikon’s discontinued DX DSLR lineup. Both cameras share the same sensor and image processor, but the D5600 adds several features that more experienced photographers might want. Here’s how they compare:
| Feature | Nikon D3500 | Nikon D5600 |
|---|---|---|
| Sensor | 24.2 MP APS-C | 24.2 MP APS-C |
| Image Processor | EXPEED 4 | EXPEED 4 |
| Autofocus Points | 11 (1 cross-type) | 39 (9 cross-type) |
| LCD Screen | Fixed, no touch | Articulating, touchscreen |
| Connectivity | Bluetooth only | Wi-Fi + Bluetooth |
| Microphone Input | No | Yes (3.5mm) |
| Guide Mode | Yes | No |
| Intervalometer | No | Built-in |
| Battery Life | 1,550 shots | 970 shots |
| Weight (body) | 365g | 415g |
| Command Dials | 1 (rear only) | 1 (rear only) |
If you’re a complete beginner and want the simplest, lightest, and most affordable option, the D3500 is the better pick. Guide Mode alone justifies the choice for someone learning the basics. The battery life advantage is also significant if you shoot all day without access to a charger.
The D5600 makes more sense if you plan to shoot video regularly (thanks to the microphone input and articulating screen) or if you want a more advanced autofocus system with 39 points. The touchscreen also speeds up menu operation and lets you tap to set focus points during Live View shooting.
Since both cameras are discontinued, pricing on the used market is competitive. The D3500 typically sells for less, which adds to its appeal as a first camera.
Best Lenses for the Nikon D3500
The D3500 uses Nikon’s F-mount and is compatible with a wide range of lenses. However, it lacks a built-in autofocus motor, which means you need AF-S or AF-P lenses for autofocus to work. Older AF-D lenses will mount on the camera but can only focus manually.
The kit lens, the AF-P DX NIKKOR 18-55mm f/3.5-5.6G VR, is a solid starting point. It covers wide-angle to short telephoto focal lengths and includes VR stabilization. For most beginners, this lens handles everyday shooting well enough for the first several months.
When you’re ready to expand, the AF-P DX NIKKOR 70-300mm f/4.5-6.3G ED VR is a strong second lens. It gives you the reach needed for wildlife, sports, and distant subjects. It’s lightweight, affordable, and pairs well with the D3500’s compact body.
For sharper portraits with blurred backgrounds, the AF-S DX NIKKOR 35mm f/1.8G is one of the most popular upgrades. Its wide f/1.8 aperture lets in more light and creates smooth background blur that the kit lens can’t match. On the D3500’s crop sensor, it gives a field of view similar to a 50mm on a full-frame camera.
The AF-S DX Micro NIKKOR 40mm f/2.8G is worth considering if you’re interested in close-up and macro photography. It focuses close enough to capture small subjects at life-size magnification, and it doubles as a sharp general-purpose lens.
Remember that the D3500 has no in-body image stabilization. Choosing lenses with VR is especially important for handheld shooting at slower shutter speeds or at longer focal lengths where camera shake becomes more noticeable.
Frequently Asked Questions
Is the Nikon D3500 still worth buying in 2026?
Yes. The D3500 remains an excellent entry-level camera for learning photography. Its 24.2 MP sensor produces high-quality images, and Guide Mode is still one of the best on-camera learning tools available. Since Nikon discontinued it in 2022, you can find used bodies at lower prices than when it was new. The only downside is that Nikon is no longer making new F-mount lenses, but there are plenty of affordable used and third-party options available.
Does the Nikon D3500 have Wi-Fi?
No. The D3500 doesn’t have Wi-Fi direct. It uses Bluetooth Low Energy through Nikon’s SnapBridge app to connect to your smartphone. SnapBridge can automatically transfer 2-megapixel copies of your photos to your phone in the background. For full-resolution transfers, you need to select individual images within the app, which takes longer than a Wi-Fi-based transfer would.
Can the Nikon D3500 shoot in RAW?
Yes. The D3500 can shoot in RAW (NEF format), JPEG, or both simultaneously. To select RAW, go to the Photo Shooting Menu and change Image Quality to RAW. RAW files give you much more flexibility when editing in software like Adobe Lightroom or Nikon’s free NX Studio. Each RAW file is approximately 25-30 MB, so a 32 GB SD card holds roughly 1,000 RAW images.
What SD card should I use with the Nikon D3500?
The D3500 has a single SD card slot that supports UHS-I cards. A 32 GB or 64 GB SDHC/SDXC card with a minimum write speed of Class 10 or UHS Speed Class 1 (U1) is sufficient for most shooting. For continuous burst shooting or video recording, a U3 card offers faster write speeds and reduces buffer wait times. SanDisk Extreme and Samsung EVO Select are reliable and affordable choices.
How do I reset the Nikon D3500 to factory settings?
The D3500 doesn’t have a single “reset all” button. Instead, you reset shooting settings and the setup menu separately. To reset shooting settings, go to the Photo Shooting Menu, scroll to “Reset shooting menu,” and select Yes. To reset the setup menu, go to the Setup Menu, scroll to “Reset setup options,” and confirm. This returns all menu items to their factory defaults without erasing photos from your memory card.
Why are my Nikon D3500 photos blurry?
Shooting 4K? See our best 4K Nikon cameras roundup.
For a look at the best Nikon bodies, see our top Nikon cameras guide.
Blurry photos on the D3500 usually come from one of three causes. First, your shutter speed might be too slow. A general rule is to keep it at or above 1/focal length (for example, 1/55 second at 55mm). Second, the autofocus may have locked onto the wrong subject. Switch to Single-Point AF Area mode so you can place the focus point exactly where you want it. Third, camera shake from handholding in low light can cause softness. Use a tripod or raise your ISO to allow a faster shutter speed.