Figuring out how to get into photography feels like a big leap when you are standing on the outside looking in, but it stops being scary the second you actually start taking pictures. You do not need top-of-the-line equipment. You do not need formal training. What you need is a basic grasp of how a camera works, the discipline to practice regularly, and the willingness to produce thousands of forgettable shots before you start consistently making ones that genuinely look good.
Getting started has never been easier than it is right now. The phone sitting in your pocket right now outperforms professional cameras that cost thousands of dollars just fifteen years ago. Free editing apps can do things that once required expensive desktop software. Online forums and video tutorials provide the kind of education that used to mean signing up for a college course. If you want to pick up photography in 2026, nearly every resource you need is available for little or no money.
What you will find below is a practical, step-by-step guide. Not motivational quotes, not abstract theory, just the actual steps that take you from “I wish I could take better pictures” to producing work you are genuinely proud of, and maybe even getting paid for it.
How to Get Into Photography: Where Do I Actually Begin
Start with whatever camera is already in your hands. If that means a smartphone, perfect. The iPhone 16 Pro, Samsung Galaxy S25 Ultra, and Google Pixel 9 Pro all support RAW capture, give you manual exposure controls, and carry sensors that can produce prints up to 8×10 inches without any issue. Using your phone eliminates the “I need better gear first” excuse that keeps so many beginners stuck at the starting line.
Your first objective is not to produce stunning images. Your first objective is to produce a high volume of images. Shoot something every single day for at least two weeks straight. Photograph the coffee cup on your desk, your pet, the way morning light falls through a window, the pattern of cracks in a sidewalk. Shooting in volume builds the instinctive habits of framing a scene, reading the available light, and recognizing why one angle works while another falls flat.
Here is a step-by-step sequence that works well for most people just starting out.
- During your first week, keep the camera in full automatic mode. Put all your attention on composition: what is inside the frame, what you are cutting out, and where your subject sits. Leave exposure settings alone for now.
- In week two, switch over to aperture priority mode (marked A or Av on most camera dials). This gives you control over depth of field while the camera selects the shutter speed automatically. Take the same subject and shoot it at f/2.8, then f/5.6, then f/8, then f/16. Compare all four shots side by side. Pay attention to how the background transforms at each setting.
- Week three is when you move to full manual mode. You set the aperture, the shutter speed, and the ISO yourself. You will blow the exposure on a lot of frames. That is exactly the point. Every overexposed or underexposed image teaches you something about how these three controls push and pull against each other.
- By week four, start capturing in RAW format. Pull your files into editing software and practice basic corrections: exposure, white balance, contrast, highlight recovery, shadow lifting. This is the stage where your photos begin looking like deliberate creative choices rather than lucky accidents.
- Choose one genre that genuinely excites you, whether that is landscape, portrait, street, or food photography, and commit to shooting only that genre for an entire month. Focused, intentional practice sharpens your skills much faster than bouncing randomly between subjects.
This five-step process spans roughly two months. By the time you finish, you will be comfortable operating your camera in manual mode without second-guessing every setting, and you will have a small but meaningful collection of edited photos that clearly show your growth from day one.
What Camera Should a Beginner Buy
The best beginner camera is whichever one you will actually take with you when you leave the house. A $3,000 mirrorless body collecting dust on a shelf because it is too bulky to carry around produces exactly zero pictures. A smartphone that is always in your pocket produces hundreds.
If you are ready to step up from a phone, mirrorless cameras represent the current standard. DSLRs still work perfectly well, but every major manufacturer has shifted their research and development budgets almost entirely toward mirrorless systems. Purchasing a brand-new DSLR in 2026 means investing in a lens ecosystem that has stopped growing. Used DSLRs remain an outstanding deal if money is tight, but if you are buying new, go mirrorless.
For your first dedicated camera, look at entry-level mirrorless bodies from Canon, Sony, Nikon, or Fujifilm. Plan on spending somewhere between $600 and $1,200 for the body bundled with a kit lens. That kit lens (usually an 18-55mm or 15-45mm zoom) is not premium glass by any stretch, but it covers a practical focal range and helps you discover which focal lengths suit your shooting style before you spend more on specialized lenses.
| Camera type | Typical cost | Best for | Limitations |
|---|---|---|---|
| Smartphone (iPhone 16, Pixel 9, Galaxy S25) | $0 (already own it) | Learning composition, casual shooting, social media content | Small sensor limits low-light performance and background blur; limited lens options |
| Mirrorless (Canon R50, Sony a6400, Nikon Z50, Fuji X-T30 II) | $700 – $1,200 with kit lens | Serious beginners who want interchangeable lenses and full manual control | Added cost of lenses over time; learning curve for settings |
| DSLR (Nikon D3500, Canon T7/T8i, used market) | $300 – $600 used with kit lens | Budget-conscious beginners; huge selection of affordable used lenses | Larger and heavier than mirrorless; lens ecosystem is no longer expanding |
| Point-and-shoot / compact (Sony RX100 VII, Ricoh GR IIIx) | $800 – $1,300 | Travel, street photography, always-in-your-pocket shooting | Fixed lens (no interchangeable options); smaller sensor than mirrorless on some models |
One of the most common beginner mistakes is dumping the entire budget into the camera body and leaving nothing for a quality lens. If you have $1,000 to spend, think about putting $600 toward a used mirrorless body and $400 toward a single sharp prime lens (a 35mm f/1.8 or 50mm f/1.8) instead of spending the full $1,000 on a body paired with only the kit zoom. A fast prime lens with a wide aperture will teach you far more about controlling light and depth of field than any bundled kit lens ever could.
What Are the Photography Basics Every Beginner Needs to Know
Photography rests on three foundational technical ideas. Every other concept you will encounter down the road grows out of these three.
The exposure triangle describes how aperture, shutter speed, and ISO work together. These three settings determine how much light reaches your camera sensor and what the final image looks like.
Aperture refers to the size of the opening inside your lens. It is measured in f-stops. A small f-stop number like f/1.8 creates a large opening, letting in plenty of light and throwing the background out of focus (a shallow depth of field). A large number like f/16 narrows the opening, reducing the light but keeping everything from front to back in sharp focus. Portrait photographers generally work in the f/1.4 to f/2.8 range to soften backgrounds behind their subjects. Landscape photographers tend to shoot between f/8 and f/16 so the entire scene stays crisp.
Shutter speed determines how long the camera sensor stays exposed to light. A fast shutter speed like 1/1000 of a second freezes action, which is ideal for sports, wildlife, or children running around a park. A slower speed like 1/30 of a second allows more light in but introduces motion blur. Any shutter speed slower than about 1/60 of a second usually requires a tripod to prevent camera shake from softening your image.
ISO adjusts how sensitive the sensor is to incoming light. ISO 100 is the baseline setting, giving you the cleanest possible image with the least sensitivity. Cranking ISO up to 6400 or beyond makes the sensor highly responsive to dim conditions, but it also introduces digital noise (that grainy texture you see in low-light phone photos). Modern cameras handle high ISO values far better than models from even five years ago, but keeping ISO as low as you can while still nailing the correct exposure will always produce the cleanest files.
Composition is the art of arranging visual elements within your frame. The composition guidelines that help beginners the most are the following.
The rule of thirds splits your frame into a 3×3 grid. Rather than placing your subject dead center, position it at one of the four points where the grid lines cross. Most cameras and smartphone apps can overlay this grid on your screen. It instantly makes images more visually engaging than straight-center compositions.
Leading lines are natural lines already present in a scene: roads, fences, rivers, long shadows. These lines guide the viewer’s eye toward the main subject. A trail stretching from the lower corner of the frame toward a person standing in the distance adds depth and visual movement that a flat, centered shot simply does not have.
Framing takes advantage of elements in the environment to build a frame within your frame. Doorways, stone arches, overhanging tree branches, and open windows can all surround your subject, adding layers of depth and drawing the viewer’s attention inward. This technique also gives images a stronger sense of place and context.
Light is the single most important ingredient in any photograph. The word “photography” literally translates to “drawing with light.” Golden hour, that window of time just after sunrise and just before sunset, delivers warm, angled light that flatters nearly every subject. The midday sun creates hard, unflattering shadows that are tough to manage. An overcast sky works like a giant softbox, scattering light evenly and eliminating harsh shadows, which makes it surprisingly good for portraiture.
Train yourself to notice light before you start obsessing over camera settings. Walk through your home at different hours and observe where sunlight lands, how shadow patterns shift, and which rooms get the best natural light throughout the day. That awareness will directly translate into stronger photographs every time you pick up the camera.
How to Get Into Photography Editing as a Beginner
When you shoot in RAW format, you capture a file containing every bit of data your camera sensor recorded. Unlike a JPEG, which processes and compresses the image inside the camera before saving it, a RAW file is completely unprocessed. Straight out of the camera, RAW files tend to look flat and lifeless. That is entirely normal. The advantage of RAW is that it hands you total control over exposure, color, white balance, and detail recovery when you sit down to edit.
Every serious photographer edits their work. Editing is not cheating. It is the second half of the creative process. Ansel Adams spent hours in the darkroom adjusting his prints through dodging, burning, and contrast manipulation. Modern editing software is simply the digital version of what photographers have always done.
Begin with these fundamental adjustments, in this order: white balance (correct any unwanted color tint), exposure (dial in the overall brightness), highlights and shadows (pull back blown-out brights and lift crushed darks), contrast (add dimensionality), and sharpening (bring out fine detail). Those five edits alone will noticeably improve the vast majority of your photos.
| Software | Cost | Platform | Best for | Learning curve |
|---|---|---|---|---|
| Adobe Lightroom | $10/month (Photography Plan) | Windows, Mac, iOS, Android | Photo organization and batch editing; industry standard for workflow | Moderate |
| Adobe Photoshop | $10/month (bundled with Lightroom) | Windows, Mac | Advanced retouching, compositing, and pixel-level editing | Steep |
| Luminar Neo | $149 one-time or $10/month | Windows, Mac | AI-powered editing with one-click enhancements; sky replacement, portrait retouching | Low |
| Capture One | $15/month or $349 perpetual | Windows, Mac | Professional color grading and tethered shooting; popular with studio photographers | Steep |
| Darktable (free) | Free, open source | Windows, Mac, Linux | Full RAW processing workflow similar to Lightroom; no subscription | Moderate to steep |
| RawTherapee (free) | Free, open source | Windows, Mac, Linux | Detailed RAW processing with extensive controls; strong noise reduction | Steep |
| Snapseed (free) | Free | iOS, Android | Mobile editing with surprisingly powerful tools; great for phone photography | Low |
For the majority of beginners, the Adobe Photography Plan at $10 per month delivers the strongest overall value. You get Lightroom and Photoshop together, 20GB of cloud storage, and access to the most thoroughly documented editing platform in existence. Almost every YouTube tutorial, online course, and photography forum out there assumes Lightroom is your editing tool. That massive ecosystem of learning materials carries real practical value when you are just getting started.
If a monthly subscription is not appealing, Darktable stands out as the best free option. It reads RAW files from virtually every camera manufacturer, offers a non-destructive editing pipeline, and has an active open-source community behind it. The interface is rougher around the edges compared to Lightroom, and tracking down good tutorials takes a bit more digging, but the quality of the final results is on par.
A word about AI-based editing tools. Adobe Firefly (integrated into both Photoshop and Lightroom), Luminar Neo’s AI capabilities, and standalone applications like Topaz Photo AI can do extraordinary things in 2026. They remove unwanted objects, swap out skies, upscale resolution, slash noise levels, and even generate entirely new backgrounds. These tools are genuinely useful in a working photographer’s kit. But learn to edit by hand first. Understanding how to manually adjust exposure, color temperature, and tonal contrast teaches you what separates a good photo from a mediocre one. If you lean on one-click AI fixes from the start, you develop a reliance on automated processing without ever grasping the principles underneath. Think of AI editing as a way to accelerate your workflow once you already understand the fundamentals, not as a shortcut around learning them.
How Do I Put Together a Photography Portfolio
A portfolio is a carefully chosen selection of your strongest work. Not your personal favorites. Not a dump of every image you have ever captured. It is your best 20 to 30 photographs, chosen to demonstrate consistent quality and a recognizable creative perspective.
The most common beginner mistake is making the portfolio too big. An art director, potential client, or hiring manager will spend somewhere between 30 and 60 seconds flipping through your work. If the third image is weak, they stop looking. Fifteen excellent images outperform fifty uneven ones every single time.
Online portfolio platforms. A personal website is the most polished, professional option available. Squarespace ($16 to $33/month), Format.com ($9 to $24/month), and Adobe Portfolio (included free with any Creative Cloud subscription) all provide templates specifically designed for photographers, with clean layouts that put images front and center. Keep the design simple. White or dark background, large photos, straightforward navigation, and absolutely no auto-playing music. Your images should be the only thing a visitor pays attention to.
Social media platforms pull double duty as discovery engines. Instagram is still the primary place where photographers get noticed by clients and by fellow photographers. Post on a regular schedule, tag your work with relevant hashtags, and interact with other photographers’ posts. A well-curated grid of 30 to 40 strong images with a consistent editing style functions as a visual portfolio that is often easier to share than a website URL.
Photography-focused sharing platforms like 500px, Flickr, and Glass host communities of photographers who offer genuine feedback and constructive critique. These sites are less effective for landing commercial work, but they are excellent for getting unfiltered opinions on your images and discovering other photographers whose creative direction inspires your own.
Do not overlook print. A physical portfolio, even a simple photobook ordered from Artifact Uprising, Blurb, or Mixbook, still carries weight in face-to-face meetings, wedding consultations, and gallery submissions. Holding a beautifully printed photograph in your hands creates an emotional impact that no screen can replicate. Print your strongest 15 to 20 images in a 10×10 or 11×14 book. Depending on the service and the size, expect to pay between $50 and $150.
Revisit and update your portfolio on a regular basis. Pull out older work that no longer reflects your current abilities. A portfolio should be a living collection, not a permanent record.
Which Photography Genre Should I Focus On
There is no rush to commit to a single genre right away. Spend your first six months experimenting broadly. Take landscape photos on weekend mornings, shoot portraits of friends after work, try street photography during your lunch break, and set up food shots at dinnertime. The genre that keeps calling you back, the one you find yourself thinking about between sessions, is the one worth dedicating real time to.
Still, knowing what options exist helps you experiment with purpose rather than just wandering aimlessly.
Portrait photography centers on people. It spans everything from quick professional headshots to elaborate studio sessions involving carefully designed lighting and wardrobe selection. Success in this genre depends heavily on people skills. You have to direct your subjects, put them at ease, and coax natural expressions out of them. Typical gear: a fast prime lens (the 85mm f/1.8 is the classic portrait workhorse), a reflector for bouncing light, and eventually an off-camera flash or strobe.
Landscape photography is all about places rather than people. Early alarms, evening chases for the last light, unpredictable weather, and long stretches of waiting define the genre. A tripod is non-negotiable. A wide-angle lens in the 14 to 24mm range handles most of the heavy lifting. Post-processing is a major part of landscape work, from exposure blending to color enhancement and managing the wide dynamic range typical of outdoor scenes.
Street photography captures the unscripted moments of everyday life in public spaces. It is candid, spontaneous, and reactive by nature. A small, inconspicuous camera or even a phone is ideal because drawing attention to yourself ruins the moment before it happens. You need no special gear for this. Some of the most celebrated street photography in the history of the medium was shot on simple point-and-shoot cameras.
Wildlife photography demands patience, long telephoto lenses in the 200 to 600mm range, and a tolerance for sitting in awkward positions for extended stretches of time. It is one of the most equipment-heavy genres, but the reward when you finally nail a perfect frame of an animal in its habitat is hard to beat.
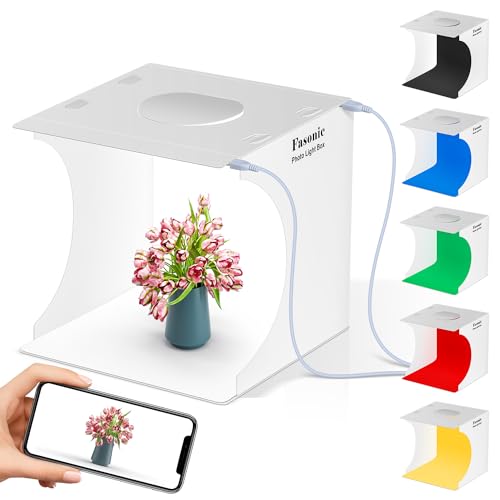
Product photography falls squarely on the commercial side. You are shooting items for online store listings, advertising campaigns, and brand catalogs. The essentials are a lightbox or light tent, a tripod, and a consistent, controlled lighting setup. This genre is one of the simplest to turn into paying work because every business selling online needs quality product images.
Wedding photography is intense, high-stakes, and high-reward. You are documenting a once-in-a-lifetime event with no opportunity for a do-over. It requires you to switch between multiple genres over the course of a single day: formal portraits, candid moments, tiny detail shots, group photos, and live event coverage. Wedding photographers generally charge between $2,000 and $6,000 or more per event.
Food photography has been growing quickly, driven by the needs of restaurants, food bloggers, cookbook publishers, and recipe apps. Beautiful natural window light, a few carefully chosen props, and thoughtful food styling matter far more than expensive camera equipment in this field. A 50mm lens or a 90mm macro handles the large majority of food photography assignments well.
Real estate photography provides steady, repeatable income. Agents need fresh photos for every new listing, and there is always a new listing. A wide-angle lens in the 16 to 35mm range, a tripod, and a basic understanding of flash technique for interior lighting form the core toolkit. A lot of real estate photographers shoot two or three properties in a single day, charging anywhere from $100 to $300 per property.
Can You Actually Earn Money from Photography
Yes, but the road from hobbyist to paid photographer is typically longer than most people assume going in. The photographers who successfully turn their work into income approach it as a business from day one, not purely as a creative outlet.
Stock photography has the lowest barrier to entry. Upload your images to platforms like Adobe Stock, Shutterstock, Getty Images/iStock, or Alamy. Each time someone downloads one of your photos, you receive a royalty payment, usually somewhere between $0.25 and $3.00 per standard license download. The per-image income is modest, but photographers who build large, well-keyworded libraries of commercially useful images (think business settings, lifestyle scenes, food, technology) can accumulate meaningful passive earnings over time. The keys are volume and market relevance. Five hundred high-quality images with genuine commercial appeal will generate more revenue than five thousand artistic shots that nobody is searching for.
Freelance client work covers portraits, professional headshots, events, product shoots, and real estate photography. Begin by offering sessions at a reduced rate to fill out your portfolio, then gradually increase your prices as your skills sharpen and word spreads. Put together a straightforward pricing sheet, grab a basic contract template (many photography associations offer these for free), and set up a dedicated business email address. Local Facebook groups, Nextdoor, and good old-fashioned word-of-mouth referrals are surprisingly effective channels for landing your first clients.
Social media and content creation can produce income through brand deals, sponsored posts, and affiliate marketing once you have built a following. Instagram, YouTube (photography tutorials, gear reviews, behind-the-scenes process videos), and TikTok are the main platforms for this. Growing an audience takes months or even years of consistent content, but photographers who openly document their learning journey often attract followers faster than those who only post polished final images.
Print sales are a natural fit for landscape, nature, and fine art photographers. You can sell prints through your own website, on Etsy, through Fine Art America, or at local art fairs and gallery exhibitions. Print-on-demand services take care of printing and shipping on your behalf, so you do not need to tie up money in physical inventory. The markup on fine art prints is substantial. A print that costs $15 to produce can sell for $50 to $200 or more, depending on the size and whether it comes framed.
Teaching and workshops become a realistic income stream once you have a solid portfolio and some real experience under your belt. Local community centers, adult education programs, and online platforms like Skillshare and Udemy all offer channels for teaching photography basics. In-person workshops where you guide a small group through a photo walk or demonstrate a lighting technique in a rented studio can charge between $50 and $200 per participant.
What Starter Gear Do I Really Need
Beginners almost always buy too much equipment too soon. Here is what you genuinely need to get started, alongside the items that can safely wait.
Camera body: Any mirrorless or DSLR camera manufactured within the last five years, or a current-generation smartphone. If you are purchasing new, the Canon EOS R50 ($680), Sony a6400 ($900), Nikon Z50 ($860), and Fujifilm X-T30 II ($900) are all solid starting points that include a kit lens in the box.
One quality lens: If your camera shipped with a kit zoom, use that first. When you are ready for your first additional lens, pick up a 50mm f/1.8 (roughly $150 to $250 from Canon, Nikon, or Sony). It is fast, it is sharp, it barely weighs anything, and it forces you to compose by physically moving around rather than standing still and twisting a zoom ring.
Tripod: A must for landscape photography, low-light shooting, and long exposures. Skip the cheapest $20 tripods because they wobble in the slightest breeze and the pan/tilt heads are sloppy. A decent aluminum travel tripod in the $60 to $120 price range (brands like Neewer, K&F Concept, or Amazon Basics) serves beginners well. Carbon fiber models ($200 and up) shave off weight but are not a priority when you are just starting.
Memory cards: Buy at least two. A 64GB or 128GB UHS-I SD card runs $10 to $20 and stores thousands of images. Carrying a backup card means you are never stranded without storage in the middle of a shoot. SanDisk Extreme and Lexar Professional are dependable options.
Editing software: The Adobe Photography Plan ($10/month for Lightroom and Photoshop) or Darktable (completely free). Start with one of these. You can always switch or add tools later as your needs evolve.
What can wait. External flashes, extra lenses, camera bags, lens filters, and studio lighting gear are all valuable additions down the line but not required for the learning phase. Buy new gear to solve specific problems as those problems actually come up, not in preparation for challenges you have not yet encountered.
How Do I Stay Motivated and Keep Getting Better
Find a community. Photography can feel lonely, particularly in the early stages when you are unsure whether your work is any good. Local camera clubs typically gather weekly or monthly for critique nights, organized photo walks, and talks from experienced shooters. Online communities like the Reddit r/photography and r/photocritique subreddits, photography Discord servers, and Facebook groups offer feedback at any time of day or night. Receiving honest reactions from other photographers pushes your growth in ways that practicing alone simply cannot match.
Give yourself challenges. Weekly themes push you to photograph subjects you would never choose on your own. “Shadows” one week, “the color blue” the next, “motion” the week after that. Working within constraints sparks creativity. The 365 Project, taking one deliberate photo every single day for an entire year, is a demanding commitment but produces remarkable skill development for anyone who sees it through.
Study photographers you admire. When you come across an image you love, stop and analyze it. Where is the light source? What focal length and aperture likely produced this look? Why does the composition pull you in? Do not just scroll past images on Instagram. Pause, examine, and try to reverse-engineer what makes them work. Published photography books are worth your attention, too. The work of Henri Cartier-Bresson, Vivian Maier, Steve McCurry, Fan Ho, and Dorothea Lange teaches composition and visual storytelling at a depth that social media feeds rarely approach.
Go back through your old photos. Revisit images you captured three or six months ago. You will spot things you missed at the time, see editing adjustments you would handle differently now, and realize just how far you have come. Re-editing old RAW files with your current skills is one of the most satisfying exercises in the entire learning process.
Shoot on a regular schedule. Natural talent matters less than consistent practice when it comes to photography. The photographer who takes 100 photos every weekend for a full year will outpace someone with more innate ability who only picks up the camera once in a while. A camera is a tool, and like any other tool, regular use builds a fluency that sporadic handling never will.
How to Get Into Photography FAQs
Is photography an expensive hobby?
It can be, but it absolutely does not have to be. A smartphone paired with free editing software costs you nothing beyond what you already own. An entry-level mirrorless camera bundled with a kit lens falls in the $700 to $1,200 range. The Adobe Photography Plan runs $10 per month. A solid beginner tripod costs $60 to $100. You can start producing genuinely good work for under $1,000 total, or for nothing at all if you shoot with your phone. Photography gets expensive when you start chasing gear upgrades for their own sake, but at every stage, the most valuable investment you can make is time spent actually shooting and editing, not a new piece of equipment.
Do I need to enroll in a photography course?
No. Photography is one of the most self-teachable skills out there. YouTube channels like Peter McKinnon, Thomas Heaton, and Jamie Windsor deliver free instruction that holds up against paid courses. Photography books such as “Understanding Exposure” by Bryan Peterson and “The Photographer’s Eye” by Michael Freeman cover both the technical and creative foundations in thorough detail. That said, a structured course, whether it is online (Skillshare, CreativeLive, Udemy) or in person at a community college, brings accountability and direct instructor feedback that pure self-study lacks. If you learn more effectively with guided structure, a course is a worthwhile investment.
How long does it take to get good at photography?
Most people notice a clear jump in quality within three to six months of shooting and editing regularly. “Good” is a subjective term, but after roughly a year of steady practice, you should feel comfortable shooting in manual mode, editing RAW files with confidence, and producing images that genuinely impress people who are not photographers themselves. Reaching a professional caliber generally takes two to five years of focused, deliberate practice. The pace depends less on raw talent and more on how often you shoot, how critically you assess your own results, and whether you actively seek out honest feedback from others.
Should I shoot in RAW or JPEG?
RAW. Every time. JPEG files compress the image and permanently throw away data in the process. If your exposure is a little off or your white balance is wrong, a RAW file lets you correct it during editing with zero quality loss. A JPEG gives you almost no room to recover mistakes. The only downside to RAW is larger file sizes (roughly three to five times bigger than the equivalent JPEG), meaning you need more storage space. Memory cards and external hard drives are inexpensive. The editing flexibility that RAW provides is not something you can buy cheaply after the fact. If your camera supports a RAW+JPEG mode, turn it on so you get both: the JPEG for quick sharing and the RAW for serious post-processing work.
What is the best camera brand for beginners?
Canon, Sony, Nikon, and Fujifilm all produce excellent cameras for people just starting out. There is no single “best” brand in any objective sense. Canon and Nikon offer the widest selection of lenses and accessories on the market. Sony leads the pack in autofocus technology at most price points. Fujifilm cameras feature physical dials and controls that many beginners find more natural to operate, and they produce appealing colors straight out of camera with no editing required. If you can, visit a camera store and physically hold models from each brand. The camera that feels right in your hands and has menus that make sense to you is the correct choice. All four manufacturers deliver image quality that goes far beyond what 99% of beginners will ever need.
Can I learn photography using only a smartphone?
Without question. Today’s smartphones carry large sensors, leverage computational photography to handle exposure and dynamic range automatically, and support manual mode apps (Lightroom Mobile, ProCam, Halide) that hand you direct control over ISO, shutter speed, and focus point. Plenty of professional photographers use phones for portions of their commercial assignments. The limitations of smartphone photography are real: the sensor is smaller, optical zoom options are limited, and achieving truly shallow depth of field is harder compared to a dedicated camera with a fast lens. But none of those limitations prevent you from learning composition, lighting, editing technique, and visual storytelling. Start with your phone. If you eventually outgrow it, you will know precisely what features you need from a dedicated camera because you will have first-hand experience with what your phone cannot do.
How do I take sharper photos?
Keep your shutter speed at a minimum of 1/(focal length) of a second. So if you are shooting with a 50mm lens, your shutter speed should be 1/50 of a second or faster. For anything slower, mount the camera on a tripod. Turn on image stabilization if your camera body or lens supports it. When shooting portraits, lock your focus on the subject’s eyes. Switch to single-point autofocus instead of letting the camera decide where to focus on its own. When maximum sharpness is the goal, shoot between f/5.6 and f/8 because most lenses deliver their sharpest results in that aperture range. And clean your lens regularly. A fingerprint or a thin layer of dust on the front element will soften every single frame you shoot through it.
Sources:
Bryan Peterson, Understanding Exposure, 4th Edition (Amphoto Books, 2016).
Michael Freeman, The Photographer’s Eye (Focal Press, 2007).
Adobe, “Adobe Photography Plan,” adobe.com/creativecloud/photography.html.
Darktable Project, “Darktable – Open Source Photography,” darktable.org.
Digital Photography Review (DPReview), Camera reviews and specifications, dpreview.com.
Shutterstock, “Contributor Earnings,” submit.shutterstock.com.
Professional Photographers of America (PPA), “Benchmark Survey 2024,” ppa.com.
TechnoWifi is reader-supported. When you buy through links on our site, we may earn an affiliate commission. Product specifications and prices are accurate as of the date of publication and may change. Always verify current details with the manufacturer or retailer before purchasing.