Connecting a MacBook to a printer is straightforward once you know which method to use. You have four main options: AirPrint over Wi-Fi (the most common), a USB cable, adding the printer by IP address, or installing the manufacturer’s driver for older wireless printers. Most people will use AirPrint and never think about it again.
One thing that trips people up is that Apple changed where the printer settings live. If your MacBook runs macOS Ventura, Sonoma, or Sequoia, you will find printers under System Settings > Printers & Scanners. On macOS Monterey and earlier, the same settings are in System Preferences > Printers & Scanners. Even older macOS versions (El Capitan through Catalina) label it System Preferences > Print & Scan.
The steps are nearly identical regardless of which macOS version you have. The setting names and window layouts just look slightly different. This guide covers all of them.
How to Connect MacBook to Printer With AirPrint
AirPrint is the easiest way to connect your MacBook to a printer, and it is the method most people should use. If your printer was made after 2013, there is a very good chance it supports AirPrint out of the box. Almost every current printer from HP, Canon, Epson, and Brother includes AirPrint support.
The only requirement is that both your MacBook and printer are connected to the same Wi-Fi network. No drivers, no software downloads, no configuration files. AirPrint handles everything automatically through Apple’s built-in printing framework.
- Make sure your printer is turned on and connected to your Wi-Fi network. Most printers display a Wi-Fi icon on their screen or have a wireless indicator light. If the printer is not yet on your network, use the printer’s own control panel to connect it to Wi-Fi first.
- On your MacBook, open System Settings (or System Preferences on older macOS). Click Printers & Scanners in the sidebar. Click the Add Printer, Scanner, or Fax button – on older macOS this is a plus (+) button at the bottom of the printer list.
- Your AirPrint-compatible printer should appear in the list automatically. Select it and click Add. That is it. macOS downloads any needed software in the background, and your printer is ready to use.
- To print something, open any document or webpage and press Command + P. Your new printer should appear as the selected printer. If you have multiple printers, use the Printer dropdown to pick the right one.
You can check whether your printer supports AirPrint by looking up the model on Apple’s AirPrint support page or checking the printer’s product listing. The AirPrint logo – a small triangle made of lines – also appears on the box and in the printer’s manual for supported models.
If your printer does not appear in the Add Printer window, double-check that both devices are on the same Wi-Fi network. A printer connected to your 5 GHz network will not show up if your MacBook is on the 2.4 GHz network, and vice versa. Some routers broadcast both bands under the same name, but others use separate network names.
How to Connect MacBook to Printer With USB Cable
A USB cable connection is the most reliable option. No Wi-Fi issues, no network configuration, no dropped connections mid-print. If your printer sits right next to your MacBook, this is a perfectly good setup.
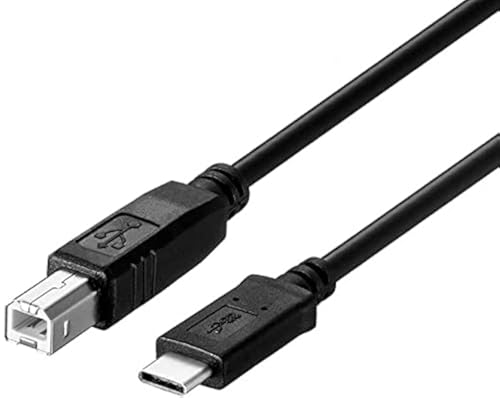
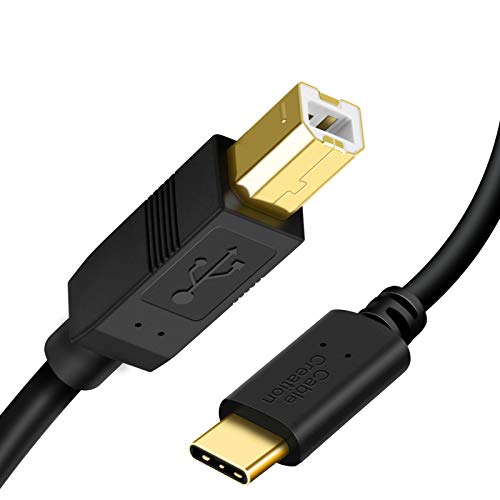
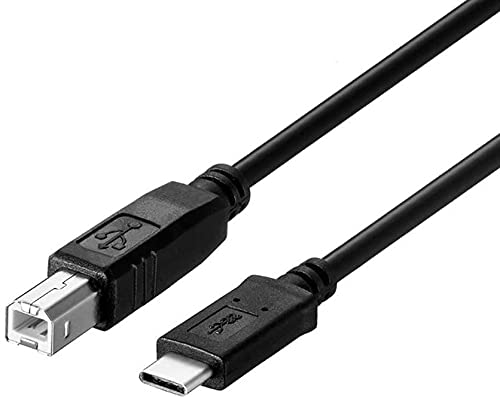
The main catch with modern MacBooks is ports. Every MacBook Air and MacBook Pro sold since 2016 uses USB-C (Thunderbolt) ports exclusively. There is no USB-A port – the rectangular one that most printer cables use. You will need a USB-C to USB-A adapter or a USB-C hub to connect a standard printer cable.
Apple sells a USB-C to USB-A adapter, and plenty of third-party options work just as well. If you already own a USB-C hub or dock with USB-A ports, use that. Any adapter that supports USB 2.0 or higher will work for printing.
Readers who found this helpful also liked our guide on 4K monitors for Mac Mini.
Once you have the right cable or adapter, plug the printer’s USB cable into your MacBook. In most cases, macOS detects the printer automatically and installs the necessary driver. You will see a notification that a new printer has been added. Open System Settings > Printers & Scanners and the printer should already be listed.
If macOS does not recognize the printer automatically, click Add Printer, Scanner, or Fax in the Printers & Scanners settings. Click the Default tab (the one with the printer icon). Your USB-connected printer should appear in the list. Select it and click Add.
For very old printers, macOS might not have a built-in driver. In that case, you will see “Select Software” or “Choose a Driver” in the Use dropdown. Visit the printer manufacturer’s website, download the macOS driver for your model, install it, and then try adding the printer again. HP, Canon, Epson, and Brother all maintain driver download pages organized by printer model.
How to Add a Printer to MacBook Using IP Address
Adding a printer by IP address is useful when your network printer does not show up in the automatic discovery list. This happens more often with office printers, enterprise-grade devices, and printers connected to a different network subnet. It also works as a fallback when AirPrint discovery is being unreliable.
First, you need to find your printer’s IP address. There are two easy ways to do this.
From the printer itself: Most printers can print a network configuration page. Look in the printer’s settings menu for “Network,” “Wireless,” or “Print Network Config Page.” The printed page will list the printer’s IP address, usually something like 192.168.1.xxx or 10.0.0.xxx.
From your router: Log into your router’s admin page (typically 192.168.1.1 or 192.168.0.1 in a web browser). Look for a list of connected devices, sometimes labeled “DHCP Client List” or “Attached Devices.” Find your printer’s name in the list and note its IP address.
- Once you have the IP address, open System Settings > Printers & Scanners on your MacBook. Click Add Printer, Scanner, or Fax. At the top of the Add Printer window, click the IP tab – it has a globe icon.
- In the Address field, type the printer’s IP address. For the Protocol dropdown, you have three options. IPP (Internet Printing Protocol) works with most modern printers and is the best default choice. LPD (Line Printer Daemon) is an older protocol that some printers still use. HP Jetdirect (Socket) is designed for HP network printers and connects on port 9100.
- The Queue field can usually be left blank – macOS fills it in automatically for most printers. In the Name field, type whatever you want to call this printer. Under Use, macOS may auto-detect the correct driver. If it shows “Generic PostScript Printer,” try clicking the Use dropdown and selecting “Select Software” to find a more specific driver for your model.
- Click Add. The printer should now appear in your Printers & Scanners list and be ready for printing.
One thing to keep in mind: if your printer’s IP address changes (which can happen if your router assigns addresses dynamically), the connection will break. You can fix this by assigning a static IP to the printer through your router’s settings, or by re-adding the printer with the new address.
How to Connect MacBook to Printer via Wi-Fi Without AirPrint
If you have an older printer that connects to Wi-Fi but does not support AirPrint, you can still print from your MacBook. You just need to install the manufacturer’s print driver or software first.
Each major printer brand has its own software package. HP printers use HP Smart, which you can download from the Mac App Store or HP’s website. Canon has Canon PRINT Inkjet/SELPHY, also available in the App Store. Epson offers Epson Connect and Epson Printer Drivers. Brother provides full-featured driver packages on their support site.
For more on this, take a look at our docking stations for MacBook Pro guide.
- Download and install the correct software for your printer model. During installation, the software typically walks you through connecting the printer to your Wi-Fi network. Follow those steps to get the printer online.
- After the driver is installed, open System Settings > Printers & Scanners. Click Add Printer, Scanner, or Fax. Your printer should now appear in the Default tab, even though it does not support AirPrint. The manufacturer’s driver makes the printer visible to macOS through Bonjour, Apple’s network discovery protocol.
Some older printers support WPS (Wi-Fi Protected Setup) for connecting to your wireless network. Press the WPS button on your printer, then press the WPS button on your router within two minutes. The printer connects to your network automatically. After the Wi-Fi connection is established, install the manufacturer’s driver on your MacBook and add the printer through Printers & Scanners.
If your printer still does not appear after installing drivers, try adding it by IP address using the method described in the previous section. Sometimes Bonjour discovery fails, but a direct IP connection works fine.
MacBook Not Finding Printer – How to Fix
If your MacBook cannot find your printer, work through these fixes in order. Most connection problems fall into a small number of categories.
- Check that both devices are on the same Wi-Fi network. This is the most common cause. Your MacBook and printer must be connected to the exact same network. If your router has separate 2.4 GHz and 5 GHz networks with different names, make sure both devices are on the same one. Open the Wi-Fi settings on your MacBook to confirm which network you are connected to, and check the printer’s network status screen.
- Restart your printer and MacBook. Power off the printer completely – unplug it from power, wait 30 seconds, then plug it back in and turn it on. Restart your MacBook by clicking Apple menu > Restart. This clears temporary network glitches that block printer discovery.
- Reset the printing system. This is the nuclear option for printing problems on macOS, and it fixes a surprising number of issues. Go to System Settings > Printers & Scanners. Right-click (or Control-click) anywhere in the printer list area and select “Reset printing system.” This removes all printers and resets the print subsystem. You will need to re-add your printers afterward, but it clears out corrupted drivers and stuck print jobs that can cause discovery failures.
- Update macOS. Apple regularly updates printer drivers and AirPrint compatibility through macOS updates. Go to System Settings > General > Software Update and install any available updates.
- Check the printer’s wireless connection. Make sure the printer’s Wi-Fi is actually active. Look for a solid Wi-Fi icon on the printer’s display. A blinking icon usually means the printer is searching for a network but is not connected. Use the printer’s control panel to reconnect to your Wi-Fi network.
- Check your firewall. The macOS firewall can sometimes block printer discovery. Go to System Settings > Network > Firewall. If the firewall is on, click Options (or Firewall Options on older macOS) and make sure “Automatically allow downloaded software to receive incoming connections” is checked. You can also temporarily turn off the firewall to test whether it is causing the problem.
- Try adding by IP address. If automatic discovery fails completely, skip it and add the printer manually using its IP address. This bypasses the discovery process entirely and connects directly. See the IP address section above for instructions.
- Check for VPN interference. If you use a VPN on your MacBook, it can block communication with local network devices like printers. Try disconnecting the VPN temporarily and then searching for your printer again. Some VPN apps have a “split tunneling” option that lets local network traffic bypass the VPN while keeping your internet traffic protected.
How to Set a Default Printer on MacBook
- If you have multiple printers, macOS lets you set one as the default so it is automatically selected every time you print. Open System Settings > Printers & Scanners. Look for the Default Printer dropdown near the top of the window (on older macOS, it may be at the bottom).
- Click the dropdown and select the printer you want as your default. You can also choose “Last Printer Used,” which automatically selects whichever printer you used most recently. This is handy if you move between a home printer and an office printer regularly.
Printing from any app. The keyboard shortcut Command + P opens the print dialog in virtually every Mac app. From there, you can choose your printer, set the number of copies, select page range, and adjust paper size and orientation. Click Print to send the job.
Managing the print queue. If a print job gets stuck, click the printer’s name in Printers & Scanners to open the print queue window. You can see all pending jobs, pause or resume them, and delete stuck jobs. Double-click the printer name, or click “Open Print Queue” to access this window.
Sharing a USB printer with other Macs. If you have a printer connected to your MacBook via USB, you can share it with other Macs on the same network. Go to System Settings > General > Sharing. Turn on Printer Sharing. Select which printer to share and which users can access it. Other Macs on the network will see the shared printer when they open Printers & Scanners and click Add Printer.
Keep in mind that shared USB printers only work while the MacBook hosting the printer is powered on and awake. If that MacBook goes to sleep or shuts down, the shared printer goes offline for everyone else on the network.
| Connection Method | Best For | Requirements | Driver Needed | Setup Time |
|---|---|---|---|---|
| AirPrint (Wi-Fi) | Most home and office setups | Both devices on same Wi-Fi, AirPrint-compatible printer | No | Under 2 minutes |
| USB Cable | Direct connection, maximum reliability | USB cable, USB-C adapter for modern MacBooks | Usually no (auto-installed) | Under 2 minutes |
| IP Address | Network printers not auto-discovered | Printer’s IP address, both on same network | Sometimes | 3 to 5 minutes |
| Wi-Fi (without AirPrint) | Older printers with Wi-Fi but no AirPrint | Manufacturer’s driver software installed | Yes | 5 to 10 minutes |
| Bluetooth | Portable label or receipt printers | Bluetooth-capable printer, manufacturer’s driver | Yes | 5 to 10 minutes |
| macOS Version | Settings App Name | Printer Settings Path |
|---|---|---|
| macOS Sequoia, Sonoma, Ventura (2022 and later) | System Settings | System Settings > Printers & Scanners |
| macOS Monterey, Big Sur, Catalina, Mojave (2018 – 2021) | System Preferences | System Preferences > Printers & Scanners |
| macOS High Sierra, Sierra, El Capitan (2015 – 2017) | System Preferences | System Preferences > Print & Scan |
How to Connect MacBook to Printer FAQs
Does MacBook Work With Any Printer?
MacBooks work with most printers, but not every single one. Any printer that supports AirPrint will work out of the box with zero driver installation. For printers without AirPrint support, you need the manufacturer’s macOS driver. Most major brands – HP, Canon, Epson, Brother, Lexmark, Xerox – provide Mac drivers for their current and recent models. Very old printers from discontinued brands may not have macOS drivers available, especially for Apple Silicon Macs running newer macOS versions.
Do I Need to Install Printer Drivers on MacBook?
For AirPrint printers, no. macOS handles AirPrint printing natively without any extra software. For USB printers, macOS usually auto-downloads the correct driver when you plug the printer in. You only need to manually install drivers if macOS does not recognize your printer automatically or if you have an older printer without AirPrint support. In those cases, visit the manufacturer’s website, find the support page for your specific printer model, and download the macOS driver package.
Can I Print From MacBook to Printer Without Wi-Fi?
Yes. Connect your printer to your MacBook with a USB cable and you can print without any network connection at all. USB printing works independently of Wi-Fi, Bluetooth, or any other wireless technology. You just need the right cable and possibly a USB-C to USB-A adapter since modern MacBooks only have USB-C ports. Some printers also support Wi-Fi Direct, which creates a direct wireless connection between the printer and your MacBook without needing a router or existing Wi-Fi network.
Why Does My MacBook Say No Printers Available?
This usually means your MacBook and printer are not on the same Wi-Fi network, or the printer’s Wi-Fi connection has dropped. Start by checking the printer’s network status – make sure it shows a solid Wi-Fi connection. Then confirm your MacBook is on the same network. Restarting both devices often fixes transient discovery issues. If the printer still does not appear, try resetting the printing system: open System Settings > Printers & Scanners, right-click the printer list, and select “Reset printing system.” As a last resort, add the printer manually using its IP address.
Yes. If a printer is shared from a Windows PC, your MacBook can connect to it. Open System Settings > Printers & Scanners, click Add Printer, and click the Windows tab (the icon that looks like a globe with a banner). Browse the available workgroups and computers to find the shared printer. You may need to enter the Windows username and password for the PC sharing the printer. Select the correct driver in the Use dropdown – try “Generic PostScript Printer” if macOS does not have the specific driver.
How Do I Print Double-Sided From MacBook?
Open the document you want to print and press Command + P to open the print dialog. Look for a checkbox labeled “Two-Sided” or “Double-Sided.” If you see it, check the box and choose between “Long-Edge binding” (standard for documents) or “Short-Edge binding” (for flip-up booklets). If the Two-Sided option does not appear, your printer may not support automatic duplex printing. In that case, you can print odd pages first, flip the stack over, and then print even pages – look for the “Odd Only” and “Even Only” options under the Pages dropdown in the print dialog.