When you purchase through links on our site, we may earn an affiliate commission. Here’s how it works.
How to Connect Printer to Chromebook – Getting Started
If you’re a Chromebook user, chances are you’ve never actually used it to print a document. This is because Chrome OS is designed to primarily focus on Google’s cloud services and virtually needs no paper.
However, there are exceptions, and paper isn’t entirely obsolete. You might need to print a work document or something personal, like a flight ticket. So, knowing how to add any printer to your Chromebook is always good.
Although printing from a Chromebook has been simplified, the process is still not straightforward. The steps to begin and the steps that follow are not very straightforward. That said, let’s take a look at how to set up a printer on a Chromebook.
Connect Printer to Chromebook Wirelessly
If you have a somewhat new printer that’s internet-ready, you should be able to add it directly to your Chromebook without using any extra software or system tweaks. So, ensure that your printer is on and connected to the same Wi-Fi network as your Chromebook.
The process of connecting a printer to a Wi-Fi network varies from one brand to the next, but you should find an internet or Wi-Fi option somewhere in the settings or on the printer’s display as the normal Wi-Fi icon.
If your printer is connected to Wi-Fi, what do you do next?
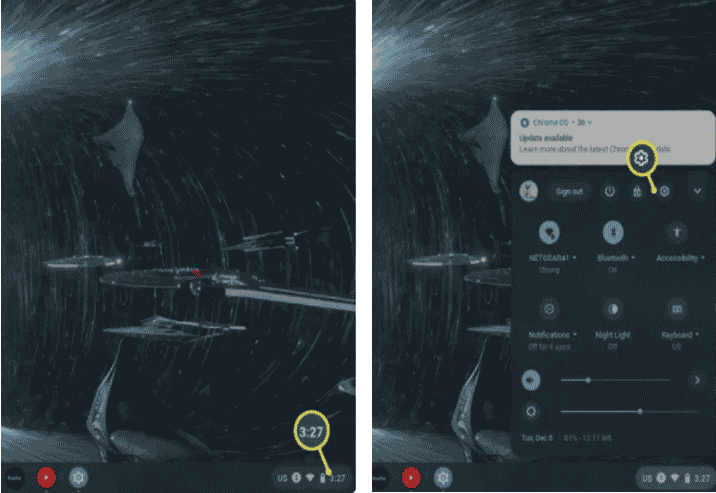
- Start by clicking the time section at the lower-right end of your Chromebook’s display.
- Then click on the gear-shaped sign to open settings.
- Next, type ‘print‘ into the search bar at the top of the settings section.
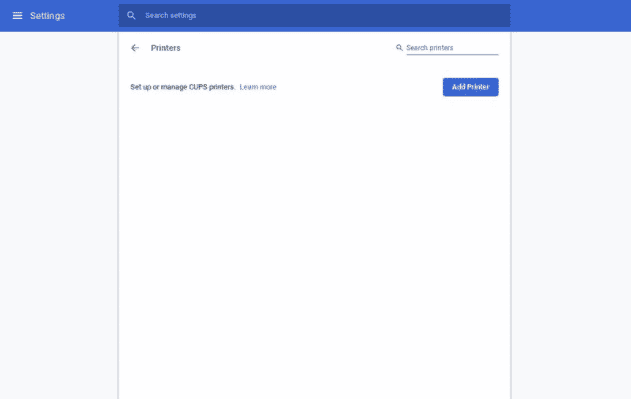
- Then select ‘Printers.’
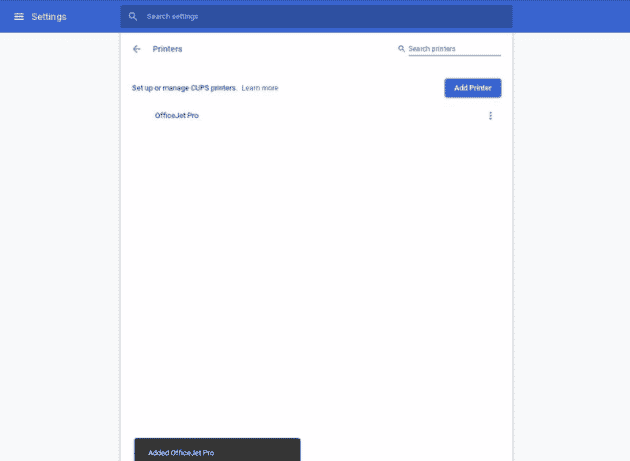
- Click on the blue “Add Printer” button.
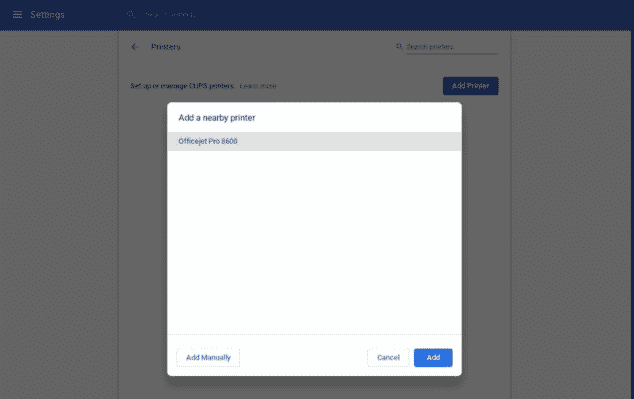
- Next, click on your printer’s name on the list and click on the blue ‘Add‘ button to finish the pairing.
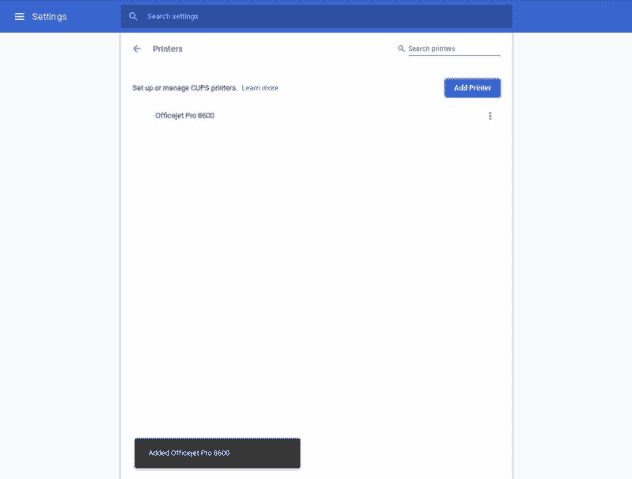
Once the setup is complete, you should be able to print immediately. Also, if you want to print anything in the future, you won’t have to repeat the entire process, except for picking the printer you wish to use if you have several.
Setup an Older Wireless Printer to Chromebook
If your printer doesn’t appear on the list, it’s likely an older but internet-ready device. So, how do you add an older wireless printer?
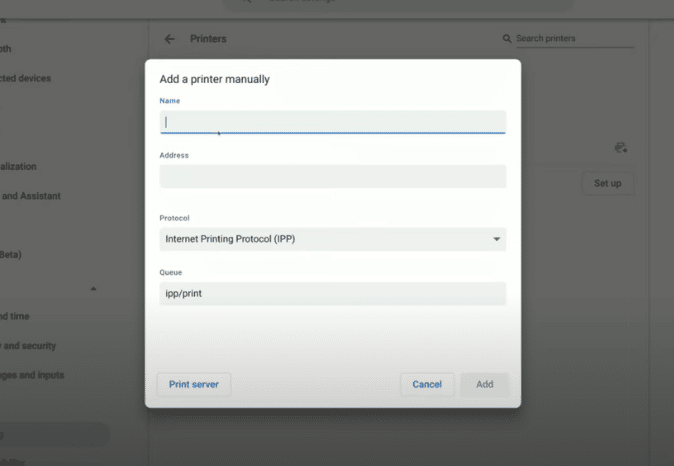
- Start by clicking the ‘Add Manually‘ button on the bottom left corner.
- Next, a prompt will appear to give your printer a name. Just add any name.
- You’ll need to type the printer’s IP address in the ‘Address‘ section. You can find the IP address on the printer’s display menu or settings, then click the blue ‘Add‘ button.
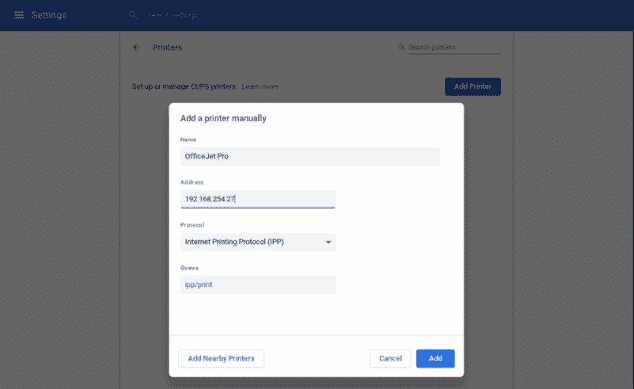
- Next, enter your printer’s manufacturer, for instance, Epson or HP, and the model ‘WF-2530‘ or ‘OfficeJet Pro 8600‘ and pick the correct options.
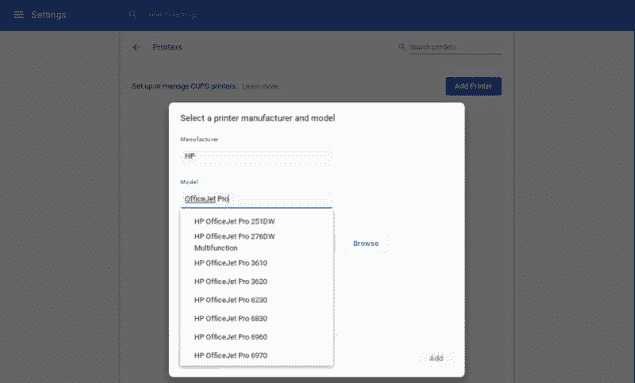
- When you’re done, click on the ‘Add‘ button.
Chromebooks also work with the Google Cloud Print framework, providing a more direct connection between them and printers.
Setup a Wired Printer to Chromebook
If you’re using a relatively old printer that’s not internet-ready, don’t worry. Using a USB cable, you can still connect the printer manually to a Chromebook.
- Start by connecting the cable to your printer and then connect the other end to the Chromebook. Note that your printer USB cable might not be compatible with the ports on your Chromebook, so you might need an adapter.
- Next, open the settings on your Chromebook and type “print” into the search bar at the top of the settings panel.
- Then click on ‘Printers.’
- Next, click on the ‘Add Printer‘ button.
- Click on your printer’s name and click the “Add” button to complete the setup.
Print a Document on a Chromebook
Once you’ve successfully added a printer to your Chromebook, it’s time to print a document or webpage. The process is super easy and involves the following steps.
- Open the document or webpage you want to print.
- Next, press Ctrl + P simultaneously.
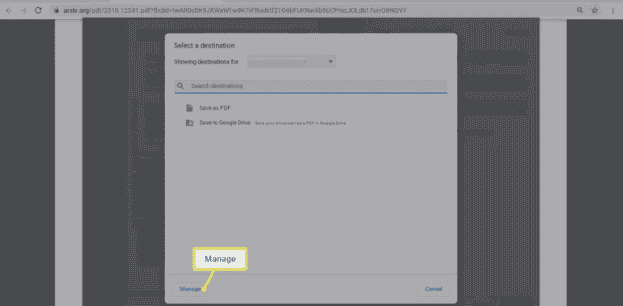
- Then click on the downward-pointing arrow next to ‘Destination.’
- Next, click on ‘See more.’
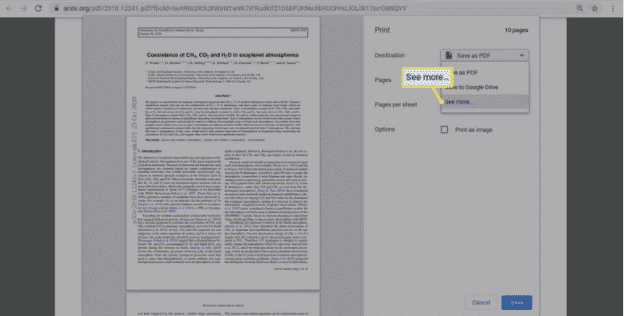
- Then, pick your printer. If you don’t see your printer, click the ‘Manage‘ button.
- Next, click on “Print.”
Before pressing the ‘Print’ button, ensure all the print settings are as you want. You can click ‘More Settings’ to change items like the paper size or layout.
Troubleshooting Print Problems on Chromebook
If you have used a printer before, you have most likely encountered problems. Printer problems can be quite frustrating, so how do you fix them on a Chromebook?
Click on the time icon in the bottom right corner of your screen, followed by ‘Settings.’
Next, press ‘Advanced’ followed by ‘Printing.’
Click on your printer followed by ‘Edit.’ Now, check for spelling errors.
If you don’t find spelling errors, try removing your printer and repeat the configuration steps.
If this doesn’t fix the problem, contact the printer’s manufacturer.
How to Connect Canon Printer to PC?
Canon is the most popular brand in the industry. It offers a range of the latest printers powered by Wi-Fi connectivity.
A Canon Printer user can connect it to the respective PC system in three different ways.
- Using the built-in Wi-Fi connectivity
- Using the Wired Connection
- Using the compatible USB data cable
Canon Printers have three options for connecting to the PC system. Initially, Google Chromebooks allowed users to connect to external printers using Google Cloud Print.
The Google Cloud Print is no longer available.
One can now easily establish a connection between the Canon Printer and a Chromebook to get printouts of the documents. Let’s get on to the tutorial now!
How to Connect Canon Printer to Chromebook?
Part 1: Connecting to the Internet
Canon Printers are compatible with the Internet. You can connect them using the built-in Wi-Fi button or the Wired connection.
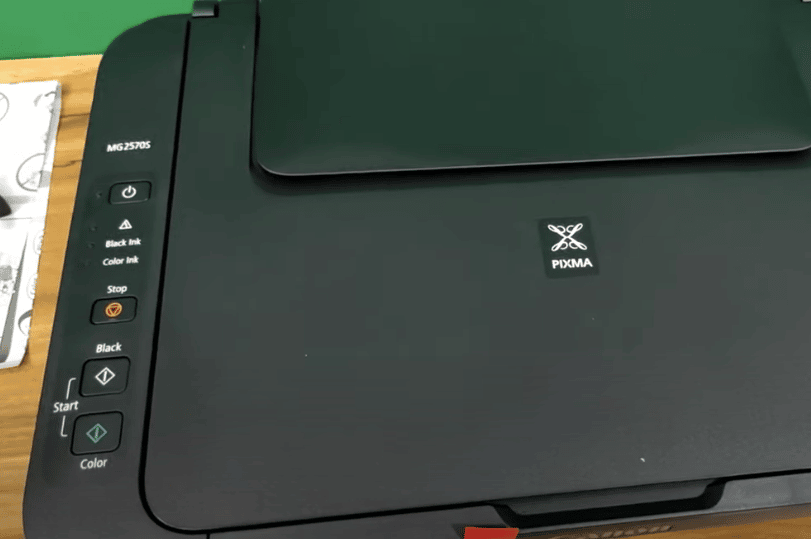
- Turn on the Canon Printer by pressing the Power button.
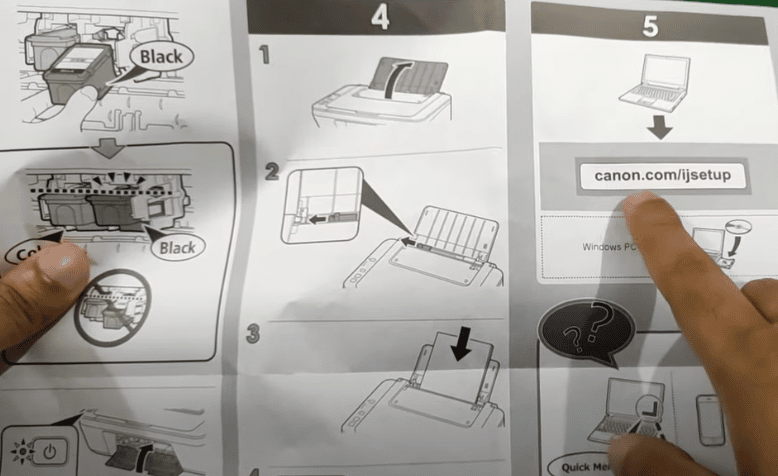
- Follow the instructions in the manual to set up the connection to Wi-Fi or a Wired Network. (Since every Printer is different, you have to follow the instructions given in the user manual)
Connecting to the internet
- After connecting the Printer to the Network, turn on the Chromebook and sign in using the same network. Ensure the Chromebook and the Canon Printer are connected to the same Network.
Part 2: Add Canon Printer to Chromebook
- Open the Chromebook and click the Profile Icon of your Chromebook Profile.
Profile icon
- Select the Settings option from the Profile menu.
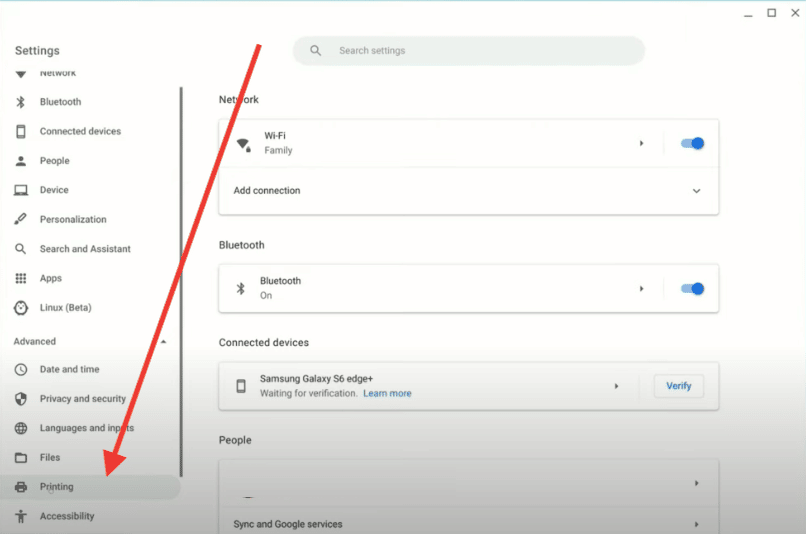
- At the bottom of the page, you will see the Advanced option. Click that option.

Advanced option
- You can see a Printing section here; select the Printers option from this page.
How to Connect Canon Printer to Chromebook – Printing
- Select the Add Printer option.

How to Connect Canon Printer to Chromebook – Add a printer
- Since we have already turned on the Printer, you can see the name of the Printer you recently connected to the Internet. Select it by clicking on its name.
- You can also add your Canon Printer manually by selecting the option ‘Select a printer manufacturer and model.’
Part 3: Start Printing
After establishing the connection, you can start printing your documents using your Chromebook.
To get a print of the current page, press Ctrl + P and select an appropriate destination folder to print that page from the connected Printer.
This is how you can connect a Canon Printer to a Chromebook. If you cannot locate the name of your Printer on the list, go with the manual method to add your printer to the Chromebook.
The following steps will show you how to connect a Canon Printer to a Chromebook manually.
How do you manually connect the Canon Printer to the Chromebook?
For some reason, you might not be able to locate the name of your Printer in the list presented by the Chromebook.
In this case, you have to connect the Printer manually. The required steps to connect a Canon Printer to a Chromebook manually are listed below:
- Turn on the Chromebook and click your Profile Icon to open the Settings menu.
- Select the Settings option and then click the Advanced option to open the Advanced Settings for the Chromebook device.
- Select the Printers option from the Printing section of this page and then click the Add Printer option.
- Select Add Nearby Printers to add the Canon Printer to the Chromebook manually. To do so, you have to add the printer’s information manually. The fields will be asked to enter the printer’s details, such as the printer’s name, IP address, etc. You can get the details about the printer right from the user manual. You can also get information about the printer from Canon’s official website by entering the name or the product code.
Add a nearby printer
- After entering the details manually, select the Add button to add the printer.
Frequently Asked Questions:
Question 1: My Canon Printer works fine with Mac, but I can’t connect it to a Chromebook. What could be the reason?
Make sure that the Canon Printer is added to your Chromebook. The above tutorial lists the connection method with the proper steps.
We request you kindly follow the above-given steps to connect the Canon Printer to your Chromebook.
Question 2: Chromebook is not showing up in my Canon Printer’s Model. What should I do?
In this case, you must manually add the printer to your Chromebook. To do so, you must collect information about your printer, such as its model number and IP address.
The manual connection method is also listed in the above tutorial.
Question 3: How do I get the information about my Canon Printer?
Generally, information about the product is listed in the package box. However, you can also find information about your Canon Printer in the user manual provided in the box.
Alternatively, you can collect valuable information about your printer from Canon’s official website. You need to enter the product name, and the required information will be presented right in front of your screen.
Take Away
Connecting a Canon Printer to a Chromebook is relatively easy but can sometimes take hours.
If you cannot connect your Canon Printer to your Chromebook, then we request that you dial their toll-free number to get technical help from the customer care team.
Canon is known for providing on-spot services to its consumers through telephone and doorstep visits. Get assisted quickly by dialing their toll-free number.
Final Thought
All in all, it’s pretty easy to add a printer to a Chromebook and print documents and web pages. Printing is not very common among Chromebook users because Chromebooks center around Google’s cloud services, but once in a while, you might need to print something. The steps may vary depending on the specific Chromebook model and version of Chrome OS. It is recommended that you consult the official Chromebook support documentation.
See Also
How to Block YouTube on Chromebook
How to Connect Canon Printer to Wifi