When you purchase through links on our site, we may earn an affiliate commission. Here’s how it works.
How to Screen Record on MacBook Pro – Overview
Have you ever wondered how to record a screen record on a MacBook? Fortunately, it’s easy to learn how to do this to record online classes, tutorials, video gameplay, and more.
A MacBook screen recorder with audio is handy for customer support representatives needing to guide customers through a product problem.
There are two primary ways to screen record on a MacBook without additional software. We have discussed how to screen record using keyboard shortcuts and QuickTime.
We will also discuss a third option for screen recording on a MacBook for those interested in using third-party apps with additional features. Read on to find out more.
How to Screen Record on MacBook Pro: Keyboard Shortcuts
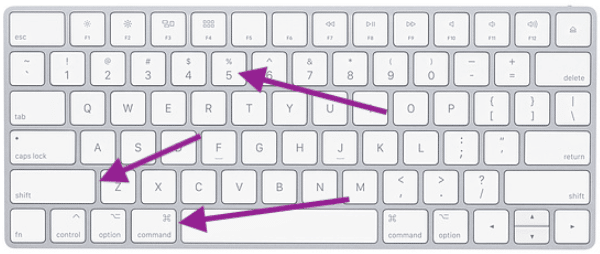
- Press and hold the Command + Shift + 5 buttons on your MacBook keyboard. This will launch the screenshot toolbar at the bottom of your screen.
Keyboard Shortcuts
- Click ‘Record Entire Screen’ or ‘Record Selected Portion.’ The fourth button after ‘X’ allows you to record the entire screen, while the fifth button enables recording a selected portion. Hover over each icon to see its function.

- If you choose to record a portion of the screen, a resizable box will appear. You can click and drag the edges of this box to cover the area you wish to capture.
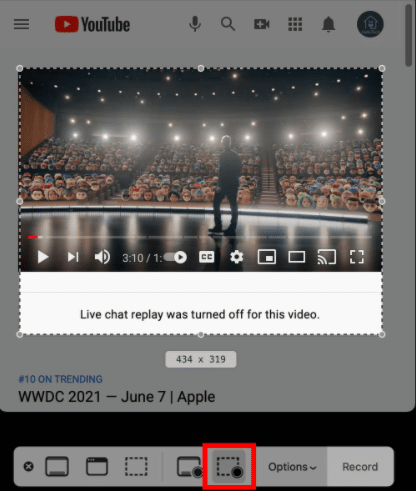
- Then, click on ‘Record,’ located on the far right side of the toolbar.

- To stop recording, click on the stop icon (a circle with a square inside) at the top of your screen. Alternatively, press Command + Control + Esc.

How to Stop Recording
To include audio or voiceover while screen recording, click on the ‘Options’ button in the screenshot toolbar. Here, you can also choose the save location for your recording, set a timer before the recording starts, and highlight your mouse clicks in the video.
How to Screen Record on MacBook Pro: QuickTime
If an older MacBook Pro or keyboard shortcuts don’t meet your needs, you can screen record using the QuickTime Player application.
- Open the QuickTime Player app, which is pre-installed on MacBooks. If it’s not in your ‘Applications’ folder, you can download it from the App Store.
QuickTime
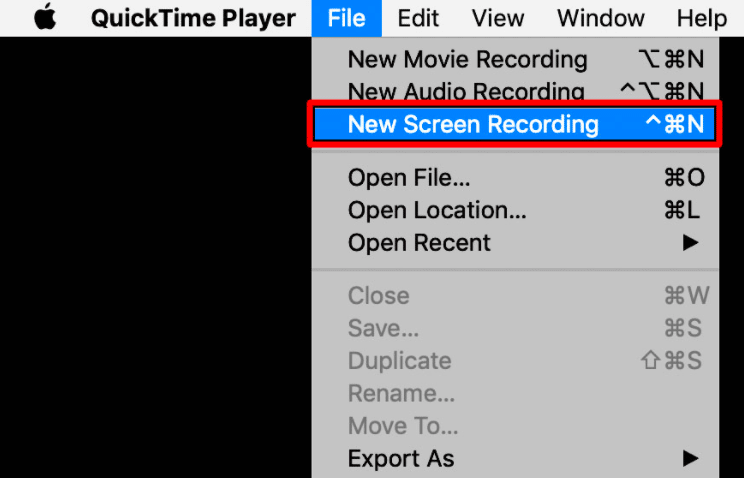
- Next, click ‘File’ from the Apple Menu bar at the top of your screen.
- Select ‘New Screen Recording.’ This action opens the screen recording tab.
- Press the red button to start recording your screen. You can click anywhere on the screen to record everything or drag to select a specific area,then click ‘Start Recording’ within that area.
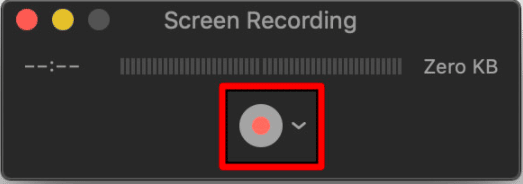
- To include audio, click the arrow next to the record button and select the microphone you wish to use.
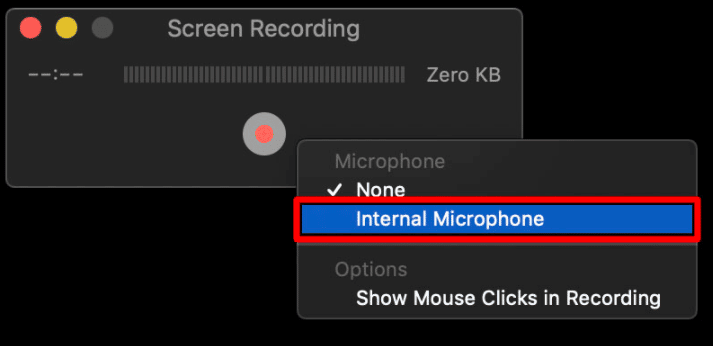
How to Record Audio
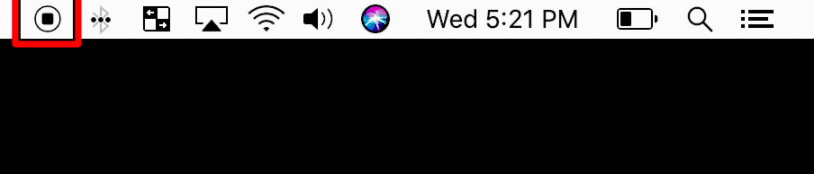
- To stop recording, click on the black circle in the menu window. Alternatively, press Command + Control + Esc.
- After stopping, QuickTime automatically displays the recording. You can then edit, play, or share it. To save, click ‘File’ then ‘Save’ in the QuickTime menu, or press Command + S.
Note: You might need to grant the app permission to record your MacBook Pro screen. Upon attempting to record, a pop-up window will request access.
How to Screen Record on MacBook Pro: 3rd Party App
Would you prefer to screen record on your MacBook without using keyboard shortcuts or QuickTime? Several screen recording applications are available for MacBooks in the App Store. For this discussion, let’s explore the Droplr app.
Droplr
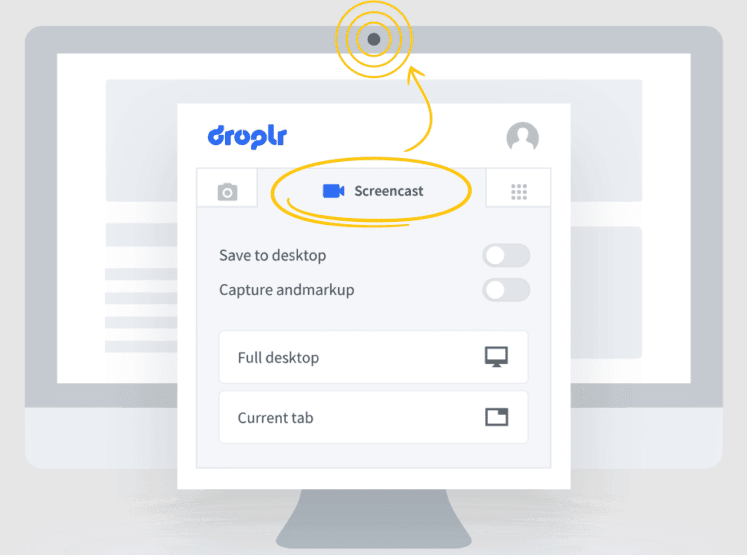
How to Screen Record on MacBook Pro – Droplr
Key features of this app include:
Integrations
The Droplr app offers integrations with native Mac screen recording capabilities, including Intercom, Sketch, Slack, Photoshop, and more. Integrating all your tools in one place can help save time and streamline your workflow.
Link Sharing
After screen recording on your MacBook, the video is automatically uploaded to your Droplr dashboard and the cloud. You’ll receive short links for your videos, which you can share with anyone, anywhere.
Mouse Clicks
Screen recording on a MacBook with the Droplr app highlights mouse clicks, which helps guide viewers during demo videos.
Record Screen and Audio
With the Droplr app, you can screen record on your MacBook with audio.
Final Thought
Creating interactive and unique content is relatively easy, whether using the native MacBook screen recorder, QuickTime, or a third-party app. Now that you know how to screen record on a MacBook, open it up and get creative.
See Also
How to Clear Cache on MacBook Pro
How to Pair AirPods with MacBook