When you purchase through links on our site, we may earn an affiliate commission. Here’s how it works.
How to Take a Screenshot on a MacBook Pro – Overview
The screenshot-capturing feature on MacBooks is a great way to save pages on your computer.
Therefore, rather than save a link to a website, you can take a photo of it and save it, allowing you to see it exactly as it was when you took it.
For instance, you can take a screenshot after making an online purchase to keep a record of the transaction details.
You can also take screenshots just to recall items you’ve shopped for on your MacBook or send a friend something you’ve discovered.
In addition, you can take screenshots to share information on social media or to illustrate an issue or problem on your MacBook.
In macOS, capturing screenshots, cropping them, and saving them is straightforward, making them easily accessible through Finder. This allows you to access the screenshots easily and quickly.
The screenshot tool on macOS has always been easy to use but somewhat basic.
However, since the release of macOS Mojave, macOS has included a built-in screenshot tool, offering functionalities similar to those found in Windows OS. This tool allows you to capture screenshots with just one click.
Let’s look at the various ways of taking screenshots on a MacBook, including how to crop them.
Take a Screenshot of the Entire Screen
- You can screenshot your whole screen by clicking the ‘Capture Entire Screen’ button in the screengrab toolbar and pressing ‘Capture.’
- Otherwise, click Shift + Command + 3 to capture the entire screen.

How to Take a Screenshot on a MacBook Pro – Take a Screenshot of the Entire Screen
Take a Screenshot of a Specific Part of the Screen
- To capture a specific section of your screen, click on the ‘Capture Selected Portion’ button in the screenshot toolbar or press Shift + Command + 4.
- At this point, the pointer will turn into a crosshair, and you can hover it on your screen so that it covers the section you want to capture. By pressing and holding Option, Shift, or Space Bar, you can adjust the selected area’s position, shape, and size.

Take a Screenshot of a Specific Part of the Screen
Take a Screenshot of a Menu or Window
- To capture a screenshot of a specific menu or window, press Shift + Command + 4 and then press the Space bar. The pointer will change to a camera icon, which you can hover over the window or menu and click to capture.
- The mouse pointer will turn into a camera icon, which you can hover over a window to highlight and then click to save the photo. In addition, you can switch back and forth between taking a custom shot and grabbing a specific menu by pressing the space bar.
Take a Screenshot of a Menu or Window
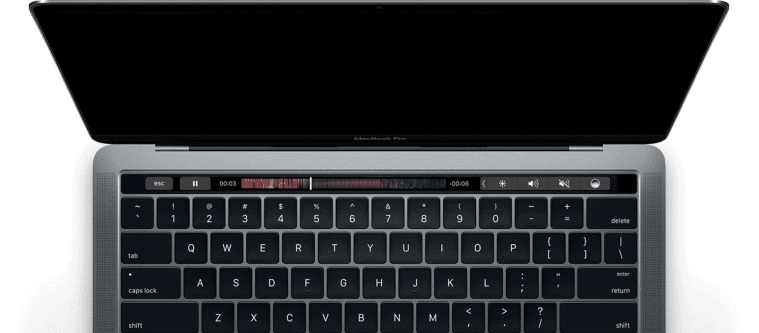
Take a Screenshot of the Touch Bar
- Not all MacBooks have a Touch Bar, but if yours has one, you can take a screenshot.
- If you’d like to share something on the Touch Bar with others, you can capture a screenshot by clicking on Shift + Command + 6.
- This action will instantaneously capture everything on the Touch Bar.
Take a Screenshot of the Touch Bar
How to Crop a Screenshot on a MacBook Pro
There are several ways to crop a screenshot. You can take a screenshot of the dimensions you need, but if you’d like to refine it afterward, here’s what you can do:
- Click on the ‘Crop’ icon. A button labeled ‘Crop’ and white corners at the image’s edges will appear. If the screenshot doesn’t please you, you can drag the edges.
- Once you are okay with your crop, click ‘Crop.’

How to Crop a Screenshot on a MacBook Pro
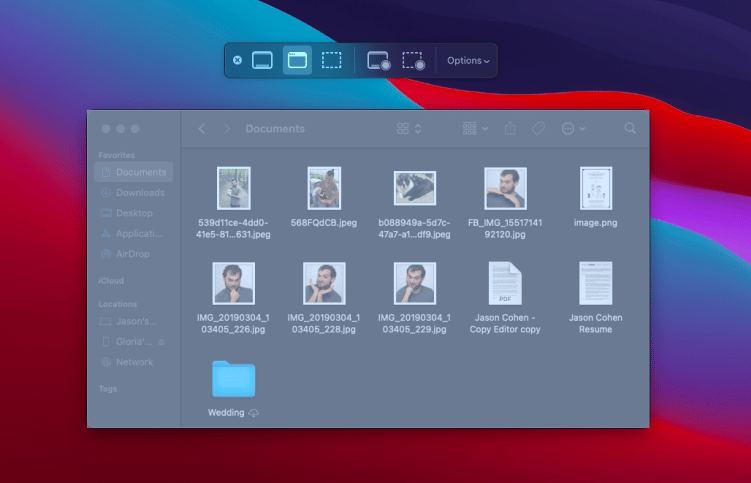
Where Are Screenshots Saved On A MacBook
By default, screenshots on a MacBook are saved to the desktop. However, with macOS Mojave or later versions, you can choose different locations for saving your screenshots.
It’s worth noting that macOS Mojave and later versions have retired the Grab application and integrated its functionalities into the Screenshot app. This application will likely save the screenshot to your documents folder, and if you don’t change the name, it will be saved as ‘Untitled.’
Therefore, it’s possible to change where screenshots are saved on macOS Mojave or later:
- Start by pressing and holding down Shift + Command + 5.
- Next, click on ‘Options.’
- Find the location you want to save the screenshot in the ‘Save to’ section.
- Otherwise, click’ Other Location’ if you’d like to save the image elsewhere.’
Final Thought
As you can see from the illustration above, capturing screenshots on a MacBook isn’t that difficult. Thanks to the inclusion of a dedicated MacBook screenshot and video capture menu in macOS, it has gotten easier than ever.
See Also
How to Take Screenshot on Android
How to Screen Record on MacPro
How to Clear Cache on MacBook Pro