Maternity photoshoot ideas work best when you plan the session between weeks 28 and 36 of pregnancy. During this window, the baby bump is round and visible enough to photograph well, and the mother still has enough energy and comfort to hold poses and switch between setups. Book too early and the belly barely shows up in photos. Wait too long and the physical strain of standing, sitting, and repositioning for an hour or more becomes a real problem. That third-trimester sweet spot gives you a strong, defined silhouette while the mom-to-be can still move freely.
Great maternity photos rely on flattering light, clean compositions, and a clear focus on the bump. But most photography advice out there stays frustratingly vague, telling you to “look for nice light” or “pick a pretty spot.” That kind of guidance falls apart the moment you are actually standing behind a camera, trying to decide which lens to grab, what f-stop to dial in, and how to position your light so the belly looks its best.
This guide gets into the real details of maternity photography. We cover camera settings for every shooting scenario, the right lenses and why they work, lighting techniques for both natural and studio setups, location options, posing direction for solo and couple shots, and a practical editing workflow. By the end, you will walk into your next maternity session with a clear plan for every frame.
Best Camera Settings for Maternity Photoshoot Ideas
Aperture priority mode is the most practical choice for the majority of maternity sessions. You get direct control over depth of field, and the camera handles shutter speed adjustments to maintain correct exposure. When you are shooting outdoors during the golden hour, open your aperture to somewhere between f/2.0 and f/2.8. This throws the background into a creamy blur that separates the mother from whatever is behind her. Set ISO between 100 and 400, and make sure the camera picks a shutter speed of at least 1/200 second.
Shooting indoors with window light is a different situation. Light falling through a window drops off fast as you move away from the glass, so you will need to bump your ISO higher. Expect to work somewhere in the 400 to 1600 range, depending on the window size, cloud cover, and time of day. Your shutter speed should stay at 1/125 second or faster. Anything slower and the tiny movements people make while holding a pose, breathing, shifting weight, will introduce softness into the image.
Studio shooting with strobes calls for a completely different approach. Go full manual. Set your aperture between f/5.6 and f/8 for crisp detail across the entire frame, lock your shutter speed to your camera’s flash sync speed (usually 1/160 to 1/200 second), and keep ISO at 100. Your strobes are supplying all the illumination, so whatever ambient light exists in the room does not matter.
Backlit outdoor portraits, where the sun sits behind the mother and wraps a golden rim of light around her hair and belly, require extra attention to metering. If you shoot in aperture priority, add +1 stop of exposure compensation. Without that adjustment, the camera reads the bright background, exposes for it, and turns the mother into a dark shadow. If your camera offers spot metering, aim the meter point directly at her face for an accurate reading.
For intentional silhouette shots, reverse the technique entirely. Switch to manual mode. Set f/8, 1/250 second, ISO 100, and meter for the bright sky behind the subject. Her body goes completely black against a vivid, colorful backdrop. This technique looks best at sunset when the sky is full of warm oranges and deep purples.
Autofocus mode matters more than most people realize. Use continuous autofocus with eye detection turned on whenever the mother is in motion, whether she is walking, turning her head, or adjusting the drape of her dress. Switch over to single-point AF for still, posed shots where she is holding a position. Modern mirrorless cameras do an excellent job tracking the nearest eye, even when you are shooting wide open at f/1.4.
Shoot in RAW format, always. Skin tones are notoriously difficult to nail in post-processing, and RAW files give you complete latitude to adjust white balance and color after the fact. A JPEG file bakes in the camera’s white balance choice permanently. RAW lets you shift color temperature later without losing any image quality at all.
There is one more in-camera adjustment that saves significant time in editing. Dialing in positive exposure compensation of +1/3 to +2/3 stop produces the bright, airy aesthetic that most maternity clients prefer. You get lifted shadows, clean and luminous skin, and a light overall mood. Making this small change while shooting means less work pulling up shadows and cleaning skin tones on the computer afterward.
| Scenario | Mode | Aperture | Shutter Speed | ISO | White Balance |
|---|---|---|---|---|---|
| Outdoor golden hour portraits | Aperture Priority | f/2.0 – f/2.8 | 1/200s or faster | 100 – 400 | Shade or Cloudy |
| Indoor natural light (window) | Aperture Priority | f/2.0 – f/2.8 | 1/125s or faster | 400 – 1600 | Auto or Custom |
| Studio with strobes | Manual | f/5.6 – f/8 | 1/160 – 1/200s (sync speed) | 100 | Flash |
| Backlit outdoor (sun behind subject) | Manual or AV | f/2.0 – f/2.8 | 1/200s | 200 – 400 | Shade (+1 EV comp) |
| Silhouette | Manual | f/8 | 1/250s | 100 | Daylight (meter for sky) |
Best Lenses for Maternity Photography
The 85mm f/1.4 or f/1.8 is the workhorse lens for maternity portraits. Nearly every portrait photographer owns one, and the reasons are straightforward. At 85mm, the lens compresses facial features in a natural, flattering way. Noses look proportionate, ears stay visible, and the overall face shape appears true to life. When you open up to f/1.4, the background melts into smooth, buttery bokeh that wipes out any distracting elements behind your subject.
This focal length also does excellent things for body proportions. The mild telephoto compression works in the mother’s favor, making the belly look prominent and well-defined while keeping her overall figure proportional and authentic. For three-quarter or full-body compositions, stand about 8 to 12 feet from the subject and let the lens do its job.
The 70-200mm f/2.8 zoom is the most flexible lens you can bring to a maternity session. At the wide end, 70mm gives you room to capture environmental shots that include the scenery. At 200mm, you get intense background compression that transforms even a cluttered park into a smooth, painterly wash of color. Having that entire zoom range available means you can switch between wide and tight compositions without swapping glass or changing your position.
The 200mm end of this lens deserves special attention for outdoor maternity work. Compression at 200mm is extremely flattering to body shape, and a mundane outdoor background becomes nothing more than a soft blur of color behind the subject at f/2.8. It is a look that is hard to replicate with shorter focal lengths.
The 50mm f/1.4 or f/1.8 remains the most affordable entry point into quality maternity photography. Every camera brand offers an f/1.8 version for under $250, and the image quality punches well above its price. The 50mm field of view suits full-body portraits and environmental compositions where you want the setting to play a role in the image. It also handles indoor work well because the wide maximum aperture pulls in plenty of light even in dimly lit rooms.
The 35mm f/1.4 opens the door to lifestyle and storytelling compositions. It is wide enough to bring the nursery, the bedroom, or a scenic outdoor setting into the frame as part of the narrative. For documentary-style maternity sessions where the environment and the story carry as much weight as the portrait itself, the 35mm is a natural choice. One thing to watch: wider lenses distort proportions at close range. Keep a comfortable distance from the subject, and do not shoot from a low angle looking upward.
The 24-70mm f/2.8 covers the broadest range of compositions on a single lens. In a studio setting, you can zoom from a 24mm wide shot that shows the full environment to a 70mm tight portrait without ever putting the camera down to swap lenses. On location, it adapts to whatever the scene calls for. It cannot match the extreme background blur of fast prime lenses, but the sheer convenience of having that zoom range when you are moving quickly between different setups is hard to argue with.
As a general principle for maternity photography, longer focal lengths produce more flattering results. The 85mm, 135mm, and 200mm focal lengths compress the body and present shape in the most appealing way possible. Wider angles like 24mm and 35mm can stretch and distort proportions, particularly near the edges of the frame. If the mother ends up near the edge of a wide-angle shot, her figure will look unnaturally pulled and warped.
| Lens | Best For | Max Aperture | Price Range |
|---|---|---|---|
| 85mm f/1.4 or f/1.8 | Classic maternity portraits, tight compositions, beautiful bokeh | f/1.4 or f/1.8 | $450 – $1,600 |
| 70-200mm f/2.8 | Versatile zoom, outdoor sessions, telephoto compression | f/2.8 | $1,400 – $2,800 |
| 50mm f/1.4 or f/1.8 | Full-body portraits, indoor work, budget-friendly option | f/1.4 or f/1.8 | $200 – $1,200 |
| 35mm f/1.4 | Lifestyle and environmental shots, documentary sessions | f/1.4 | $500 – $1,400 |
| 24-70mm f/2.8 | All-purpose flexibility, studio and outdoor | f/2.8 | $1,100 – $2,400 |
Best Locations for Maternity Photoshoot Ideas
Outdoor sessions during golden hour top the list of client requests, and the results speak for themselves. Open meadows, flower gardens, paths lined with trees, and sandy beaches all look stunning when the sun hangs low and casts warm, directional light. The classic backlit golden hour look, where the sun sits behind the mother and outlines her hair and belly with a glowing rim of light, is the single most popular maternity photography style in 2026.
Tall grass and wildflower fields give you a simple, uncluttered backdrop that keeps every ounce of visual attention on the mother. Gardens introduce color and texture without becoming visually noisy. Tree-lined paths create natural leading lines that pull the viewer’s eye through the composition. Beaches offer wide open sky, reflective wet sand, and clean horizon lines. All of these options work. Ultimately, the quality of the light matters far more than the specific place you choose.
Indoor lifestyle sessions at home produce images with a completely different emotional tone. Photographing the mother in her own bedroom, the nursery she has been preparing, or a living room flooded with window light creates intimate images that feel personal and grounded in real life. A photo of the mother sitting on her own bed in soft morning light, or standing in the finished nursery surrounded by baby clothes and tiny shoes, carries an emotional resonance that generic outdoor portraits sometimes cannot match.
When shooting indoors at home, position the mother near the largest window in the room. If the window has sheer curtains, even better. Sheer fabric transforms harsh direct sun into soft, diffused light that wraps gently around the subject. Turn off overhead lights, floor lamps, and any other artificial light sources so the window becomes your only source of illumination. This creates clean, directional light with a beautiful, gradual shadow transition across the face and body.
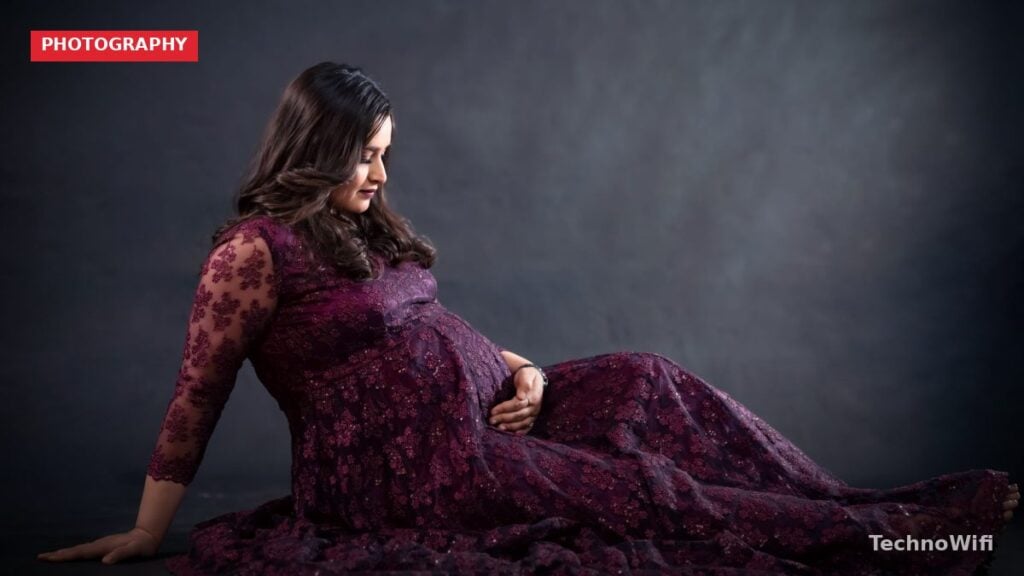
Studio sessions put you in complete command of every variable. Dark backgrounds paired with dramatic side lighting produce editorial, gallery-quality images with a moody, artistic feel. White or neutral gray backgrounds keep things clean and timeless. Working in a studio eliminates every environmental headache: no wind messing up hair, no unexpected weather changes, no strangers wandering through the background of your shot.
Urban settings, think brick walls, interesting architecture, and city streets, bring a modern, contemporary energy to maternity photos. These locations look best in open shade, where tall buildings block direct sunlight and create soft, even illumination across the scene. Stay away from mixed lighting situations where part of the mother is standing in sunlight and part is in shadow. That kind of contrast is extremely difficult to fix in editing and rarely looks good.
Water adds both visual interest and a sense of movement to maternity images. Beaches during low tide provide firm, reflective sand that creates a mirror effect under the subject’s feet. Shallow creek beds and lakeshores give the mother an opportunity to interact with the environment in a way that feels organic and unscripted. Flowing fabrics near water are especially striking when backlit, because the breeze lifts the fabric while the water catches and reflects the warm light.
When it comes to maternity photography, timing trumps location every time. Schedule your shoot within one hour of sunset for the softest, most forgiving natural light. Overcast days also work wonderfully. Heavy cloud cover turns the entire sky into one enormous diffuser, wiping out hard shadows entirely. Stay away from shooting under midday sun between 11 a.m. and 2 p.m. unless you can find complete shade to work in.
How to Light a Maternity Photoshoot
When shooting outdoors with natural light, position the sun behind the subject whenever possible. Backlighting wraps a warm glow around the mother’s hair, shoulders, and belly while keeping the light falling on her face soft and indirect. The tradeoff is that the face and belly will be underexposed without some help. Solve this by placing a reflector in front of the subject, held by an assistant. A white reflector provides gentle, subtle fill. A silver reflector kicks back stronger, more noticeable fill light. Angle it to bounce sunlight back onto the front of her body.
Another option is to add fill flash set roughly 2 stops below your ambient exposure. This puts just enough light on the face and belly to balance against the bright backlight without making it obvious that flash was involved. The goal is invisibility. If someone looks at the final photo and can tell you used a flash, the flash was too strong. Dial it down until the fill looks entirely natural.
Indoor natural light is all about where you place the mother relative to the windows. Position her facing a large window at approximately a 45-degree angle. This setup produces gentle shadows on the side of her face and body that is turned away from the glass, adding depth and three-dimensional shape without creating harsh contrast. The window functions as a giant softbox. The bigger the window, the softer and more wrapping the light becomes.
Sheer white curtains are one of the simplest and most effective light modifiers you can find on location. A south-facing window at noon without any curtains throws hard light with sharp, well-defined shadow edges. Hang a sheer curtain over that same window and those shadows soften into smooth, gradual transitions. If the room you are shooting in does not have curtains, hold a translucent panel from a 5-in-1 reflector kit between the window and the subject. It does the same job.
A single-light studio setup is easier to pull off than most beginners think. Position a large softbox or octabox at 45 degrees to the mother, placed slightly above her eye level and angled downward. This recreates classic portrait lighting and flatters nearly every maternity pose you will try. On the opposite side of the subject, set up a white reflector to bounce some of that key light back into the shadows. Move the reflector close, within 3 to 4 feet of her, or it will not do much of anything.
Adding a second light takes the setup one step further. Place a hair light or rim light behind the subject to create visual separation from the background. Position this second light above and slightly behind her, aimed at the back of her head and shoulders. For the most flattering contrast, set a key-to-fill ratio of about 3:1. In practical terms, that means your main light should be roughly 1.5 stops brighter than the illumination reaching the shadow side.
Silhouette lighting is the most dramatic option for maternity photography. Place a bare strobe or a continuous light source directly behind the subject. Alternatively, position the mother in front of a large, bright window. Expose for the background light source rather than for the subject. Her body goes completely dark, creating a bold, striking outline of the pregnant belly against a bright, clean backdrop. The profile of the bump reads beautifully in silhouette form.
One rule that should never be broken: do not fire on-camera flash directly at a maternity subject. A pop-up flash or a speedlight mounted on the hot shoe and aimed straight at the mother produces flat, lifeless light with ugly shadows cast directly behind her body. It flattens the shape of the belly, eliminates the soft shadows that give the body form and dimension, and makes skin look harsh and unflattering. Either move the flash off-camera or leave it off entirely.
Maternity Photoshoot Posing Guide
Both hands on the belly is the signature maternity pose, and its popularity is well earned. One hand placed gently on top of the bump and the other cradling it from below frames the belly, draws the viewer’s eye to it, and gives the mother’s hands a purposeful, natural-looking position. Direct her to gaze down at the belly for a quiet, reflective mood. Or ask her to look straight into the camera for a portrait that feels confident and direct.
The side profile shot is a must for showing the full scope of the belly’s shape. Turn the mother so she faces 90 degrees from the camera, chin tilted slightly upward, shoulders pulled back and pressed gently down. This stance lengthens the neck, sharpens the jawline, and presents the belly at its most prominent angle. Shoot at eye level or just slightly below. Photographing from above looking down will compress the belly and make it appear smaller than it actually is.
Including the partner adds an emotional layer to the image set. The most reliable couple pose is simple: the partner stands behind the mother with both hands resting on the belly, and both of them look down together. It reads as genuine, it works from nearly any camera angle, and it photographs consistently well. For a different look, have the partner kneel beside the belly and gaze up at the mother while she looks down. Pressing foreheads together with hands intertwined over the bump creates a quiet, private moment between the two of them.
When directing couples, less is more. Over-coaching partners into rigid, carefully engineered positions produces photos that look stiff and staged. Give them a general starting point and then let them settle into it on their own. The small, instinctive adjustments they make, a slight head tilt, a real smile, a hand that shifts position naturally, are exactly what makes the image feel authentic rather than manufactured.
Seated poses are an excellent option for mothers who are further along and finding it harder to stand for long stretches. Sitting on a bench, perching on the edge of a bed, or settling onto the floor with legs tucked to one side is far more comfortable than standing during extended shooting. Seated positions also produce images that feel relaxed and grounded. The hand placement on the belly follows the same principles as standing poses.
Flowing fabric introduces a sense of movement and visual drama that static poses cannot achieve on their own. A sheer wrap, a long chiffon scarf, or several yards of lightweight material tossed into the air by an assistant while the camera fires creates dynamic motion in an otherwise still image. This technique works best with backlighting, because the light passes through the translucent fabric and makes it glow. Set your camera to continuous shooting mode and time the fabric toss so you capture the peak of the motion.
Bringing older siblings into the session creates images that families hold onto for years. A child touching the belly, leaning in to plant a gentle kiss, whispering to the baby inside, or walking hand-in-hand with the mother tells a visual story about the growing family. Let the child interact naturally instead of forcing them into stiff, predetermined positions. Children under five are unpredictable by nature. Shoot quickly, accept that not every frame will be perfect, and focus on capturing real, unscripted moments.
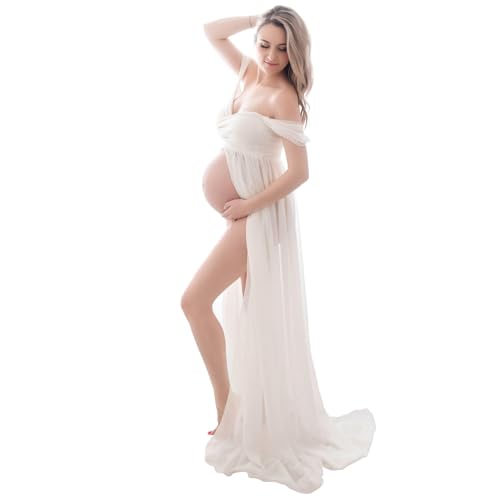
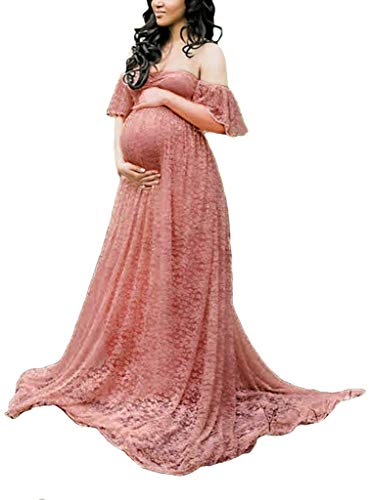
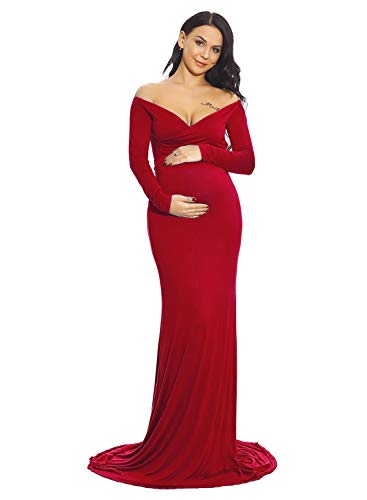
Wardrobe direction plays a bigger role than many clients expect. Fitted fabrics that hug the belly and show its shape photograph far more effectively than loose, baggy clothing that conceals the bump. Solid colors outperform busy patterns because patterns compete with the subject for visual attention. White, cream, soft pastel shades, and warm earth tones all look beautiful against natural outdoor and studio backgrounds alike. Steer clients away from clothing with oversized logos, brand names, or bold graphic prints that pull the eye away from the subject.
Maternity Photo Editing Tips
Consistent skin tones across the entire session is the single highest editing priority. Over the course of a maternity shoot, the light shifts as you change locations, move between indoor and outdoor setups, and the sun moves across the sky. Because you shot in RAW (you did shoot RAW, right?), you can batch-correct white balance in Lightroom so the skin tones match from the very first image to the very last. Pick one reference photo where the skin looks accurate, dial in your white balance settings, and then sync those same settings across all similar frames from that setup.
Skin smoothing needs to be subtle enough that no one can tell it happened. In Lightroom, the texture slider set somewhere between -20 and -40 softens skin texture without completely erasing pores and natural detail. Once you drop below -50, the skin starts looking waxy and plastic, the telltale sign of heavy-handed editing. For more precise work in Photoshop, frequency separation is the standard technique. It lets you smooth surface texture on one layer while keeping the underlying color variation and natural tonal shifts intact on a separate layer.
The bright, airy editing style is the dominant look in maternity photography right now. You can achieve it by lifting the shadows slider (+30 to +50 in Lightroom), pulling highlights down (-20 to -40) to recover any blown-out areas, and shifting the color temperature slightly warmer by +200 to +500K. The combination produces glowing, luminous skin with gentle shadows and a warm overall atmosphere. It is the look most maternity clients expect in 2026, and it works well across both indoor and outdoor images.
Color grading is where you define the visual identity of a maternity gallery. One of the most popular color treatments right now pairs warm tones in the highlights with cool tones in the shadows. This creates visual separation between the subject, which picks up warmth from the highlight shift, and the shaded areas, which recede slightly with the cooler tones. For a moodier, more subdued look, pull global saturation down by 10 to 20 percent and push the color palette toward earthy tones using the HSL panel. Both approaches are valid. Let the mood of the session and the shooting environment guide your choice.
Editing body shape is a topic that requires sensitivity. Light retouching of temporary skin changes is standard practice: clearing up blemishes, softening stretch marks if the client specifically asks for it, evening out uneven tan lines. This kind of work is expected and normal. But reshaping the body itself is something the vast majority of maternity clients do not want and do not ask for. The whole purpose of a maternity session is to document this particular moment in time. Clients want to look back and remember how they genuinely looked, not see a digitally altered version that does not match their real experience.
Delivery expectations for maternity photography follow a fairly standard pattern. For a typical one-hour session, delivering 30 to 50 fully edited images is the norm. This provides the client with enough variety to fill a gallery, assemble an album, order wall prints, and share favorites on social media without overwhelming them with near-identical shots. Aim to deliver within two to three weeks while the excitement and anticipation of the pregnancy are still high. Waiting longer than a month risks delivering the photos after the baby has already arrived, at which point the parents’ attention and emotional energy have shifted entirely to the newborn.
Maternity Photography FAQs
What is the best time during pregnancy for maternity photos?
The ideal window falls between 28 and 36 weeks. By week 28, the belly is clearly defined and shows up well on camera. At 36 weeks, most women still have enough comfort and energy to stand, sit, and transition between different poses for 60 to 90 minutes without too much difficulty. Scheduling earlier than 28 weeks means the bump may not be prominent enough for traditional maternity compositions. Scheduling later than 36 weeks makes the physical demands of a session much harder to manage, and waiting too long runs the risk of the baby arriving before the shoot takes place.
Can I do a maternity photoshoot with a phone camera?
Today’s smartphone cameras are capable of producing genuinely good maternity photos under the right conditions. Phones equipped with portrait mode can simulate shallow depth of field convincingly, and the computational photography built into recent iPhones, Google Pixels, and Samsung Galaxy models handles skin tones surprisingly well. The main weakness is performance in low light. Phone sensors are physically small, and they produce visible grain and noise in dim indoor environments. For the best results with a phone, shoot outdoors during golden hour or position the mother next to a large window with plenty of natural light. That said, a dedicated camera paired with a fast lens will still produce noticeably better background blur, wider dynamic range, and cleaner low-light images.
How long does a maternity photoshoot take?
Budget 60 to 90 minutes of actual shooting time. That gives you enough room for two to three outfit changes, several different poses, and at least two different locations or lighting setups. Add another 15 to 20 minutes on each end for getting gear set up and breaking it down afterward. Shorter sessions of about 30 minutes can work for a single-look shoot with no wardrobe changes. Longer sessions running two hours or more start to cause fatigue, because standing and holding poses for that long is physically tiring during the third trimester. Plan for rest breaks every 20 to 30 minutes so the mother can sit, hydrate, and catch her breath.
What should the mother wear for maternity photos?
Fitted fabrics that hug the belly and define its shape produce the most striking maternity images. Stretchy, body-conscious dresses and tops make the bump clearly visible. Solid colors in white, cream, soft pastels, and earth tones look great against both natural outdoor settings and studio backdrops. Avoid busy patterns, oversized logos, and bold graphic designs that pull attention away from the mother. Sheer fabrics and flowing wraps add drama and a sense of movement, particularly when backlit during an outdoor session. A number of maternity photographers maintain a small collection of gowns and wraps that clients can borrow for the shoot at no extra charge.
Do maternity photos look better indoors or outdoors?
Both settings produce beautiful results, and the strongest maternity galleries usually include images from both. Outdoor sessions shot during golden hour yield warm, romantic images with natural scenery and gorgeous backlighting. Indoor sessions next to large windows produce intimate, personal images with soft, directional light and a quieter mood. Studio sessions give you total control and are ideal for dramatic, editorial-style work. The right choice depends on the client’s personal taste and the emotional tone they are going for. Many photographers offer combination sessions that begin indoors for the intimate, quiet shots and then transition outdoors to catch golden hour for the final set of images.
How much do maternity photographers charge?
Pricing for maternity photography varies significantly based on geographic location, the photographer’s experience level, and what is included in the package. Across most U.S. markets, a standard one-hour session with 20 to 40 edited digital images typically runs between $200 and $500. Established specialists working in major metropolitan areas charge $500 to $1,500 or more, and those higher-end packages often include a longer session, a larger number of delivered images, professional hair and makeup, access to a studio wardrobe, and physical print products. Some photographers also bundle maternity sessions with newborn sessions at a combined rate, which tends to offer better overall value than booking each session as a standalone.