Canon’s EOS M50 was a big deal when it launched in 2018. It was Canon’s first mirrorless camera with 4K video and one of the first to include Eye Detection AF. For a camera that cost around $780 with a kit lens at launch, it punched well above its weight. And it still does for anyone picking one up used in August 2026.
The M50 uses Canon’s EF-M mount and has a 24.1-megapixel APS-C sensor paired with the DIGIC 8 image processor. It’s compact, it has a vari-angle touchscreen that’s great for vlogging, and the Dual Pixel CMOS AF system tracks faces and eyes automatically. Here’s how to set it up and get the most out of it.
Canon M50 Specs Overview
| Spec | Detail |
|---|---|
| Sensor | 24.1 MP APS-C CMOS |
| Image Processor | DIGIC 8 |
| ISO Range | 100 – 25600 (expandable to 51200) |
| Autofocus | Dual Pixel CMOS AF, 143 points, Eye Detection AF |
| Continuous Shooting | 10 fps (7.4 fps with AF tracking) |
| Video | 4K 24fps (1.6x crop), 1080p 60fps |
| Screen | 3-inch vari-angle touchscreen, 1.04M dots |
| Viewfinder | Electronic, 2.36M dots |
| Connectivity | Wi-Fi, Bluetooth, NFC |
| Battery | LP-E12, rated ~235 shots |
| Weight | 387g (body with battery and card) |
| Lens Mount | Canon EF-M (EF/EF-S compatible with adapter) |
| Card Slot | Single SD (UHS-I) |
First-Time Setup
Right out of the box, charge the LP-E12 battery using the included charger. A full charge takes about two hours. Slide the battery into the compartment on the bottom of the camera with the contacts facing inward.
Insert an SD card into the slot on the right side of the camera. A 32GB or 64GB UHS-I card works well for everyday shooting. If you plan to shoot 4K video, go with a U3-rated card for faster write speeds.
Attach the kit lens (typically the EF-M 15-45mm f/3.5-6.3 IS STM) by aligning the white dots on the lens and camera body, then twisting clockwise until it clicks into place.
Power the camera on with the switch on top. It’ll walk you through setting the date, time, and time zone. After that, format your SD card by going to Menu > Setup (wrench icon) > Format Card. This wipes the card clean and sets up the correct file structure.
How to Use Canon M50 Shooting Modes
The mode dial sits on top of the camera. Here’s what each position does.
| Mode | What It Controls | When to Use It |
|---|---|---|
| A+ (Scene Intelligent Auto) | Everything automatic | Quick snapshots, learning the camera |
| Av (Aperture Priority) | You set aperture, camera handles shutter speed | Portraits, landscapes, controlling depth of field |
| Tv (Shutter Priority) | You set shutter speed, camera handles aperture | Sports, action, freezing motion |
| M (Manual) | You set everything | Tricky lighting, studio work, long exposures |
| SCN (Special Scene) | Preset modes for specific situations | Handheld night scene, HDR, panorama |
| Creative Filters | In-camera effects like toy camera, miniature, etc. | Fun, experimental shooting |
| Movie | Dedicated video mode with manual controls | Filming with full control over settings |
Start with Av mode if you’re coming from a smartphone or point-and-shoot. Rotate the main dial on top to set your aperture. Lower f-numbers (like f/3.5) blur the background more, while higher numbers (like f/8 or f/11) keep more of the scene in focus. The camera automatically adjusts shutter speed to match, so you don’t have to worry about exposure.
Understanding ISO, Shutter Speed, and Aperture on the M50
ISO
ISO controls how sensitive the sensor is to light. The M50’s range goes from 100 (lowest sensitivity, cleanest images) up to 25600 (highest sensitivity, most noise). For most daytime shooting, keep ISO at 100-400. Bump it up to 1600-3200 indoors or in dim conditions. Anything above 6400 introduces noticeable grain, so save those higher values for situations where you’d rather have a noisy photo than a blurry one.
The easiest approach is to set ISO to Auto and let the camera pick. You can limit the Auto ISO range in Menu > Shooting > ISO Speed Settings > Max for Auto to keep the camera from going too high.
Shutter Speed
Shutter speed determines how long the sensor is exposed to light. Fast speeds like 1/1000s freeze action. Slow speeds like 1/30s or slower let in more light but can introduce motion blur from camera shake or moving subjects.
A good rule of thumb for handheld shooting: keep your shutter speed at or above 1/focal length. So at 45mm on the kit lens, shoot at 1/50s or faster. The lens’s built-in image stabilization gives you about 3.5 stops of extra flexibility, but it can’t fix a moving subject.
Aperture
Aperture is the size of the lens opening. Wider openings (lower f-numbers) let in more light and blur the background. Narrower openings (higher f-numbers) produce sharper images from front to back.
With the kit lens, your widest aperture is f/3.5 at 15mm, narrowing to f/6.3 at 45mm. If you want creamier background blur, pick up the EF-M 22mm f/2 STM. It’s small, affordable, and opens up to f/2, which makes a big difference compared to the kit lens.
How to Use the Touchscreen and EVF
The M50’s vari-angle touchscreen is one of its standout features. You can flip it out to the side and rotate it to face forward for selfies and vlogging, angle it down for overhead shots, or close it against the body to protect it during transport.
Tap anywhere on the screen to set your focus point. You can also use Touch & Drag AF, which lets you move the AF point by dragging your finger across the touchscreen while looking through the electronic viewfinder (EVF). Enable this in Menu > Shooting > Touch & Drag AF Settings.
The EVF (electronic viewfinder) is helpful in bright sunlight when the LCD is hard to see. Bring your eye to the viewfinder and the camera automatically switches from LCD to EVF display thanks to the proximity sensor.
How to Record Video on the Canon M50
The M50 records 4K video at 24fps and 1080p at up to 60fps. There’s an important catch with 4K though: the camera applies an additional 1.6x crop on top of the APS-C crop, and it disables Dual Pixel CMOS AF, falling back to slower contrast-detection AF. For most people, 1080p is the better choice because you get the full sensor width, faster autofocus, and smoother frame rates.
To start recording, you can press the red Record button from any shooting mode, or turn the mode dial to Movie for manual exposure control during video.
Key video settings to adjust (Menu > Shooting > Movie Recording Quality):
- 1080p 60fps for smooth motion, good for action and slow-motion editing
- 1080p 24fps for a cinematic look
- 4K 24fps only if you specifically need the resolution and don’t mind the crop and slower AF
The M50 has a 3.5mm microphone input on the left side of the camera. Plugging in an external mic like the Rode VideoMicro dramatically improves audio quality compared to the built-in stereo mic. If you plan to vlog or record interviews, an external mic is one of the best upgrades you can make.
Continuous video recording is limited to about 29 minutes and 59 seconds per clip. The camera also tends to overheat during extended 4K recording in warm conditions, so keep an eye on the temperature warning icon.
Canon M50 Wi-Fi and Bluetooth Setup
The M50 connects to your phone via Wi-Fi, Bluetooth, and NFC. Download Canon’s Camera Connect app to get started.
- On the camera, go to Menu > Wireless Communication Settings > Wi-Fi/Bluetooth Connection.
- Select Connect to Smartphone and follow the on-screen instructions.
- Open the Camera Connect app on your phone and pair with the M50.
Once paired, you can transfer photos wirelessly, use your phone as a remote shutter release, and add GPS location data to your images. The Bluetooth connection stays active in low-power mode, so you can wake the camera from your phone without touching it.
Best Lenses for the Canon M50
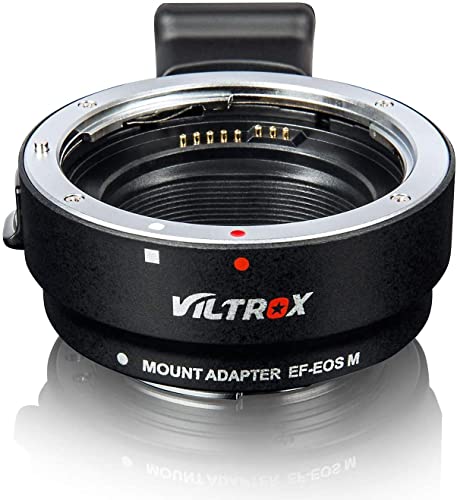
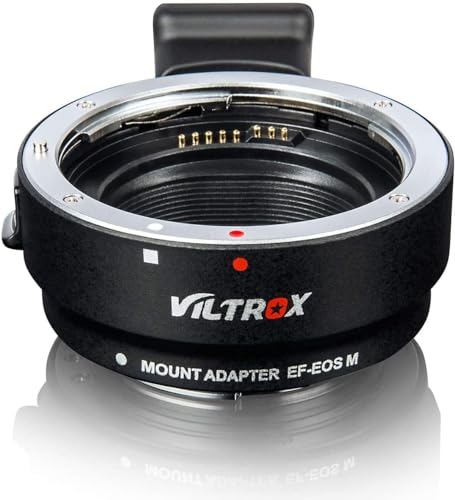
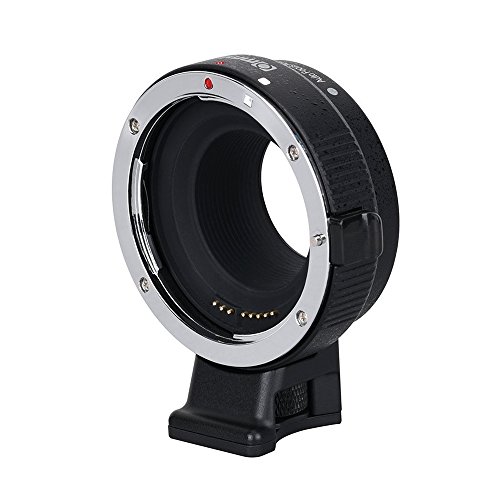
The M50 uses Canon’s EF-M mount. The lens selection is smaller than Canon’s EF or RF mounts, but there are enough solid options to cover most needs. You can also use any EF or EF-S lens with Canon’s EF-EOS M mount adapter.
| Lens | Best For | Why |
|---|---|---|
| EF-M 15-45mm f/3.5-6.3 IS STM (kit) | General shooting | Compact, stabilized, covers everyday focal lengths |
| EF-M 22mm f/2 STM | Street, travel, low light | Tiny pancake lens with a wide f/2 aperture |
| EF-M 55-200mm f/4.5-6.3 IS STM | Wildlife, sports, travel | Affordable reach with stabilization |
| EF-M 32mm f/1.4 STM | Portraits, low light | Sharpest EF-M prime, gorgeous background blur |
| EF-M 11-22mm f/4-5.6 IS STM | Landscapes, architecture, vlogging | Ultra-wide angle with stabilization |
| Sigma 16mm f/1.4 DC DN (EF-M) | Low light, video, astrophotography | Fast aperture, excellent sharpness |
Recommended Settings for Common Situations
| Scenario | Mode | ISO | Aperture | Shutter Speed |
|---|---|---|---|---|
| Outdoor portraits | Av | 100 – 400 | f/2 – f/4 | Auto |
| Landscapes | Av | 100 | f/8 – f/11 | Auto (use tripod) |
| Indoor events | Av or P | 1600 – 6400 | Widest available | Auto |
| Sports / action | Tv | Auto | Auto | 1/500s or faster |
| Vlogging | Movie mode | Auto | f/4 – f/5.6 | 1/50s (at 24fps) or 1/125s (at 60fps) |
| Night / long exposure | M | 100 – 800 | f/4 – f/8 | 2 – 30 seconds (tripod required) |
Canon M50 FAQs
Is the Canon M50 still worth buying in 2026?
For the price you’ll find it at on the used market, absolutely. The Dual Pixel AF with Eye Detection is still very capable, and the 24.1 MP sensor produces excellent images. The main drawback is that Canon has stopped developing new EF-M lenses since shifting to the RF mount system, so the native lens selection won’t grow. That said, the existing EF-M lenses cover most bases, and the EF-EOS M adapter opens up Canon’s massive EF and EF-S lens library.
Can I use EF lenses on the Canon M50?
Yes, with Canon’s EF-EOS M mount adapter. It works with both EF and EF-S lenses and maintains full autofocus and image stabilization. The adapter adds some length and weight to the setup, but it gives you access to hundreds of Canon lenses. This is especially handy if you already own EF glass from a Canon DSLR.
Why does my M50 overheat during 4K video?
The M50’s small body doesn’t have much room for heat dissipation. During 4K recording, the processor works harder than in 1080p, and the camera can hit its thermal limit after 10-15 minutes in warm environments. If 4K matters to you, shoot in shorter clips and give the camera breaks between takes. For longer recording sessions, stick with 1080p. It generates less heat and can typically run until the battery or card fills up.
See Also