Your iPhone and MacBook Air are built to work together. Apple’s ecosystem ties them through wired connections, wireless syncing, shared clipboards, and even using your iPhone as a webcam. Whether you have a brand-new iPhone 16 or an older iPhone 11, there are multiple ways to link it to your MacBook Air for file transfers, backups, and smooth multitasking.
This guide covers every method available right now – from the basic USB cable connection to newer features like iPhone Mirroring in macOS Sequoia. Each section includes the exact settings paths and requirements so you can get things working on the first try.
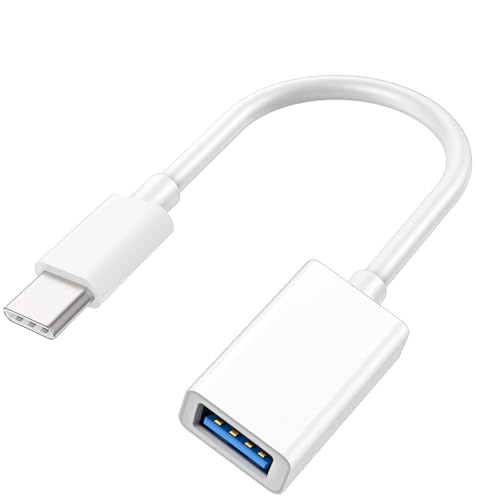
What Cable Do You Need to Connect iPhone to MacBook Air
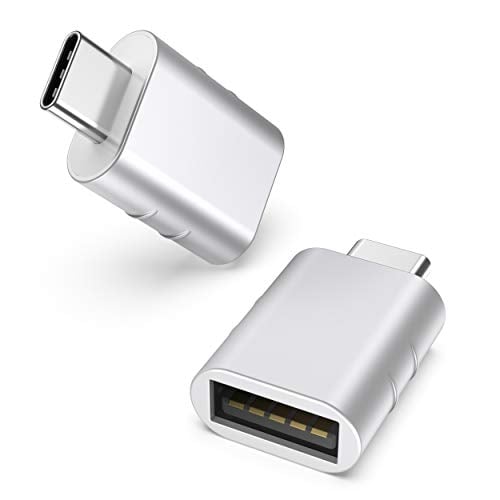
The cable you need depends on which iPhone you have. Apple switched from Lightning to USB-C starting with the iPhone 15 lineup in 2023. Every MacBook Air sold since the 2018 redesign only has USB-C (Thunderbolt) ports – there is no USB-A port on any current MacBook Air model.
If you own an iPhone 15, iPhone 15 Pro, iPhone 16, or iPhone 16 Pro, you need a standard USB-C to USB-C cable. Apple includes one in the box with these models, and it works directly with the MacBook Air’s USB-C ports.
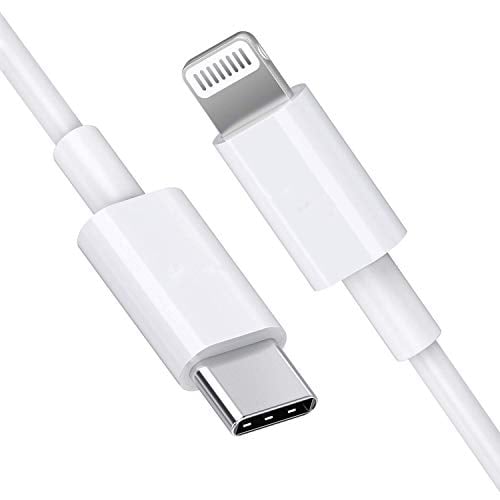
For iPhone 14 and all earlier models (iPhone 13, 12, 11, SE, etc.), you need a Lightning to USB-C cable. Apple sells an official one, but any MFi-certified third-party cable works fine. Avoid cheap knockoffs – they can cause connection drops and charging issues.
| iPhone Model | iPhone Port | Cable Needed | Included in Box |
|---|---|---|---|
| iPhone 16 / 16 Pro / 16 Plus / 16 Pro Max | USB-C | USB-C to USB-C | Yes |
| iPhone 15 / 15 Pro / 15 Plus / 15 Pro Max | USB-C | USB-C to USB-C | Yes |
| iPhone 14 / 14 Pro / 14 Plus / 14 Pro Max | Lightning | Lightning to USB-C | Yes (Lightning to USB-C) |
| iPhone 13 and earlier | Lightning | Lightning to USB-C | Varies by model |
| iPhone SE (3rd gen) | Lightning | Lightning to USB-C | Yes (Lightning to USB-C) |
How to Connect iPhone to MacBook Air with a USB Cable
When you plug your iPhone into a MacBook Air, the connection is handled through Finder – not iTunes. Apple replaced iTunes with Finder for iPhone management starting with macOS Catalina in 2019. If you see old guides telling you to open iTunes, that information is outdated.
- Plug your iPhone into the MacBook Air using the correct cable. The first time you connect, your iPhone will display a “Trust This Computer?” prompt. Tap Trust and enter your iPhone passcode. On the Mac side, you may also see a prompt asking to allow the accessory to connect – click Allow.
- Open a Finder window on your MacBook Air. In the left sidebar under “Locations,” you will see your iPhone listed by name. Click on it to open the iPhone management screen. This is where you control syncing, backups, and software updates.
From the Finder iPhone screen, you can sync music, movies, TV shows, podcasts, audiobooks, and photos between your Mac and iPhone. Click the tabs along the top (General, Music, Movies, etc.) to choose what gets synced. Check the boxes next to the content you want, then click Apply in the bottom-right corner.
To back up your iPhone, stay on the General tab in Finder. Under the Backups section, select “Back up all of the data on your iPhone to this Mac.” Click Back Up Now. You can also choose to encrypt your backup with a password, which saves Health data, Wi-Fi passwords, and website history that unencrypted backups skip.
Finder also lets you update or restore your iPhone software. On the General tab, click Check for Update to install the latest iOS version. If your iPhone has serious problems, you can click Restore iPhone to factory reset it – but this erases everything on the device, so make sure you have a backup first.
How to Connect iPhone to MacBook Air Wirelessly
You do not need a cable to connect your iPhone and MacBook Air for most tasks. Apple offers several wireless options that keep your devices in sync automatically. The three main wireless methods are iCloud, AirDrop, and Wi-Fi sync through Finder.
iCloud Syncing
iCloud is the easiest way to keep your iPhone and MacBook Air connected without thinking about it. When both devices are signed into the same Apple ID, iCloud automatically syncs your photos, contacts, calendars, Safari bookmarks, Keychain passwords, Notes, and Reminders across both devices.
- On your iPhone, go to Settings, tap your name at the top, then tap iCloud. Here you can toggle individual services on or off. Turn on everything you want synced – Photos, iCloud Drive, Contacts, Calendars, and so on.
- On your MacBook Air, open System Settings, click your Apple ID at the top, then click iCloud. You will see the same list of apps and services. Make sure the same ones are enabled on both devices. iCloud Drive is especially useful – it gives you access to the same files from both your iPhone and Mac through the Files app and Finder.
The free iCloud plan includes 5 GB of storage, which fills up fast if you sync photos. Apple offers paid plans at 50 GB, 200 GB, and 2 TB through iCloud+ if you need more space.
AirDrop
AirDrop lets you send files, photos, links, and other content between your iPhone and MacBook Air wirelessly. It uses a combination of Wi-Fi and Bluetooth, so both need to be turned on for AirDrop to work. The devices should be within about 30 feet of each other.
We also wrote a hands-on guide on how to backup iPhone that you might find useful.
On your iPhone, open Control Center and long-press the network settings card (the section with Wi-Fi and Bluetooth). Tap AirDrop and set it to Contacts Only or Everyone for 10 Minutes. On your MacBook Air, open Finder, click AirDrop in the sidebar, and set the same visibility preference.
To send a file from iPhone to Mac, open the file or photo, tap the Share button, and select your MacBook Air from the AirDrop section. On the Mac, click Accept when the notification appears. To send from Mac to iPhone, drag a file onto the AirDrop window in Finder or right-click a file and choose Share, then AirDrop.
Wi-Fi Sync
Wi-Fi sync lets you sync your iPhone with your MacBook Air through Finder without a cable – but you need to set it up with a cable first. Plug your iPhone in, open Finder, select your iPhone in the sidebar, and on the General tab check the box that says “Show this iPhone when on Wi-Fi.”
After enabling this, your iPhone will appear in Finder’s sidebar whenever both devices are on the same Wi-Fi network. You can sync content, back up, and manage your iPhone just like you would with a cable – it is just a bit slower over Wi-Fi.
How to Use Handoff and Universal Clipboard Between iPhone and MacBook Air
Handoff is one of those Apple features that feels almost invisible until you start relying on it. It lets you start a task on your iPhone and pick it up on your MacBook Air, or the other way around. Open a webpage in Safari on your iPhone, and a Safari icon appears in the Dock on your MacBook Air. Click it, and the same page opens right where you left off.
Handoff works with Safari, Mail, Maps, Messages, Reminders, Calendar, Contacts, Pages, Numbers, and Keynote. On your iPhone, the Handoff icon shows up at the bottom of the app switcher (swipe up and hold on iPhones without a Home button). On your MacBook Air, it appears as an icon on the far-right side of the Dock.
For Handoff to work, both devices need to be signed into the same Apple ID with Bluetooth and Wi-Fi turned on. On your iPhone, go to Settings, then General, then AirPlay and Handoff, and toggle Handoff on. On your MacBook Air, go to System Settings, then General, then AirDrop and Handoff, and enable “Allow Handoff between this Mac and your iCloud devices.”
Universal Clipboard is an extension of Handoff that most people do not realize exists. Copy text, an image, a photo, or a video on your iPhone, then paste it on your MacBook Air using Command+V. It works the other direction too – copy on the Mac, paste on the iPhone. There is no extra setup required beyond the same Handoff requirements.
The clipboard content stays available for about two minutes after copying, so you need to paste relatively quickly. It works with text, images, photos, and videos. For large files like videos, the transfer might take a few seconds over Wi-Fi before you can paste.
How to Use iPhone as a Webcam for MacBook Air
Continuity Camera turns your iPhone into a high-quality wireless webcam for your MacBook Air. The iPhone’s camera system is significantly better than the built-in webcam on any MacBook Air, so this feature makes a noticeable difference in video call quality. Apple introduced this in macOS Ventura and iOS 16.
The setup is almost entirely automatic. Make sure your iPhone and MacBook Air are signed into the same Apple ID with Bluetooth and Wi-Fi enabled. When you open a video app like FaceTime, Zoom, or Microsoft Teams, your Mac will detect your iPhone and offer to use it as a camera source. You can also manually select it from the video settings in most apps.
For the best results, mount your iPhone on top of your MacBook Air’s screen. Apple sells a MagSafe-compatible mount from Belkin, and several third-party options are available for non-MagSafe iPhones. The iPhone should be in landscape orientation with the rear cameras facing you.
Continuity Camera includes several bonus features beyond basic video. Desk View uses the ultra-wide lens on your iPhone to show an overhead view of your desk – useful for showing documents, drawings, or physical objects during a video call. Center Stage keeps you centered in the frame as you move around. Portrait mode blurs the background. Studio Light brightens your face while darkening the background.
Readers who found this helpful also liked our guide on how to connect AirPods to iPhone.
| Feature | Minimum iPhone | Minimum iOS | Minimum macOS | Notes |
|---|---|---|---|---|
| Continuity Camera (basic) | iPhone XR | iOS 16 | macOS Ventura | Works wirelessly via Bluetooth and Wi-Fi |
| Center Stage | iPhone 11 | iOS 16 | macOS Ventura | Requires ultra-wide camera |
| Portrait Mode | iPhone XR | iOS 16 | macOS Ventura | Blurs background behind you |
| Studio Light | iPhone 12 | iOS 16 | macOS Ventura | Brightens face, dims background |
| Desk View | iPhone 11 | iOS 16 | macOS Ventura | Uses ultra-wide lens for overhead view |
Your iPhone needs to be locked and near your MacBook Air for Continuity Camera to work. It will not activate if you are using your iPhone for something else. The connection is wireless, but you can also plug in via USB for a more stable connection during long calls.
How to Use iPhone Mirroring on MacBook Air
iPhone Mirroring is a feature Apple added in macOS Sequoia and iOS 18 in late 2024. It puts your iPhone’s screen directly on your MacBook Air’s display, and you control it with your Mac’s keyboard and trackpad. Your iPhone stays locked the whole time – nobody nearby can see what you are doing on it.
To use iPhone Mirroring, open the iPhone Mirroring app in your Applications folder or Launchpad on your MacBook Air. The first time you launch it, you will need to authenticate with your iPhone passcode or Face ID. After that initial setup, your iPhone screen appears in a window on your Mac.
You can click on iPhone apps, type with your Mac keyboard, and scroll with your trackpad just like you would on the iPhone itself. This is handy for responding to iPhone-only apps (like certain social media or banking apps) without picking up your phone. Notifications from your iPhone also appear on your Mac, and you can click them to open the relevant app in the mirroring window.
One of the most useful parts of iPhone Mirroring is drag and drop. You can drag files, photos, and documents between your iPhone screen and your Mac desktop. This makes transferring content between devices faster than AirDrop for quick one-off files.
iPhone Mirroring requires macOS Sequoia or later and iOS 18 or later. Your MacBook Air needs to have either an Apple Silicon chip (M1 or later) or a T2 security chip (found in 2018 and 2019 Intel MacBook Air models). Both devices must be signed into the same Apple ID with Bluetooth and Wi-Fi enabled. Your iPhone and MacBook Air need to be near each other, though they do not have to be on the same Wi-Fi network.
Troubleshooting iPhone to MacBook Air Connection
Connection problems between an iPhone and MacBook Air usually come down to a few common causes: a bad cable, outdated software, or incorrect settings. Here are the most frequent issues and how to fix them.
If your MacBook Air does not recognize your iPhone when connected via USB, start with the basics. Try a different cable – damaged or non-certified cables are the most common cause. Try a different USB-C port on your MacBook Air. Restart both devices. Make sure your MacBook Air is running the latest macOS by going to System Settings, then General, then Software Update. Also check that you tapped Trust on the “Trust This Computer?” prompt on your iPhone.
If AirDrop is not showing the other device, confirm that Wi-Fi and Bluetooth are turned on for both your iPhone and MacBook Air. Check the AirDrop visibility setting – if it is set to “Receiving Off” or “Contacts Only” and the other device is not in your contacts, AirDrop will not find it. Set it to “Everyone for 10 Minutes” temporarily for troubleshooting. Also make sure both devices are signed into an Apple ID and that Personal Hotspot is turned off on the iPhone.
When iCloud is not syncing properly, verify that both devices are signed into the same Apple ID. Check your internet connection on both devices. Go to Settings (on iPhone) or System Settings (on Mac) and confirm that the specific iCloud services you need are toggled on. Also check your iCloud storage – if it is full, syncing stops for services like Photos and iCloud Drive.
Handoff problems are almost always caused by one of three things: the devices are not on the same Wi-Fi network, Bluetooth is off on one device, or Handoff is disabled in settings. Check all three. On iPhone, go to Settings, General, AirPlay and Handoff. On Mac, go to System Settings, General, AirDrop and Handoff. Toggle Handoff off and back on if it was already enabled.
| Problem | Most Likely Cause | Fix |
|---|---|---|
| Mac does not see iPhone via USB | Bad cable or missing Trust prompt | Try a different cable, tap Trust on iPhone, restart both devices |
| AirDrop not finding devices | Wi-Fi or Bluetooth off, or AirDrop set to Receiving Off | Enable Wi-Fi and Bluetooth, set AirDrop to Everyone for 10 Minutes |
| iCloud not syncing | Different Apple IDs or iCloud storage full | Check Apple ID on both devices, free up or upgrade iCloud storage |
| Handoff not working | Not on same Wi-Fi or Handoff disabled | Connect to same Wi-Fi, enable Handoff in settings on both devices |
| Continuity Camera not activating | iPhone is unlocked or in use | Lock iPhone, make sure both devices use same Apple ID |
| iPhone Mirroring not available | macOS or iOS version too old | Update to macOS Sequoia and iOS 18 or later |
| Wi-Fi sync not showing iPhone | Not on same Wi-Fi network | Connect both devices to the same Wi-Fi, re-enable in Finder |
How to Connect iPhone to MacBook Air FAQs
Do I Need iTunes to Connect iPhone to MacBook Air?
No. Apple discontinued iTunes on the Mac with macOS Catalina in 2019. iPhone management is now handled through Finder. When you plug your iPhone into a MacBook Air running macOS Catalina or later, open a Finder window and select your iPhone from the sidebar under Locations. Everything you used to do in iTunes – syncing, backups, updates, restores – is done in Finder now.
Can I Connect iPhone to MacBook Air Without a Cable?
Yes. You can connect wirelessly through iCloud syncing, AirDrop, Handoff, Universal Clipboard, Continuity Camera, and iPhone Mirroring. iCloud syncs data automatically when both devices share the same Apple ID. AirDrop transfers individual files over Wi-Fi and Bluetooth. For ongoing wireless syncing through Finder, enable Wi-Fi sync by connecting via cable once and checking “Show this iPhone when on Wi-Fi” in Finder.
How Do I Transfer Photos from iPhone to MacBook Air?
The fastest method depends on how many photos you are transferring. For your entire photo library, enable iCloud Photos on both devices – your photos will sync automatically. For a handful of photos, use AirDrop to send them directly. You can also plug your iPhone in via USB and import photos using the Photos app or Image Capture on your MacBook Air. Another option is iPhone Mirroring with drag and drop in macOS Sequoia.
Why Won’t My MacBook Air Recognize My iPhone?
The most common fix is trying a different cable. Damaged or non-certified cables frequently cause recognition failures. Also make sure you tapped Trust on the “Trust This Computer?” prompt on your iPhone when connecting. Restart both devices, check for macOS and iOS updates, and try a different USB-C port on your MacBook Air. If none of that works, reset your iPhone’s location and privacy settings by going to Settings, General, Transfer or Reset iPhone, Reset, then Reset Location and Privacy.
Can I Mirror My iPhone Screen on MacBook Air?
Yes, if your MacBook Air runs macOS Sequoia or later and your iPhone runs iOS 18 or later. Open the iPhone Mirroring app on your MacBook Air to see and control your iPhone screen directly on your Mac. Your iPhone stays locked while mirroring, and you can interact with iPhone apps using your Mac’s keyboard and trackpad. This feature requires an Apple Silicon or T2-equipped MacBook Air.
What Is the Best Way to Back Up iPhone to MacBook Air?
Connect your iPhone to your MacBook Air with a USB cable and open Finder. Select your iPhone in the sidebar, go to the General tab, and click Back Up Now. For the most complete backup, check the box to encrypt your backup – this saves passwords, Health data, and Wi-Fi settings that unencrypted backups skip. You can also back up to iCloud wirelessly by going to Settings, tapping your name, then iCloud, then iCloud Backup on your iPhone.