There are several ways to connect your Canon EOS R to a computer, and the best method depends on what you need to do. A USB cable gives you the fastest file transfer speeds and is the go-to choice for downloading large batches of RAW photos after a shoot. Wi-Fi works well for sending a few JPEGs without plugging anything in. Tethered shooting over USB puts each image on your computer screen the second you press the shutter, which studio and product photographers rely on daily. Canon’s EOS Webcam Utility also lets you turn the camera into a high-quality video source for Zoom, Teams, or live streaming. This guide walks through every method with the exact menu paths, cable specs, and software you need.
How to Connect Canon EOS R to Computer with USB
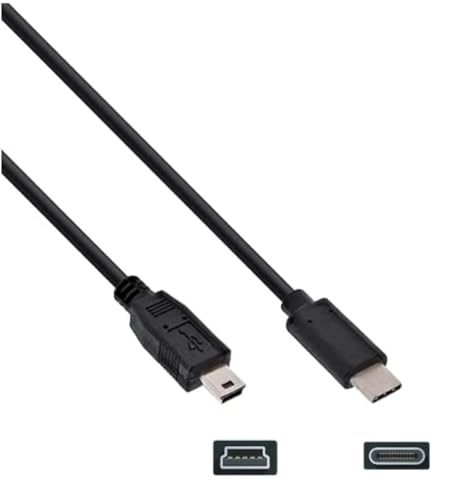
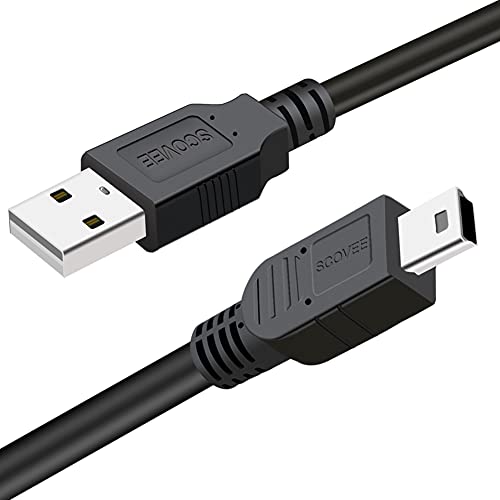
USB is the most reliable way to connect the Canon EOS R to a computer. It’s also the fastest option for transferring files. The EOS R has a USB Type-C port (USB 3.1 Gen 1) located on the left side of the body, behind the rubber terminal cover. You’ll need a USB-C cable to make the connection.
| Your computer’s port | Cable you need | Transfer speed | Typical cost |
|---|---|---|---|
| USB-C | USB-C to USB-C | Up to 5 Gbps | $8 – $15 |
| USB-A (standard rectangular) | USB-C to USB-A | Up to 5 Gbps | $8 – $12 |
| Thunderbolt 3/4 (MacBook) | USB-C to USB-C | Up to 5 Gbps (limited by camera) | $8 – $15 |
Canon doesn’t include a USB cable in the EOS R box, so you’ll need to buy one separately. Any standard USB-C data cable works fine. Watch out for charge-only cables, though. They look identical to data cables but can’t transfer files. If your computer doesn’t recognize the camera when you plug it in, try a different cable first.
Steps to Transfer Photos via USB
- Turn the camera off before plugging in. Open the rubber terminal cover on the left side and insert the USB-C connector into the digital terminal (the port closest to the bottom). Plug the other end into your computer.
- Turn the camera on. Your computer should detect it within a few seconds. On Windows, it shows up under “This PC” as “Canon EOS R” or as a removable drive. On Mac, it appears on the desktop or in the Finder sidebar.
- Browse to the images. Open the camera’s storage and navigate to DCIM > 100CANON (or a similarly numbered folder). RAW files are in .CR3 format, and JPEGs use .JPG. Drag the files you want to a folder on your hard drive.
- Eject before unplugging. On Windows, right-click the camera in File Explorer and select “Eject.” On Mac, click the eject icon next to the camera name in Finder. Pulling the cable without ejecting can corrupt files on the memory card.
Using Canon EOS Utility for USB Transfer
Canon’s free EOS Utility software gives you more control than simple drag-and-drop file browsing. Download it from Canon’s support site at usa.canon.com/support (search for “EOS R” and look under Drivers & Downloads). It’s available for both Windows and Mac.
After installation, connect the camera via USB and turn it on. EOS Utility should launch automatically. If it doesn’t, open it manually from your applications. The software lets you download all images at once, pick specific images to download, or control the camera remotely for tethered shooting. You can also change camera settings from the computer, which is handy when the camera is mounted on a tripod or overhead rig where the physical controls are hard to reach.
How to Connect Canon EOS R to Computer via Wi-Fi
The Canon EOS R has built-in Wi-Fi (802.11b/g/n at 2.4GHz) and Bluetooth 4.1. This means you can connect it to your computer wirelessly for file transfers or remote shooting. Keep in mind that Wi-Fi is significantly slower than USB. It works well for sending a handful of JPEGs, but transferring hundreds of 30MB RAW files over Wi-Fi gets tedious fast.
Connect via Wi-Fi to a Windows or Mac Computer
- Install EOS Utility on your computer first. The Wi-Fi connection requires this software to be running in the background.
- On the camera, press Menu. Navigate to the Wireless Communication Settings tab (the wrench icon with radio waves). Select Wi-Fi Settings and set Wi-Fi to Enable. Go back and select Wi-Fi Function. Choose the computer icon labeled Transfer images to a computer (or pick “Remote control (EOS Utility)” for tethered shooting).
- Pick your connection method. Select Connect via Wi-Fi. The camera scans for available networks. Choose your home Wi-Fi network from the list and enter the password using the on-screen keyboard. This part is slow, but you only need to do it once since the camera saves the network.
- Pair with the computer. The camera searches for computers running EOS Utility on the same network. On your computer, EOS Utility should show a pairing prompt. Click “Connect” on the computer, then confirm on the camera when you see the computer name appear.
After the initial pairing, the camera remembers the connection. Future connections happen automatically whenever both devices are on the same network and EOS Utility is running.
Using Canon Camera Connect App as a Workaround
If you need to move photos from the EOS R to a computer quickly and you don’t have a USB cable or EOS Utility set up, the Canon Camera Connect app on your phone can serve as a bridge. Connect the camera to your phone via Wi-Fi or Bluetooth through the app, download the images to your phone, and then transfer them to your computer through cloud storage (iCloud, Google Photos, Dropbox) or AirDrop on a Mac. It’s not the fastest workflow, but it gets the job done when you’re in a pinch. The Camera Connect app is free on both iOS and Android, and it also lets you use your phone as a remote viewfinder and shutter release, which can be useful for group photos or self-portraits.
How to Use Canon EOS R for Tethered Shooting
Tethered shooting sends each photo from the camera to the computer the moment you press the shutter. The image appears on the computer screen within seconds. Studio photographers, product shooters, and art directors rely on tethering so everyone on set can review results on a large monitor instead of squinting at the camera’s 3-inch LCD.
| Tethering software | Price | Platform | Key advantage |
|---|---|---|---|
| Canon EOS Utility | Free | Windows, Mac | Full camera control, free with any Canon camera |
| Adobe Lightroom Classic | $10/month (Photography plan) | Windows, Mac | Images import directly into your Lightroom catalog |
| Capture One | $24/month or $300 one-time | Windows, Mac | Industry standard for commercial and fashion work |
| Canon Digital Photo Professional | Free | Windows, Mac | Handles CR3 RAW files natively, good for quick review |
Tethered Shooting Setup
- Connect the camera to the computer via USB-C. Wi-Fi tethering through EOS Utility is possible but adds a 2 to 5 second delay per image, which is too slow for most studio work. USB tethering shows images on screen within 1 to 2 seconds.
- Open your tethering software. In Lightroom Classic, go to File > Tethered Capture > Start Tethered Capture. Name the session, choose a destination folder, and click OK. The camera name appears in a control bar at the top of the screen. In EOS Utility, click “Remote Shooting” after the camera connects. In Capture One, open the Capture tab and the camera should appear automatically.
- Start shooting. Press the shutter button on the camera or click the virtual shutter in the software. The image transfers to the computer and appears on screen. You can adjust exposure, white balance, and focus from the software without touching the camera.
- Use a long USB-C cable. The typical 3-foot cable is too short for studio work. Get a 10-foot or 15-foot USB-C cable rated for data transfer. TetherTools makes cables specifically designed for tethered shooting ($30 to $50) with high-visibility orange jackets and strain relief connectors. A generic 10-foot USB-C data cable ($12 to $18) works fine as well.
- Disable auto power off. Go to Menu > Setup (wrench icon) > Auto Power Off and set it to “Disable.” Otherwise the camera shuts itself off during idle moments, killing the tethered connection.
How to Use Canon EOS R as a Webcam
The Canon EOS R can work as a high-quality webcam for video calls, live streaming, or recording directly to your computer. The image quality from a full-frame camera with an RF or EF lens is miles ahead of any built-in laptop webcam or standalone USB webcam.
Using Canon EOS Webcam Utility (Free)
Download and install Canon EOS Webcam Utility from Canon’s website. It’s free for both Windows and Mac. Connect the camera to your computer via USB-C and turn it on. Set the camera to video mode or photo mode (both work). Open your video app (Zoom, Google Meet, Microsoft Teams, OBS Studio) and select “Canon EOS Webcam Utility” as the video source in the app’s settings.
The camera outputs a clean video feed with no on-screen overlays (no focus points, no exposure info on the image). Set the lens to autofocus so it tracks your face. For extended use, pick up a Canon DR-E6 dummy battery paired with a Canon AC-E6N power adapter (about $60 total). This is strongly recommended because the camera battery drains in roughly an hour during continuous video output.
Using an HDMI Capture Card
For higher quality video or lower latency, connect the camera’s Micro HDMI (Type D) output to a capture card like the Elgato Cam Link 4K ($100) or a budget USB HDMI capture card ($15 to $30). The capture card plugs into your computer’s USB port and shows up as a webcam source in any video app. This approach bypasses the EOS Webcam Utility software entirely and delivers a full-resolution, low-latency feed. On the camera, go to Menu > Shooting > HDMI Output and enable “Clean HDMI output” to strip the on-screen display from the video feed.
Canon EOS R Connection Methods at a Glance
| Method | Best for | Speed | Software needed | Cable needed |
|---|---|---|---|---|
| USB file transfer | Batch transfer after a shoot | Fast (5 Gbps max) | None (File Explorer/Finder) or EOS Utility | USB-C cable |
| USB tethered shooting | Studio/product photography | 1-2 second preview | EOS Utility, Lightroom, or Capture One | USB-C cable (10-15 ft recommended) |
| Wi-Fi transfer | Quick transfer of a few images | Slow (2.4GHz only) | EOS Utility on computer | None |
| Wi-Fi remote shooting | Camera on tripod, shoot from a distance | 2-5 second delay per image | EOS Utility on computer | None |
| Webcam (EOS Webcam Utility) | Video calls, streaming | Real-time video | Canon EOS Webcam Utility (free) | USB-C cable |
| Webcam (HDMI capture card) | Low-latency streaming, high quality | Real-time video, lower latency | None (capture card is plug-and-play) | Micro HDMI to HDMI + capture card |
| Camera Connect app (phone) | Quick mobile transfer, remote viewfinder | Moderate | Canon Camera Connect (iOS/Android) | None |
Troubleshooting Canon EOS R Computer Connections
Computer doesn’t recognize the camera via USB. Try a different USB cable first. Charge-only cables look the same as data cables but won’t transfer files. Also try a different USB port on the computer and avoid USB hubs (connect directly). On Windows, open Device Manager and look for the camera. A yellow warning icon means there’s a driver problem, which reinstalling EOS Utility usually fixes.
Wi-Fi connection keeps dropping. The EOS R’s Wi-Fi runs on 2.4GHz only and has limited range. Stay within 30 feet of your router with as few walls as possible between the camera and the access point. If your router has separate 2.4GHz and 5GHz networks, make sure the computer is on the 2.4GHz band (same as the camera). Also check the camera’s Wi-Fi power saving mode. Go to Menu > Wireless Communication Settings > Wi-Fi Settings > Power Saving and set it to Disable during active use.
Tethered shooting disconnects mid-session. The most common culprit is a loose cable. USB-C connectors are small and slide out if the cable gets bumped. Use a cable with a locking mechanism or tape it down with gaffer tape. Also disable Auto Power Off (Menu > Setup > Auto Power Off > Disable) and connect the camera to wall power using a dummy battery adapter so it doesn’t run out of juice mid-shoot.
EOS Webcam Utility shows a black screen. Confirm the camera is on and the lens cap is off (it happens more often than you’d think). Check that no other application is already using the camera feed, since only one app can access a webcam source at a time. If it still doesn’t work, uninstall and reinstall the EOS Webcam Utility. On Mac, you may need to grant camera access under System Settings > Privacy & Security > Camera.
Wi-Fi file transfer is painfully slow. That’s expected behavior, unfortunately. The EOS R’s Wi-Fi tops out at about 15 to 20 Mbps under ideal conditions. A single 30MB CR3 RAW file takes roughly 12 to 15 seconds over Wi-Fi. A full 64GB card of RAW files could take over an hour wirelessly versus 3 to 5 minutes over USB. If you only need quick previews, set the camera to shoot RAW+JPEG and transfer just the smaller JPEG files wirelessly. Save the full RAW transfer for USB.
Canon EOS R Computer Connection FAQs
What USB cable does the Canon EOS R need?
The Canon EOS R uses a USB Type-C (USB 3.1 Gen 1) port. If your computer has USB-C ports, get a USB-C to USB-C cable. If your computer has the standard rectangular USB-A ports, get a USB-C to USB-A cable. Canon doesn’t include a USB cable in the box. Any data-rated USB-C cable will work, but avoid charge-only cables because they can’t transfer files even though they look identical.
Can the Canon EOS R connect to a computer wirelessly?
Yes. The EOS R has built-in Wi-Fi (2.4GHz) and Bluetooth 4.1. Install Canon’s free EOS Utility on your computer, enable Wi-Fi in the camera’s Wireless Communication Settings menu, and pair the two over your home Wi-Fi network. Once paired, you can transfer images wirelessly or control the camera remotely. Wi-Fi is much slower than USB, so it’s best suited for small batches of photos rather than a full shoot’s worth of RAW files.
How do I set up the Canon EOS R as a webcam?
Download Canon’s free EOS Webcam Utility from their website. Install it, connect the camera via USB-C, and turn it on. Then select “Canon EOS Webcam Utility” as the video source in Zoom, Teams, Meet, or OBS. For sessions longer than an hour, use a dummy battery AC adapter (Canon DR-E6 + AC-E6N) since the camera battery drains quickly during continuous video. You can also use the Micro HDMI output with a capture card like the Elgato Cam Link 4K for lower latency.
Why won’t my computer detect the Canon EOS R?
The number one cause is a charge-only USB cable. Try a different cable that’s rated for data transfer. Other things to check: use a different USB port (skip the hub and go direct), restart both the camera and computer, and make sure Auto Power Off is disabled so the camera doesn’t shut down during connection. On Windows, reinstalling EOS Utility can clear driver conflicts. On Mac, verify that camera access is allowed under System Settings > Privacy & Security.
What software supports tethered shooting with the EOS R?
Canon’s free EOS Utility handles tethered shooting out of the box. Adobe Lightroom Classic ($10/month Photography plan) and Capture One ($24/month or $300 one-time) also support tethering with the EOS R and add more advanced editing and file management features. For basic file transfer without tethering, you don’t need any software at all. The camera shows up as a removable drive in File Explorer (Windows) or Finder (Mac) when connected via USB.
Can the Canon EOS R send RAW files over Wi-Fi?
It can, but it’s slow. The EOS R’s Wi-Fi maxes out around 15 to 20 Mbps in ideal conditions. Each 30MB CR3 RAW file takes about 12 to 15 seconds to transfer wirelessly. A 64GB card packed with RAW images would take over an hour via Wi-Fi compared to roughly 3 to 5 minutes over USB. A practical workaround: shoot RAW+JPEG and send only the smaller JPEGs over Wi-Fi for quick review. Then transfer the full RAW files over USB when you’re back at your desk.