How to Connect Your Camera to a Computer and Record
Whether you’re a seasoned photographer or just getting started, knowing how to connect a camera to a computer and record is a skill you’ll use regularly. Connecting your camera to a PC or laptop serves two main purposes: transferring photos and videos you’ve already shot, and using the camera as a live webcam for recording video directly to the computer.
Both processes are pretty simple once you know the steps. This guide covers both methods with photos to walk you through each one.
Transferring Photos from Camera to Computer via USB
To download photos and videos from your camera to a computer, you’ll need the USB cable that came with the camera. Most cameras include one in the box. If yours is missing, check the camera’s port type (usually mini-USB or micro-USB) and pick up a replacement cable for a few dollars.
Step 1. Turn On Your Computer
Boot up your PC or laptop. Once it’s running, close any unnecessary applications. Transferring high-resolution photos and large video files can slow things down if you have a bunch of programs running in the background.
Step 2. Open the USB Port Cover on the Camera
Find the USB port on your camera body. It’s usually behind a small rubber flap on the side of the camera. Plug the USB cable’s smaller end into the camera’s port.
How to connect the camera to the computer and record – open the flip cover of the USB portStep 3. Turn On the Camera in View/Playback Mode
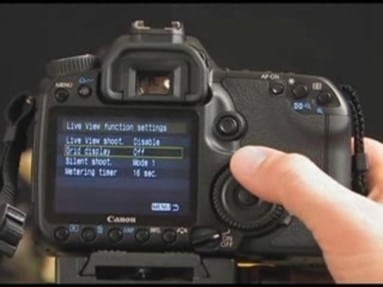
Power on the camera. Your computer should detect it automatically within a few seconds. For video output, look for a “Video Out” mode in your camera’s settings. The exact menu location varies by camera model, so check your manual if you can’t find it.
Step 4. Install Camera Drivers if Needed
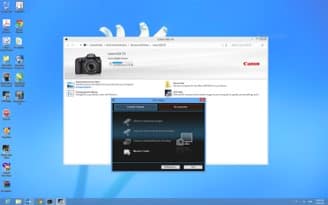
If this is your first time connecting the camera to this computer, it may need to install drivers. This can take a minute or two. A pop-up window will appear on screen once the driver installation is complete, giving you options for what to do next.
Step 5. Open Your Camera’s Storage on the Computer
Open “This PC” (Windows) or Finder (Mac) to find your connected camera listed as a device.
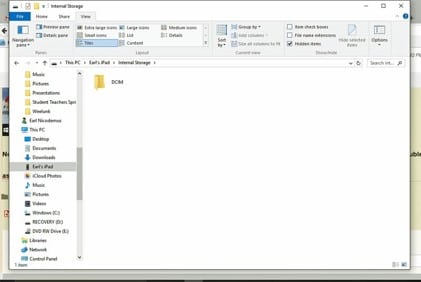
Click on “Internal Storage” under the Devices and Drives section. Open the storage folder (on most modern digital cameras, this is labeled “DCIM”). Inside, you’ll find subfolders containing your photos and videos. You can rename these folders however you like and start copying files to your computer.
Step 6. Transfer and Manage Your Files
Drag your photos and videos to a folder on your computer’s hard drive. Once the transfer is complete, you can edit, organize, delete, or share your files however you want.
Quick tip: Always turn off your camera before disconnecting the USB cable. This prevents potential file corruption on the memory card.
Using Your Camera as a Webcam to Record on Your Computer
You can also connect your camera to a computer and use it as a live webcam. This is great for recording video directly to your hard drive, streaming, or making video calls with much better image quality than a typical laptop webcam provides.
Step 1. Turn On Your Computer
Boot up your PC or laptop, just like before.
Step 2. Connect the USB Cable to the Computer
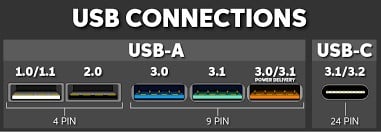
Plug the larger end of the USB cable into a USB port on your computer.
Step 3. Connect the Other End to the Camera
Plug the smaller end of the cable into your camera’s USB port.
Step 4. Set the Camera to Record Mode
Power on the camera and switch it to record (video) mode. The exact method depends on your camera model. Some cameras have a dedicated video switch on the mode dial, while others require you to change modes through the menu system.
Step 5. Verify the Connection
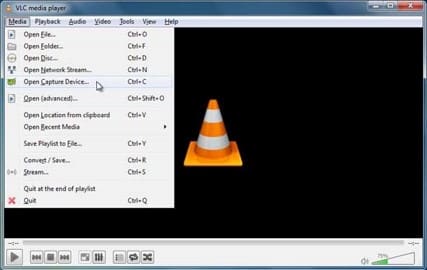
Make sure all cable connections are secure at both ends. On your computer, open “This PC” (Windows) and look for a “USB Video Source” or “Capture Device” icon. If you’re using webcam software like Canon’s EOS Webcam Utility, Sony’s Imaging Edge, or OBS Studio, select the camera as your video input source in the software settings.
Step 6. Start Recording
Your computer should now display the live video feed from your camera. Use your recording software to capture the video. OBS Studio is a free, popular option that works well for this purpose.
Step 7. Save Your Recording
When you’re done recording, stop the capture and choose a folder on your computer to save the video file. Make sure you have enough disk space before starting, as video files can be very large.
Tips for Better Results
- Use AC power: If you plan on recording for more than 30 minutes, use a dummy battery and AC adapter to keep the camera powered. Camera batteries drain quickly during continuous video output.
- Check your recording software: Free options like OBS Studio work well for recording webcam feeds. Canon users can download EOS Webcam Utility for free from Canon’s website. Sony offers Imaging Edge Webcam, and Nikon has its own Webcam Utility as well.
- Watch your storage: Video files are large. A one-hour 1080p recording can take up 5 to 10 GB of disk space. Make sure you have enough room on your hard drive before starting a long session.
- Audio matters: The camera’s built-in mic probably won’t sound great when it’s sitting across the room. Consider plugging an external microphone directly into your computer for better audio quality, or use a dedicated USB mic.
These days, most major camera manufacturers (Canon, Nikon, Sony, Fujifilm, and others) offer free webcam utility software that makes connecting your camera to a computer for recording easier than ever. The image quality improvement over a standard webcam is dramatic, and the entire setup takes just a few minutes.