When you purchase through links on our site, we may earn an affiliate commission. Here’s how it works.
How to Use an External Webcam on a Mac? – Let’s Start!
The MacBook is an excellent choice for those on a strict budget. It’s also ideal for individuals preferring not to carry a larger laptop. Furthermore, the Mac offers more user-friendly features than the iPad, making it a more flexible option.
How to Use External Webcam on Mac
Apple’s MacBook models include a webcam at the top of the screen, similar to those found on iPhones. This device, known as the iSight camera, features a small, green indicator light on the right that illuminates when the webcam is active.

Unfortunately, MacBooks do not have the highest-quality webcams on the market. Despite excellent camera setups in devices like the iPhone and iPad Pro, the MacBook’s 720p webcam is less impressive and lacks detail and clarity.
The best solution? Use an external webcam. Below are the steps to connect an external webcam to your MacBook.
Step-By-Step Guideline on How To Set Up An External Webcam On a Mac
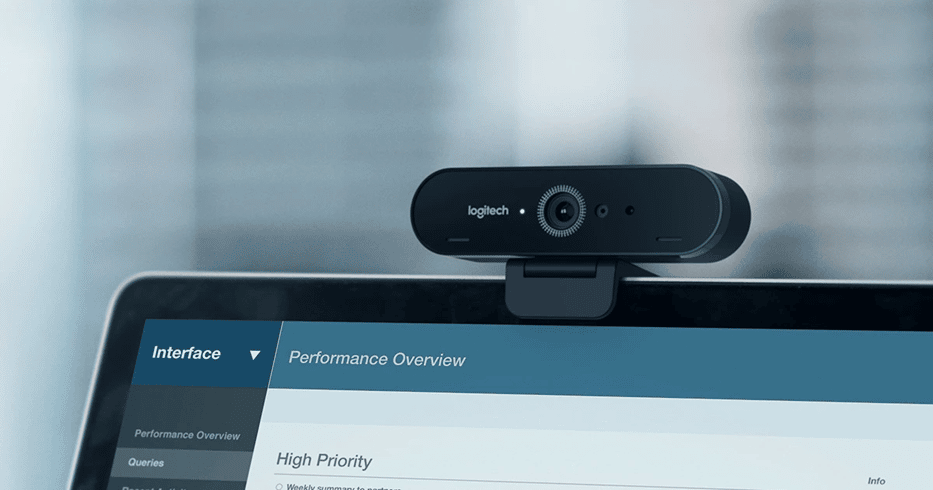
Setting up an external webcam on a MacBook is straightforward. If you’re considering using an external or USB webcam instead of the built-in iSight camera, the steps below will efficiently link your webcam to your computer.
- Step 1: Connect the external webcam’s USB cable to a MacBook’s USB port using the included USB adapter.
- Step 2: Wait 10-20 seconds for the MacBook to recognize the external webcam.
- Step 3: Launch the dedicated camera program on your computer. The “Photo Booth” tool, integrated into macOS, provides a live video feed of yourself. Third-party applications like Zoom and Skype can also be used.
- Step 4: Select your external webcam from the list of available webcams. Your external webcam will be installed and ready for use shortly.
How to Use an External Webcam for FaceTime
- Open the FaceTime app in your Mac settings.
- Click “Audio & Video” and select your connected webcam from the drop-down menu.
How to Use an External Webcam for Skype
- Open the Skype app in your Mac settings.
- Click on Skype, then navigate to “Preferences.“
- In Skype settings, go to “Audio & Video” and select your external webcam from the list.
How to Use an External Webcam for Zoom
- Open the Zoom app in your Mac settings.
- Click Zoom, then select “Preferences” from the drop-down menu.
- In Zoom settings, change your camera default settings by selecting “Video” and choosing your external webcam.

When making a video call with any third-party service, you must adjust the default settings to your newly installed external webcam.
All the necessary details are in the drop-down menu, and you should follow similar steps for your preferred video conferencing, chatting, and calling services.
How to Troubleshoot an External Webcam Connection on a Mac
If you encounter a black screen on your MacBook with a “There is no camera connected” error message or if the external camera stops working suddenly, here are steps to ensure a proper connection. If issues persist, resetting your
Mac’s System Management Controller (SMC) might be necessary.
How to Check External Webcam Connection
- Ensure the cable and port are clean and abrasion—free; dust and debris can interfere with the connection.
- Make sure the cable is securely connected.
- If the webcam is not recognized, try connecting it to a different USB port on your computer.
- For non-Apple cameras, verify that all necessary drivers and software are installed.
How to Reset the Mac’s System Management Controller (SMC)
- Shut down your Mac.
- Disconnect the power adapter.
- Press and hold the Shift-Control-Option keys on the left side of the built-in keyboard, then press the power button simultaneously. Hold these keys and the power button for 10 seconds.
- Release all keys and the power button.
- Reconnect the power adapter.
- Turn on your Mac by pressing the power button again.
Final Thoughts
As the demand for impeccable audiovisual interaction grows globally, many seek clarity, prompting them to install external cameras on their MacBooks. Although most MacBook versions come with built-in cameras, external webcams offer enhanced portability and superior sound and visual quality.
See Also