Why Connect a Webcam to Your TV?
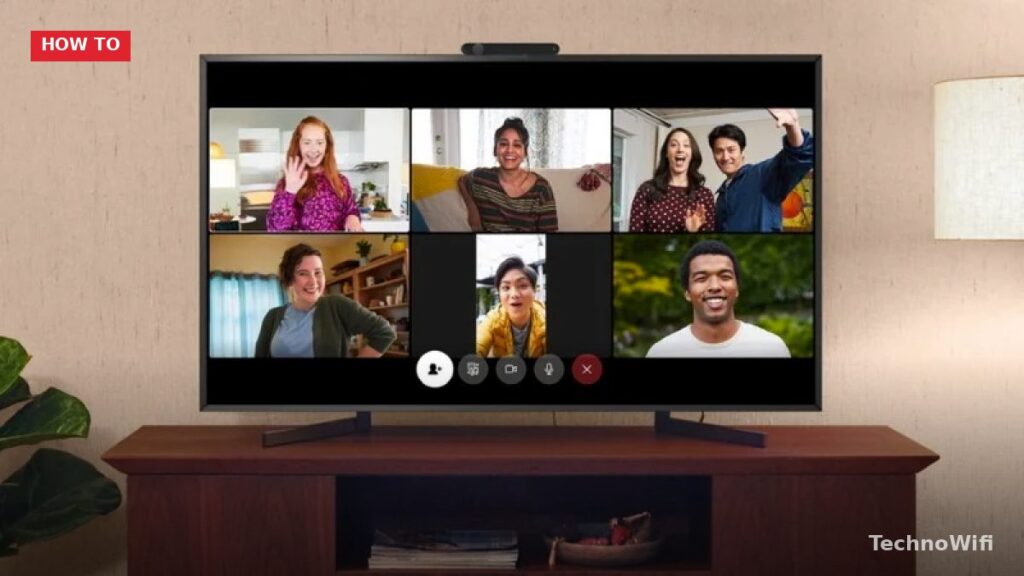
Video calls on a laptop or phone screen can feel cramped, especially when multiple people need to join in. Connecting a webcam to your TV gives you a larger, more comfortable view. It works well for family video chats, remote meetings with a group in the same room, and even online fitness classes where you want to see the instructor clearly.
The process differs depending on what type of TV you have. Smart TVs, regular TVs with HDMI inputs, and TVs paired with streaming devices each require a slightly different approach. This guide walks through every method so you can pick the one that fits your setup in 2026.
Method 1: USB Webcam on a Smart TV
This is the simplest option if your TV has USB ports and runs a smart TV operating system (Samsung Tizen, LG webOS, Google TV, or Android TV).
- Locate a USB port on your TV. Check the back and side panels. Most smart TVs made after 2018 include at least one USB port.
- Plug in the webcam. Connect the webcam’s USB cable directly to the TV’s USB port.
- Open a video calling app on the TV. Launch Google Meet, Zoom, or another video app from the TV’s app store. Many smart TVs now include video calling apps pre-installed or available for download.
- Select the webcam in the app settings. Go to the app’s camera settings and choose the connected USB webcam. You should see a live preview of the camera feed on your TV screen.
- Sign in and start calling. Log into your account and place or receive video calls directly from the big screen.
Method 2: Laptop or PC Connected via HDMI
If your TV is not a smart TV, or if it does not support video calling apps natively, you can route everything through a computer.
- Connect your laptop or PC to the TV using an HDMI cable. Plug one end into the computer’s HDMI output and the other into an HDMI input on your TV.
- Switch the TV’s input source. Press the Source or Input button on your TV remote and select the HDMI port you just connected to.
- Plug the webcam into the computer. Connect the USB webcam to your laptop or PC (not the TV).
- Open a video calling app on the computer. Launch Zoom, Google Meet, Microsoft Teams, or any other video app on the computer. The TV now mirrors or extends your computer screen, displaying the call on the larger display.
- Select the webcam in the app. Make sure the video app is using your external webcam and not the laptop’s built-in camera.
This method works with any TV that has an HDMI input, regardless of whether it is a smart TV. The computer handles all the video processing, and the TV simply acts as a large monitor.
Our guide on how to connect Bluetooth headphones to Xbox one goes into more detail if you need it.
Method 3: Using a Streaming Device
Streaming devices like Amazon Fire TV Stick, Roku, Apple TV, and Chromecast with Google TV can bridge the gap between a webcam and a non-smart (or older smart) TV.
- Amazon Fire TV: Some Fire TV models support USB webcams through a USB OTG adapter. Plug the webcam into the adapter, connect it to the Fire TV Stick, and use the Alexa video calling feature or a compatible app.
- Apple TV: With Continuity Camera, you can use your iPhone as a webcam and FaceTime directly on your Apple TV 4K. No separate USB webcam is needed.
- Chromecast with Google TV: Google Meet works on Chromecast with Google TV. Some USB webcams can connect through a USB-C hub, depending on the model.
Support varies by device and model, so check the manufacturer’s compatibility list before purchasing a webcam for this purpose.
Method 4: Wireless Screen Mirroring
If you would rather avoid cables running between your computer and TV, wireless mirroring is an option.
- Chromecast: Cast a Chrome browser tab or your entire desktop to a Chromecast-enabled TV while running a video call on the computer.
- AirPlay: Mirror your Mac or iPhone screen to an Apple TV or AirPlay-compatible smart TV.
- Miracast: Many Windows laptops can mirror their screen wirelessly to a Miracast-compatible smart TV.
Keep in mind that wireless mirroring can introduce a slight delay (latency), which may be noticeable during fast-paced conversations. A wired HDMI connection is more reliable when low latency matters.
Advantages of Using a Webcam on Your TV
Comfort and Flexibility
Sitting on a couch in your living room is far more relaxed than hunching over a laptop. A TV-based setup lets you move freely while staying visible on the call.
We also wrote a hands-on guide on how to connect soundbar to TV that you might find useful.
Better Viewing for Groups
When multiple people need to see the call, a 50-inch or larger TV screen is far easier to share than a 13-inch laptop. Everyone in the room can follow the conversation without squinting.
Larger Display for Presentations
If someone on the call shares their screen, you get to see it on a full-size TV. Charts, documents, and slides are much easier to read at this scale.
Things to Watch Out For
Internet Stability
Video calls demand consistent bandwidth. If your Wi-Fi signal is weak near the TV, consider using a wired Ethernet connection or moving your router closer. Dropped frames and frozen video often come down to network issues rather than the webcam itself.
Privacy Considerations
An always-connected webcam on a TV in your living room is worth thinking about from a privacy standpoint. Disconnect or cover the webcam when it is not in use, especially if the TV is connected to the internet at all times.
Audio Quality
TV speakers may pick up echoes or feedback during a call. A dedicated Bluetooth speaker with a built-in microphone, or a USB speakerphone, typically delivers cleaner audio for both you and the person on the other end.
Troubleshooting Tips
- If the TV does not recognize the webcam, try a different USB port or restart the TV by unplugging it for 30 seconds.
- Make sure the video calling app has camera and microphone permissions enabled in the TV’s settings.
- Update the TV’s firmware and the video calling app to the latest versions. Compatibility issues are often resolved with software updates.
- If you are mirroring from a laptop via HDMI and the display looks stretched or cropped, adjust the resolution settings on the computer to match the TV’s native resolution (usually 1920×1080 or 3840×2160).