When you purchase through links on our site, we may earn an affiliate commission. Here’s how it works.
How to Set Up a Logitech Webcam – Getting Started
You can buy and use a Logitech webcam to conduct various things, from job interviews to conference calls, using video apps such as Microsoft Teams, Skype, and Zoom.
Setting up a Logitech webcam is relatively easy, and you might need one if your computer doesn’t have one or if the one it came with doesn’t satisfy your needs.
Webcams from Logitech have no dedicated on/off switch, so they connect to your computer once you plug them in. This review will examine the step-by-step processes of setting up a Logitech webcam on Mac and Windows OS.
Windows OS
- Place your Logitech webcam at the desired point. Depending on the model, you might be able to fasten it on top of your screen or screw its base onto a tripod.
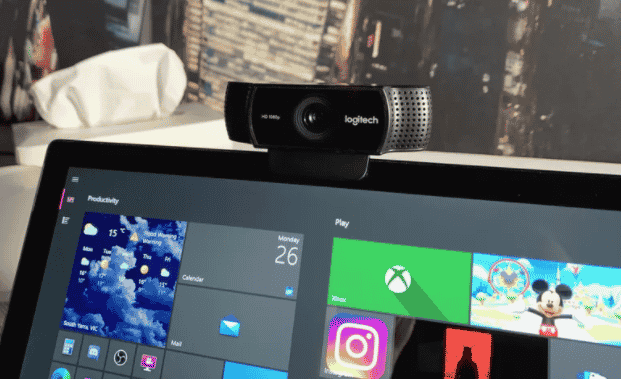
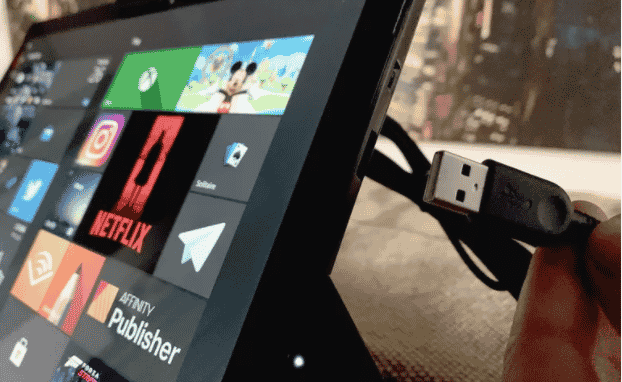
- Next, plug the smaller end of the provided USB cable into the webcam and the larger end into an unoccupied USB slot on the side of your laptop or behind your desktop.
- Your PC should automatically detect the Logitech webcam and install the correct drivers if you don’t already have them. (Modern Logitech webcams are designed to be plug-and-play, which means they work without needing additional drivers on most versions of Windows. However, you might find helpful software on Logitech’s support page for specific features or troubleshooting. This applies broadly to Windows 7 and newer, as Microsoft has largely standardized webcam support in Windows 8 and beyond, making additional drivers unnecessary for basic webcam functionality.)
- Launch the camera app. If you’re unsure where it is, click on the magnifying glass at the bottom-left corner of your screen, type ‘Camera,’ and press ‘Enter’ on your keyboard.
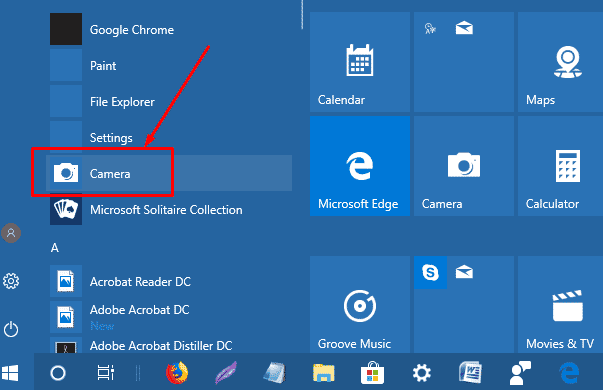
- The camera app will launch, and you can see yourself on the screen.

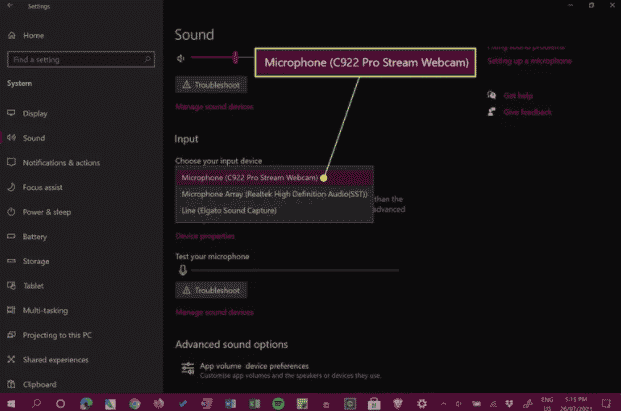
- Next, you’ll need to set up the webcam’s mic. Most Logitech webcams have an inbuilt mic, so you won’t need one. Open Settings, click on System, and then click on Sound in Windows to set up the mic. Next, click on the drop-down menu to see your options.
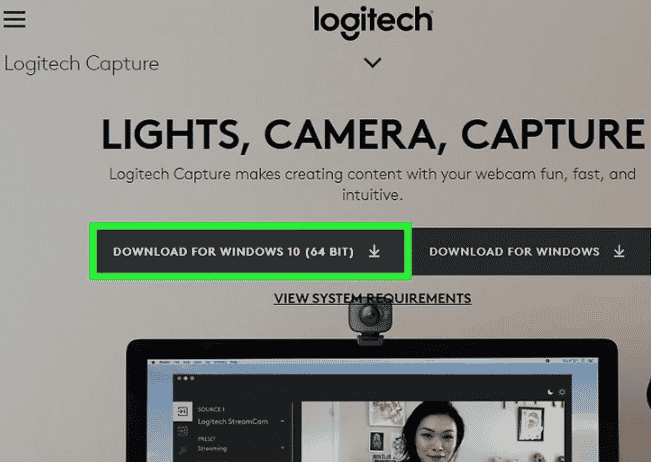
- If you have one of the latest Logitech webcams and your PC runs Windows 10 or 11, you can install the Logitech Capture Software. This software will allow you to get the most out of your Logitech webcam; however, it is optional.
Mac OS
- Place your Logitech webcam at the desired point. Depending on the model, you might be able to fasten it on top of your screen or screw its base onto a tripod.

- Next, plug the smaller end of the provided USB cable into the webcam and the larger end into an unoccupied USB slot on the side of your laptop or behind your desktop.

- Like Windows, modern versions of macOS support most Logitech webcams out of the box without manually downloading drivers. When you connect a Logitech webcam to a Mac, macOS recognizes the device immediately and makes it available for use in applications like FaceTime and others without requiring additional driver downloads. Ensure that your macOS is current to facilitate the best compatibility and performance.
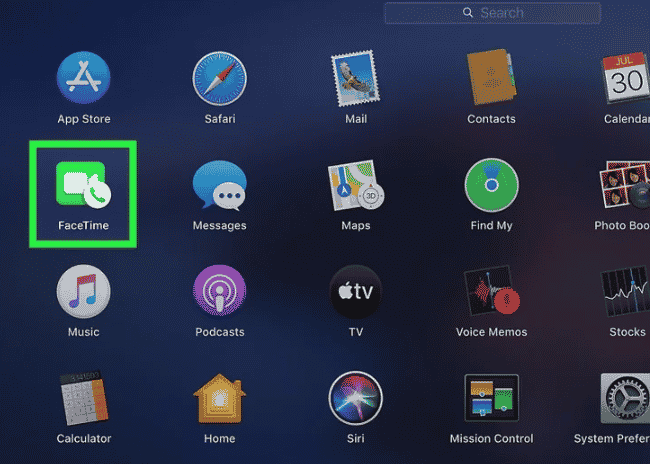
- Launch FaceTime on your Mac PC to test the webcam. If you’re unsure where FaceTime is, Open the ‘Applications’ menu and double-click FaceTime. The FaceTime app will launch, and you will see yourself on your Mac PC screen.
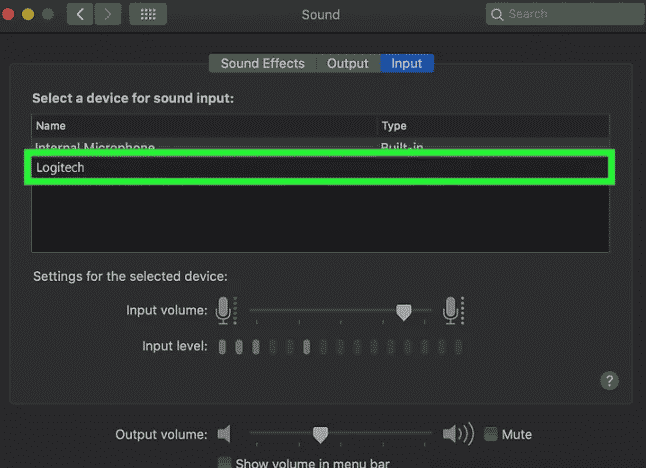
- Next, you’ll need to set up the webcam’s mic. Again, most Logitech webcams have an inbuilt mic, so you won’t need one. To ensure that your Mac is using the webcam’s mic, click on the Apple logo in the upper left corner of your screen, then click on ‘System Preferences,’ then click on ‘Sound,’ and choose your webcam from the list.
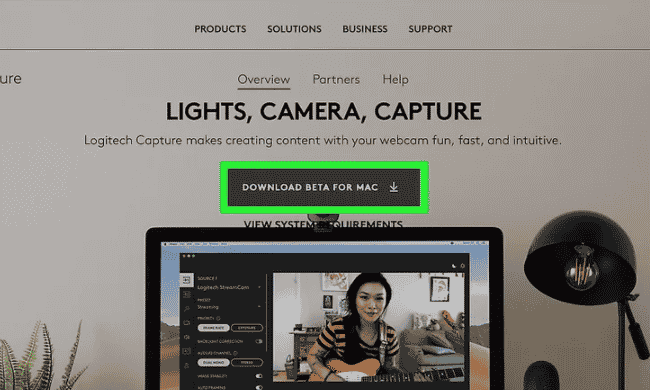
- The Logitech Capture Software offers enhanced functionality for Logitech webcams, including filters and transitions for video recording. However, compatibility specifics may vary by webcam model. Users with Mac OS 10.14 (Mojave) or later can benefit from additional features. The software is optional but will allow you to get the most out of your Logitech webcam. Some features include adding filters, applying transitions to video, placing text over a web stream, etc.
Troubleshooting Connection Problems
You might encounter problems when using a Logitech webcam on your PC. Fortunately, there are some things you can try to correct these issues.
Ensure That You’ve Selected Your Webcam in The Streaming App
If you’re using your Logitech webcam with a video chat app or trying to record a video on your computer and can’t see yourself on the screen, the streaming app might be trying to use the built-in webcam, and you need to change it.
Plug Your Webcam in Another Unoccupied USB Port
If your webcam’s built-in LED notification light doesn’t illuminate when you’re testing it using FaceTime or the Windows Camera app, the USB port might be faulty. First, disconnect the webcam and connect it to another USB port; this might fix the problem.
If these troubleshooting steps don’t help you set up your Logitech webcam, you can connect it to another computer and test it because the problem might be your PC.
Don’t worry. Connecting your Logitech webcam to another computer won’t interfere with the connection on your computer. Once you’re done testing, you can reconnect it.
Final Thought
Now that you’ve set up your Logitech webcam on either Mac OS or Windows OS, you can use it for video chats on apps such as Microsoft Teams, Skype, and Zoom. Of course, it has a better resolution than your PC’s webcam, so your videos will have superb quality.
See Also
How to Use External Webcam on Laptop Windows 10