When you purchase through links on our site, we may earn an affiliate commission. Here’s how it works.
How to Attach Webcam to Monitor – Overview
Various technological advancements are making the world smaller every day. Webcams have played an essential role in business and social life. They allow video transmissions in real time.
Most modern computer models have built-in webcams, but some don’t. This article will examine how to attach a webcam to a monitor.
How to Position The Webcam
Webcams are essential tools for video conferencing. To get the best experience, you need to place your webcam in an optimal position.
This will create a good angle for the camera, and the webcam will be able to transmit videos of good quality. Here are a few things you need to consider when positioning the webcam.
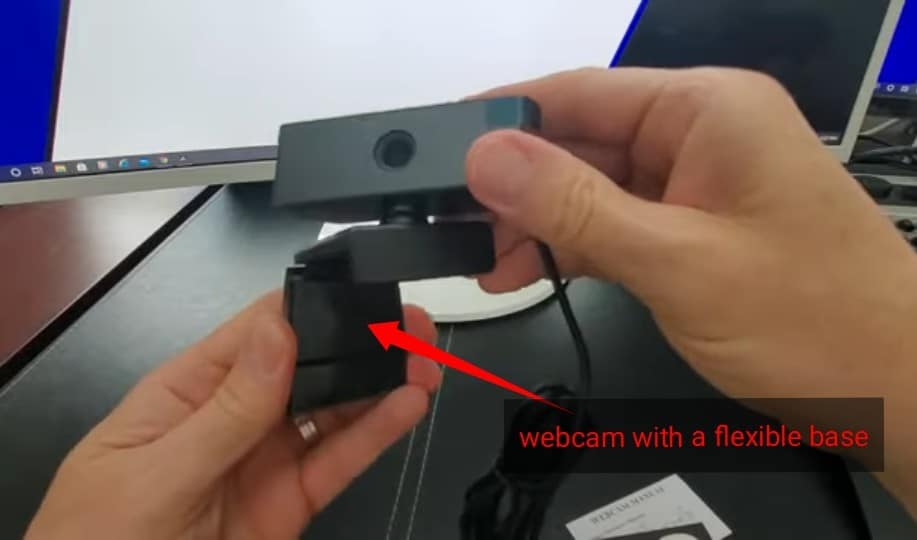
1. Webcams usually have a base that can be revealed simply by unfolding the camera. Some have a flexible base that can be used as a stand or a clip. The camera needs to be positioned on a flat surface as a stand or a clip and can be secured to the monitor.
Usually, webcams with bases that can be used as clips must be separated from the webcam before they can be used.
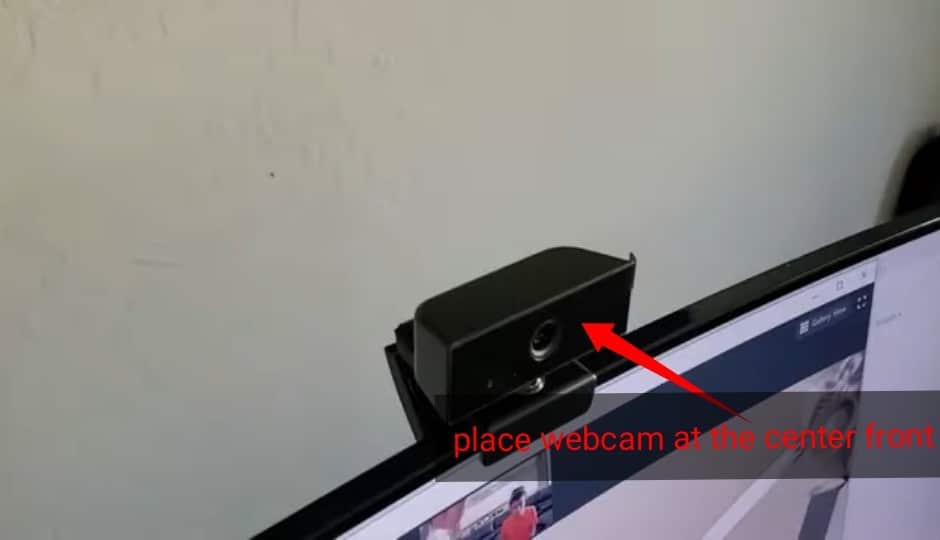
2. Determine the desired location for the webcam. For a monitor, the center top would be preferable.
However, this may not be possible if your monitor is placed at an angle. In such a case, you can position the webcam toward one of the monitor’s ends. Feel free to try different angles and then settle on the best one.
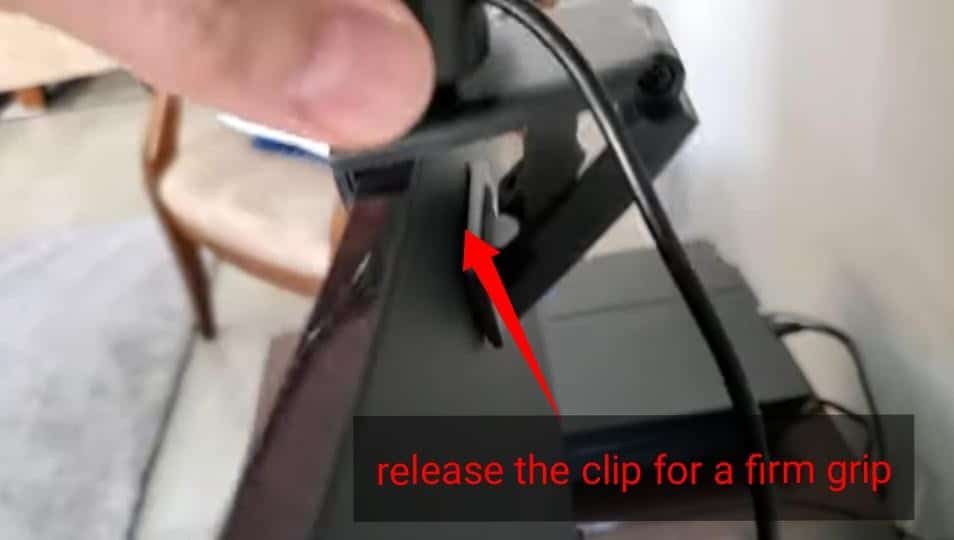
3. Place the front part of the clip onto the monitor, ensuring the webcam is facing the front.
4. Release the back of the clip for a firm grip to secure the webcam. The grip will vary based on the thickness of the monitor. When the monitor is thin, you must find a way to secure it and work around it.
If clipping the webcam onto the monitor or placing it on a flat base is impossible, get creative. Try using a tripod stand or even a stack of books.
5. Once the webcam is secure, make any necessary adjustments. Ensure it is straight and facing your preferred direction, and that the lens is at the right height.

How to Connect The Webcam to The Monitor
Now that you have successfully attached your webcam to your monitor, you need to connect it to the monitor for it to work.
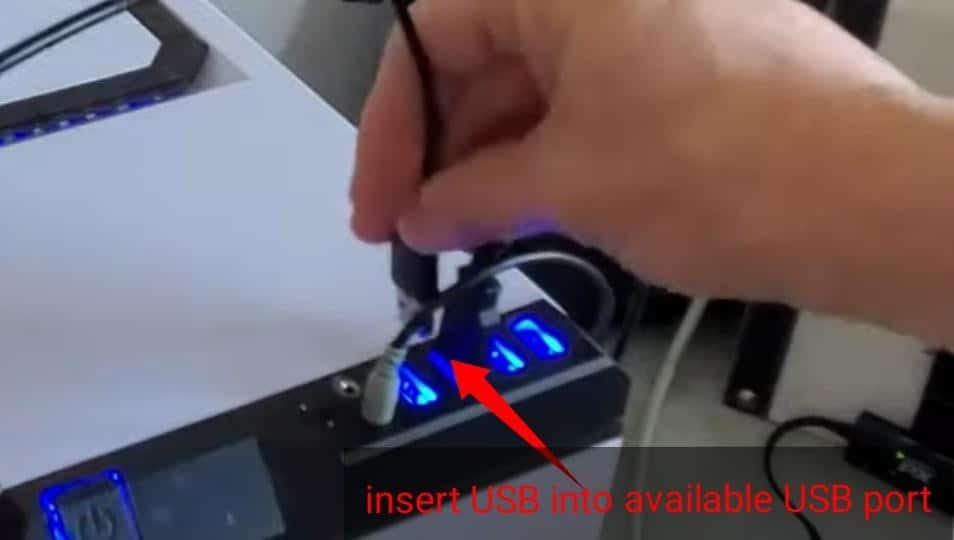
- Most webcams come with USB cables that can be inserted into a USB port. Plug the USB into an available port.
USB
- You can then install the webcam software on the computer. Some webcams recognize the software automatically, while others provide a CD with the software, which can be inserted into the computer’s CD Drive. Sometimes, there is no CD, and the software is not recognized automatically. In such cases, you can download the necessary drivers to the manufacturer’s website, making installation possible.
- A setup page should appear on the screen. Follow the steps provided. They are usually easy to follow.
- When you have completed all the steps, click on the install button. A popup icon should appear on the screen to notify you that the installation is complete.
- You can then select the settings based on your preference.
- When the installation is complete, the webcam is ready for testing.
How To Enable A Webcam
- On the homepage, click on the start icon.
- Then select settings
- Click the privacy option
- On the left side, look for the camera and select it.
- Turn on the ‘choose which apps can access your camera’, option.
- Several apps are available. Select the camera app. However, you can choose any or all of them.
- Close the settings.
- Go back to the homepage and select the camera from the menu. You should now be able to test whether your webcam is working correctly.
How To Test And Use A Webcam
- On the homepage, click the Windows start menu button.
- In the Windows search box, type camera.
- From the results provided, select the Camera app.
- The camera app should open up, allowing you to see a live video of yourself on the screen. You can adjust the camera for a better angle till your face is centered on the screen.
- Then, click the record button. While it’s recording, try speaking.
- Stop recording when you’re done.
- You can playback the video by clicking on the camera roll.
- You’re done once you have viewed the video and confirmed that the webcam is working. The webcam is ready to be used as a video conferencing app.
Final Thoughts
Webcams are essential tools in the digital age. They make communication easier and more effective. Once you have it set up, you can have video calls in real-time.
See Also