When you purchase through links on our site, we may earn an affiliate commission. Here’s how it works.
How to Check CPU Temp in 2026
Is your computer running hot? If you are experiencing random shutdowns, screen freezes or sluggish performance during heavy tasks, your CPU might be overheating.
Keeping an eye on your CPU temperature is especially important if you have overclocked your processor or if you regularly run demanding applications like video editors and modern games. Pushing your system past safe thermal limits without knowing it can lead to throttled performance or even hardware damage over time.
Unfortunately, Windows 11 still does not include a built-in desktop tool for checking CPU temperature. To get this information, you either need to access your BIOS/UEFI firmware or install a third-party monitoring app. In this guide, we will cover both methods step by step so you can pick the one that works best for you.
Method 1: Check CPU Temp from BIOS/UEFI
Every modern PC has a BIOS or UEFI firmware interface that displays hardware information, including CPU temperature. This method does not require installing any software, but it does require restarting your computer.
Readers who found this helpful also liked our guide on how to use external webcam on Windows 10.
Here is how to access BIOS/UEFI on Windows 11:
- Open the Start menu and click on Settings (or press Windows + I).
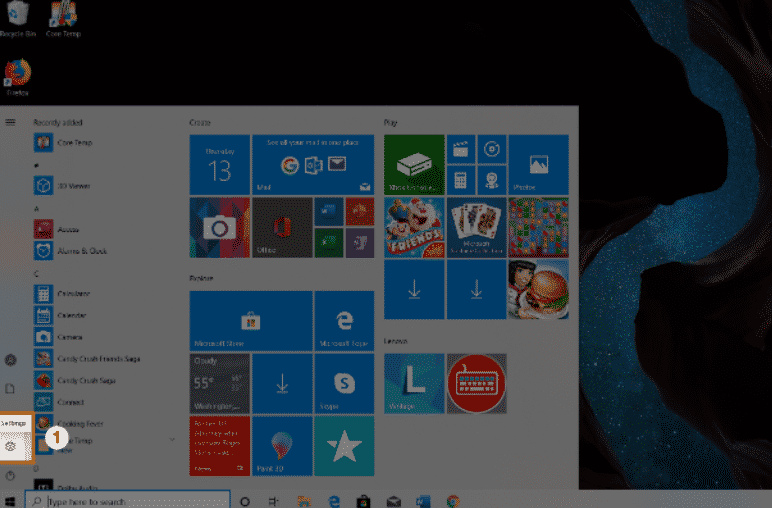
How to Check CPU Temp
- Navigate to System > Recovery.
- Under “Recovery options,” find “Advanced startup” and click “Restart now.”
- Your PC will restart into the recovery menu. Choose Troubleshoot.
- Select Advanced Options.
- Click on UEFI Firmware Settings, then click Restart.
- Your PC will boot directly into the BIOS/UEFI interface.
- Look for a section labeled “PC Health Status,” “Hardware Monitor” or “System Information.” The exact name varies by motherboard manufacturer (ASUS, MSI, Gigabyte, etc.). Your CPU temperature will be displayed there.
Alternatively, you can enter BIOS by pressing a key during boot. Restart your PC and press Delete, F2 or F12 (depends on your motherboard) as soon as the manufacturer logo appears.
The main downside of this method is that it only shows temperatures while you are in BIOS, not while you are actually using Windows. For real-time monitoring during gaming or other heavy tasks, third-party apps are a better fit.
Method 2: Check CPU Temp with Third-Party Apps
If you want to monitor your CPU temperature without restarting, third-party software is the way to go. Here are three popular and reliable tools for 2026.
Core Temp
Core Temp is a lightweight, free application that shows the temperature of each individual CPU core. It is one of the most popular monitoring tools around and gets regular updates for new processors.
1. Download Core Temp from its official website and install it.
2. Open the app. Your CPU core temperatures are displayed at the bottom of the main window.
3. You can also see temperature readings in your system tray by clicking “Show Hidden Icons” in the Windows 11 taskbar.
Core Temp also displays your CPU’s “Tj. Max” value, which is the maximum safe operating temperature for your specific processor. You always want to keep your temps well below that number.
HWiNFO64
HWiNFO64 is a more advanced monitoring tool that tracks temperatures across your entire system: CPU, GPU, motherboard, storage drives and more. It is free, frequently updated and supports all the latest Intel and AMD hardware.
Open HWiNFO64 in “Sensors Only” mode for a clean view of all temperature readings. You can customize which sensors are visible, set up logging to track temps over time, and configure alerts if any temperature crosses a threshold you define. This is the go-to tool for overclockers and power users who want detailed hardware data.
HWMonitor
HWMonitor from CPUID is another solid option. It shows a tree-style overview of all your hardware sensors, covering temperatures, voltages, fan speeds and power consumption. It requires no configuration and works right away after installation.
For more on building a great setup, take a look at our 4K gaming monitors guide.
What Is a Safe CPU Temperature?
The maximum safe temperature depends on your specific CPU model. Both Intel and AMD publish a maximum operating temperature (called “Tj. Max” for Intel and “T Case Max” or “T Junction Max” for AMD) in their spec sheets. Here is a general guideline for what different temperature ranges mean:
- Below 60 degrees C: Ideal. Your CPU is running cool with plenty of thermal headroom.
- 60 to 75 degrees C: Normal under load. Most CPUs will sit in this range during gaming or intensive work.
- 75 to 85 degrees C: Getting warm. If you are not overclocking, check your fans and airflow. Clean out any dust buildup.
- 85 to 95 degrees C: Too hot. Your CPU may start thermal throttling to protect itself. Investigate your cooling setup right away.
- Above 95 degrees C: Danger zone. Sustained temperatures this high can shorten the lifespan of your processor or cause permanent damage.
Modern CPUs from Intel (Core Ultra and 15th gen) and AMD (Ryzen 9000 series) are designed to handle short bursts at higher temperatures, but you should still aim to keep average temps below 85 degrees C during regular use.
Tips to Lower Your CPU Temperature
If your temperatures are running higher than expected, here are some practical steps to bring them down.
Clean Your PC
Dust buildup is the most common cause of high temperatures. Open your case and use compressed air to blow out dust from fans, heatsinks and intake filters. Doing this every three to six months keeps airflow at its best and prevents heat from getting trapped.
Improve Your Case Airflow
Make sure your case has enough intake and exhaust fans. A common effective setup is two or three intake fans at the front and one or two exhaust fans at the top and rear. Also check that cables are tidied away and not blocking the path of air between intake and exhaust.
Replace the Thermal Paste
Thermal paste between your CPU and cooler dries out over time, reducing its ability to transfer heat. If your cooler has been installed for more than two years, removing the old paste and applying a fresh layer can drop temperatures by 5 to 10 degrees C. A small tube of quality thermal paste costs only a few dollars.
Upgrade Your Cooler
If your stock cooler is not keeping up, consider moving to an aftermarket air cooler or an AIO liquid cooler. Even an affordable tower cooler like the Cooler Master Hyper 212 can deliver a significant improvement over a stock Intel or AMD cooler.
Adjust Your Fan Curves
Most motherboards let you customize fan speed curves in BIOS or through companion software. If your fans are not ramping up quickly enough under load, adjust the curve so they spin faster as temperatures rise. This is a free fix that can make a noticeable difference.
Final Thoughts
Monitoring your CPU temperature does not have to be complicated. Tools like Core Temp and HWiNFO64 make it simple to check temps in real time, and the BIOS method works when you just need a quick reading without installing anything.
Building a habit of regular temperature checks is smart, especially if you overclock or live in a warmer climate. Catching a cooling problem early can save you from costly hardware damage and keep your PC running at its best for years.
