When you purchase through links on our site, we may earn an affiliate commission. Here’s how it works.
How to Setup Google Nest Wi-Fi
Google has become a notable contender in the Wi-Fi router market with its Google WiFi and Google Nest WiFi systems. Introduced in 2016, Google WiFi, and later Google Nest WiFi, have gained popularity for their mesh capabilities, competing closely with other mesh systems like Eero.
Today, Google has expanded its smart home product line to include Google Nest WiFi, building upon the success of the Google WiFi mesh system to offer enhanced features and integration with the Google Nest ecosystem. These compact mesh Wi-Fi units can provide a robust signal to your home.
Mesh Wi-Fi kits are meant to be expandable, and you can have a couple of them depending on the size of your home. This setup can handle multiple devices, meaning you can use Wi-Fi in the kitchen, lounge, and elsewhere. First, let’s look at the setup process of Google Nest Wi-Fi.
The Steps of Setting Up Google Nest Wi-Fi Include:
1. To ensure optimal coverage, Begin by positioning your Nest WiFi router in a central location and any additional Nest WiFi points throughout your home. The primary Nest WiFi unit connects to your modem and acts as the main router, with additional points expanding the mesh network.
2. Connect your Nest WiFi router to your internet modem using the Ethernet cable. This connection will serve as the gateway for your Nest WiFi mesh network.
3. Launch the Google Home App on your device. You can get it on the Apple App Store for iPhone users and Google Play for Android users if you don’t have the app.
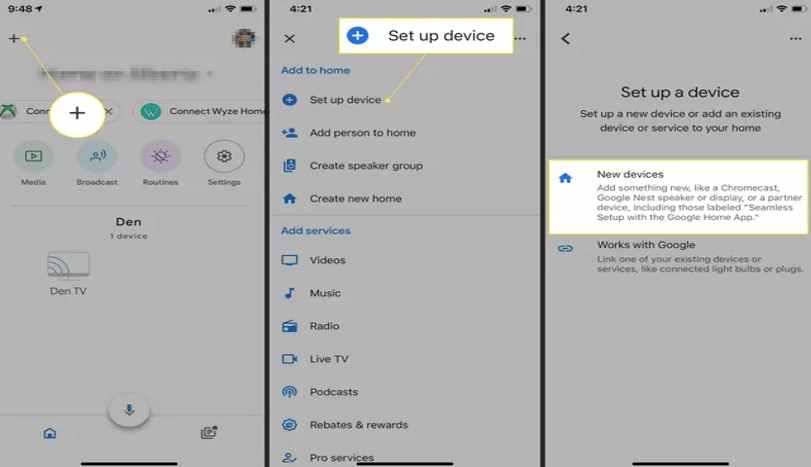
4. In the Google Home app, tap the ‘+’ sign in the top left corner of the home screen to begin adding a new device.
5. Tap “Set Up Device” in your home.
6. Select “Set up device” and then choose “New devices in your home” to proceed with the Nest WiFi setup.
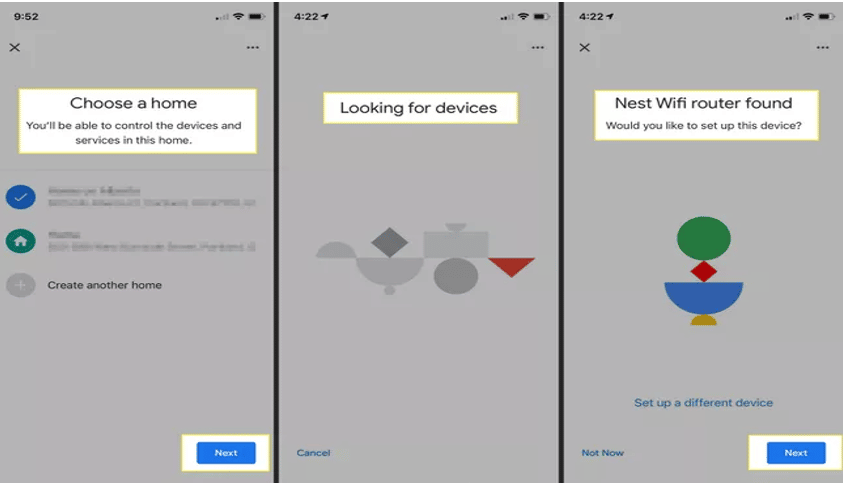
7. The app will prompt you to select an existing home or create a new one for your device setup, ensuring your Nest WiFi is organized within your preferred Google Home structure.
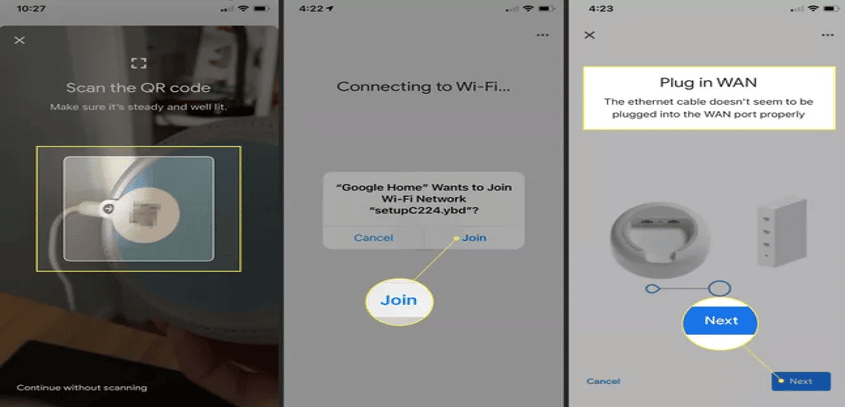
8. The Google Home app will use your smartphone’s camera to scan the QR code on the bottom of your Nest WiFi router, facilitating a secure connection.
9. Once you’ve scanned the QR code, a prompt should appear asking if you want to connect to the Nest Wi-Fi network; tap “Join.”
10. Then, the App will confirm your router is connected and check if your internet is active.
NOTE:
The Google Home App provides very specific error messages when the setup cannot be successfully completed. For instance, if your LAN cable isn’t properly plugged in, the app will prompt you to check its connection. If you follow all the steps correctly but your modem does not allow Google Nest WiFi to connect to the internet, contact your ISP and request them to “Reprovision Your IP Address.” This may be necessary to ensure your Nest WiFi can connect to the internet properly.
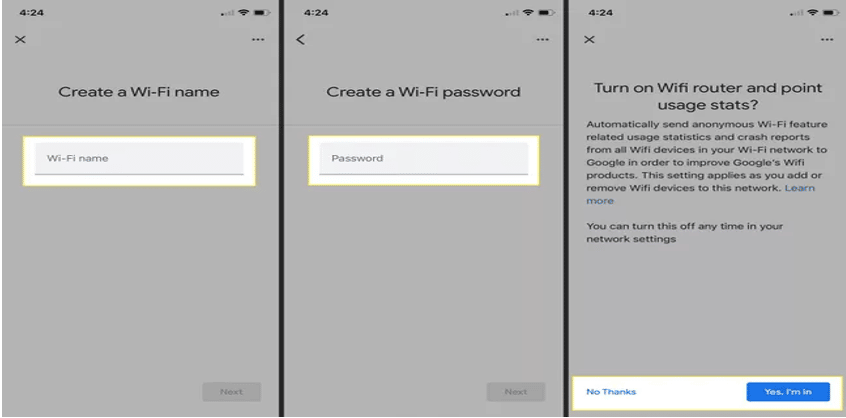
11. You’ll need to create a Wi-Fi name and add it, then tap “Next.”
12. You’ll also need to create a passcode to secure your Wi-Fi link, then tap “Next.”
13. You’ll be asked if you want to share your anonymous usage data. Tap “Yes” to opt-in or “No” to opt-out.
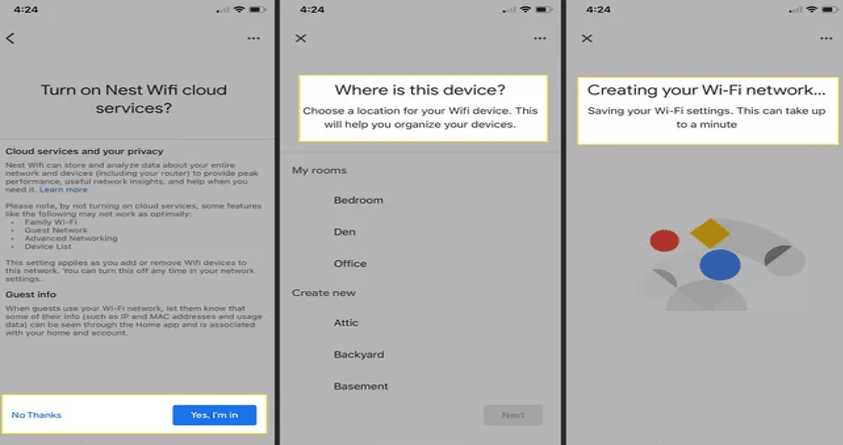
14. You’ll also be asked if you want to use Nest Cloud Services. Using some services such as Family Wi-Fi or Guest Network is vital. Tap “Yes” to opt-in or “No” to opt-out.
15. The Home App will ask where your router is situated. Pick a location and tap “Next.”
16. The Home App will check for firmware updates, and if there are no new updates, it will create your Wi-Fi network.
17. Once again, you’ll be asked to join a Wi-Fi network. This time, use the credentials you had set up earlier and tap “OK.” The setup is now complete.
How Do You Set Up a Nest Wi-Fi Hub?
Setting up an access point is the same as setting up the Nest router, but the process is complete as soon as you scan the QR code and pick the access point’s location. You won’t need to enter your Wi-Fi username and password because the link is already active.
Note: Google Nest WiFi Points feature built-in speakers with Google Assistant support, allowing you to use voice commands such as ‘Hey Google’ and ‘OK Google’ directly from the WiFi points. Also, this system is available in various configurations such as ‘1+1‘ and ‘1 + 2.’
Final Thought
The setup process for Google Nest WiFi is designed to be user-friendly and integrates seamlessly with the broader Google ecosystem, offering an accessible entry point into mesh WiFi systems for users of varying technical backgrounds.
See Also