When you purchase through links on our site, we may earn an affiliate commission. Here’s how it works.
“What camera settings do you recommend for landscape photography?” this is the most common question asked by clients to professional photographers.
During the workshops, most of the newbies ask the same question. Well, there’s no specific answer to this question, as one has to change the camera settings depending on the time and the location while taking the shots.
However, some of the basic settings for landscape photography are common which we have listed below.
Landscape Photography is quite fascinating as it gives you realistic shots in a full frame. Before you start taking landscape shots, make sure to check the following settings first.
Recommended Camera Settings for Landscape Photography
1. File Type
This is the most common function every photographer has to check before starting their photo-shooting work. Digital Cameras take pictures in two different file formats i.e. RAW files and JPEG files. Most professional photographers would recommend you take pictures in RAW files instead of the default JPEG format.

file type
JPEG formatted images are internally compressed and they are not good at editing. On the other hand, RAW images let you edit them the way you want on any type of photo-editing software.
The only drawback here is RAW files occupy double the space that JPEG files require. You have to deal with the storage space of your camera’s memory card. Since Landscape Shots need editing, it is recommended to take pictures in RAW format only, especially while taking landscape shots.
2. Focus type
A digital camera lets you choose between autofocus and manual focus settings while taking pictures. If you are good at focusing on an object manually, then you should go with the manual focus. You can also select the manual focus option if you have a tripod or any external support. Manual focus allows you to focus more precisely on the desired object.

Basic Settings for Landscape Photography – focus type
Autofocus is a highly used option when it comes to taking quick shots using your camera. However, we do not recommend using the autofocus option during landscape photography. Instead, you can go with the multi-point focus option that lets you cover up the entire area that you want to capture.
Apart from this, there is an additional setting available to let you take the sharpest images in JPEG format. The AI Servo setting should be enabled while taking shots of moving objects. This option is enabled by default so that you don’t have to change it manually.
3. More of the Basic Settings
Just like every other camera, basic settings such as white balance, contrast, brightness, etc. should be checked and set properly before shooting any type of photographs. Since landscape photography is different from others, you must check all of these settings well.
more of the basic settings
White balance adjusts the scene of the frame as per the current environmental condition. You don’t need to manually change this setting if you have enabled the auto option.
Since you take landscape photos in RAW files, you can easily adjust the white balances while editing them on the photo-editing software. White balance improves the sharpness of your images and makes them look more realistic.
Apart from this, DSLRs come with a built-in noise reduction feature to remove unwanted noise from the frame. However, this setting consumes extra resources for the camera. As soon as you are taking pictures in RAW files, you should not worry about this noise reduction feature.
Just turn it off and take pictures normally. The photo-editing software will remove all the unnecessary noise from the images when you export them from the software.
Additionally, you can also adjust the picture tone, contrast, and brightness of the shots that you take from the camera. You can see the final result on the camera screen and can make changes accordingly.
4. Playback Settings
The playback option allows you to view the shot taken by you on the camera’s screen. Many of the newbies don’t seem aware of the playback menu settings present in the camera. It can be optimized as per your needs and while taking landscape images, it must be optimized. It is very crucial for landscape photography.
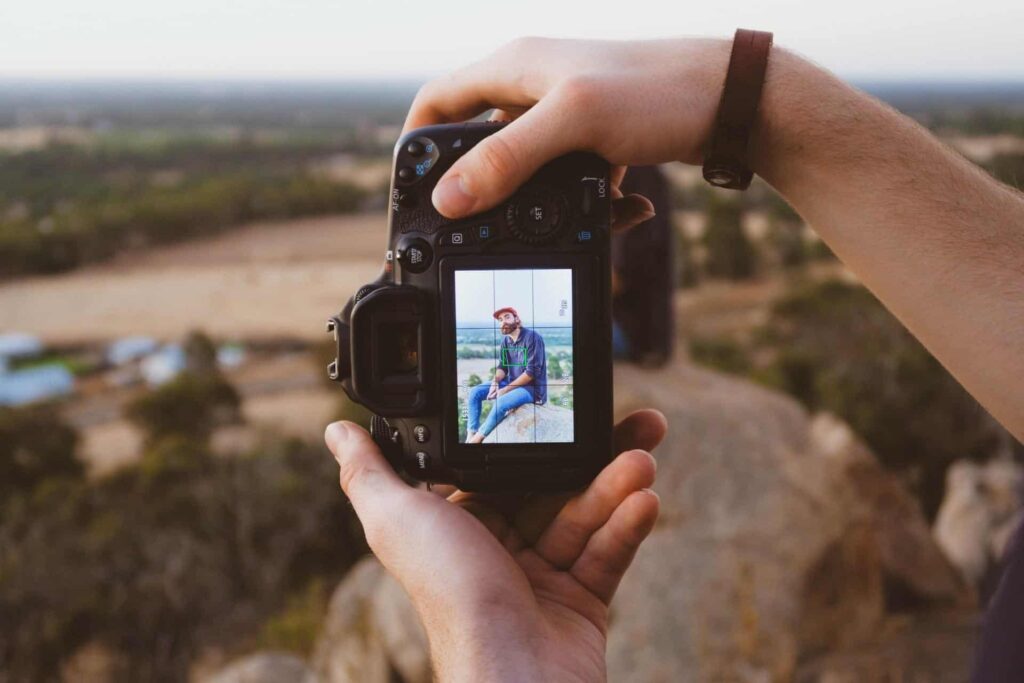
Basic Settings for Landscape Photography – Playback Settings
The histogram is an essential function present in the playback menu settings of the camera. When you are not sure about the exposure of the images that you take, by enabling this function, you could easily figure out the overexposed area.
There is one more function of rotating the picture. Whenever you take a vertical shot, you will have to rotate the camera to view the shot. By enabling this rotation function, every time you take a vertical image, the camera will display the image accordingly. You need not rotate the camera again and again to view the vertical shot.
If your camera has a touch-screen feature, you can simply turn on the one-click zoom feature to zoom-in the images quickly.
You don’t need to press the zoom-in button to view the image more clearly. Just one click on the area and the image will be zoomed in automatically.
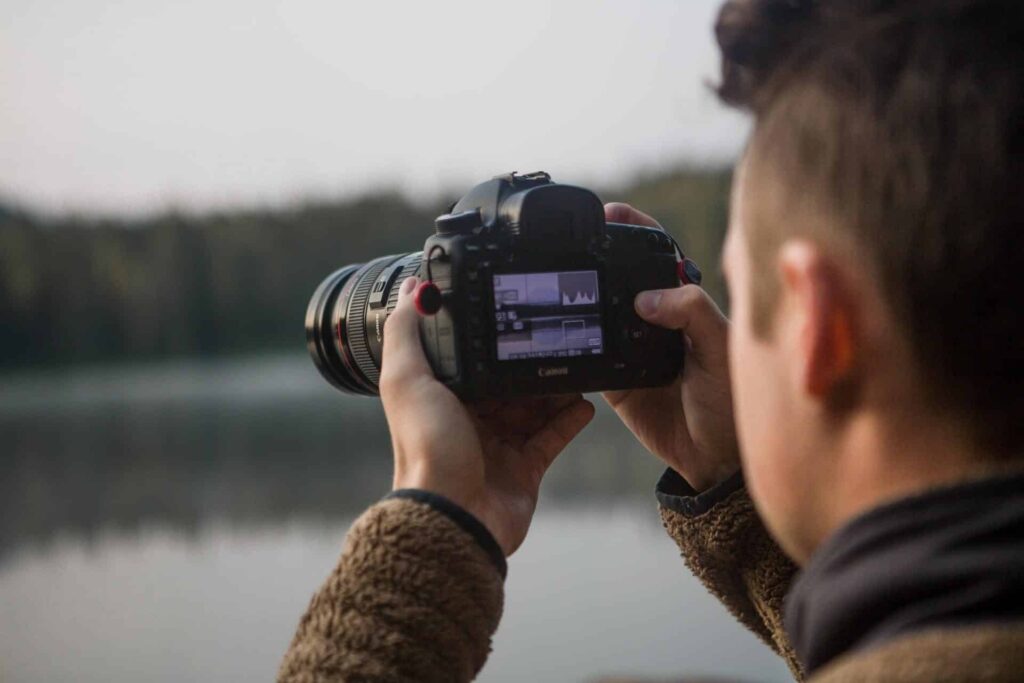
5. Exposure Settings of the Camera
Exposure Settings are the most crucial setting in the camera to take the perfect shots. It sharpens up the final image even before you edit them. If you have set the right exposure settings in your camera, there will be no editing job required.

Exposure settings of the camera
The first thing you need to adjust is the aperture rate. It gives the required depth-of-field to your final images.
The aperture setting may vary as per the current environmental condition and you need to adjust it accordingly. For taking low light photos, keep the aperture setting low, and for taking in-depth photos, keep the aperture setting high.
After selecting the aperture rate, the next thing you need to adjust is the shutter speed. The shutter speed of the camera offers the required light to take the perfect shot. Keep the shutter speed as low as you can to take sharp images during the daytime.
There comes a time when you have to manually adjust everything on your own. ISO range is the final set that you need to adjust to taking professional landscape shots.
In general, the ISO range adjusts the brightness of the images. You can check the ISO range or can adjust it in real time on the viewfinder before clicking the final shot.
6. Camera Mode
Every DSLR camera has a dedicated Camera Mode button in it. This dial button allows users to select a suitable camera mode. You need to check which mode works automatically and which requires manual settings. Make sure you choose the mode that takes a wide range of photos or full-frame photos precisely.
To figure out the perfect mode for landscape photography, you need to practice a lot with the camera.
Basic Settings for Landscape Photography – Camera Mode
What we recommend to you here is to select the Camera Mode that works with manual settings. Most professional photographers do recommend using manual mode while taking landscape photos as it gives full control to users to adjust the settings accordingly.
Conclusion:
It takes a lot of passion and dedication to become a professional photographer. You have to play a lot with the camera’s settings by taking pictures in different conditions of different objects in different modes.
Landscape Photography requires professionalism and you must understand the basic settings listed above before you start shooting your first landscape photograph. Your landscape photography skills will be improved gradually as you practice, and you will be able to make changes to the additional settings on your own.
The most important thing here is to understand the changes you have just made.
If you don’t understand the basic changes and their impacts on the final results, then you won’t be able to improve your photography skills. You can watch video tutorials or guides on the web to learn more about landscape photography!
See Also