How to Shoot Landscape Photography with Nikon D5300
If you’re looking to dial in your Nikon D5300 landscape settings, you’re working with a very capable camera. The D5300 packs a 24.1MP DX CMOS sensor that skips the optical low-pass filter, giving you extra sharpness in fine details like foliage, water ripples, and distant textures. Paired with the EXPEED 4 processor, it delivers clean, detailed images that can compete with cameras well above its price class.
For landscape shooting, a wide-angle lens opens up your field of view and lets you capture sweeping scenes. The Sigma 10-20mm f/3.5 is a popular choice among D5300 owners for its sharpness and value. If budget is a concern, the Nikkor AF-S DX 18-55mm kit lens still gets solid results at its wider end.
One advantage the D5300 has over simpler Nikon bodies is its articulating LCD screen. This lets you shoot from low angles (great for foreground-heavy compositions) without lying on the ground.
Nikon D5300 Landscape Settings: Step by Step
Step 1. Starting with Programmed Auto Mode
If you’re still getting comfortable with manual controls, Programmed Auto (P) mode is a safe starting point. Turn the mode dial to P, and the D5300 will automatically select both shutter speed and aperture for proper exposure. You can still shift these values using the command dial to experiment with different combinations that give the same overall exposure. Programmed Auto works well when you want consistent results without worrying about getting the technical details wrong.
Step 2. Switching to Aperture Priority
For more control over your landscape shots, move the mode dial to A (Aperture Priority). Set your aperture to f/8 for most situations, or go to f/11 or f/16 when you need everything from the closest foreground rock to the farthest mountain to be sharp. Aperture Priority lets you focus on depth of field while the camera picks the matching shutter speed. Keep an eye on the shutter speed readout in the viewfinder to make sure it doesn’t drop too low for handheld shooting. If it does, bump up your ISO or mount the camera on a tripod.
Step 3. Manually Focusing for Precision
When you need exact control over where focus lands, switch the camera to manual mode (M) and flip the lens focus switch to MF. Look through the viewfinder and use the multi-selector to navigate until the focus confirmation indicator lights up. This manual adjustment ensures the focus is exactly where you want it, which matters a lot for landscape photography where every detail counts.
For even more precision, use Live View and zoom in on the LCD screen. The D5300’s articulating screen makes this easier than on most entry-level Nikons, since you can tilt it up and see clearly while the camera sits on a low tripod.
Step 4. Adjusting Shutter Speed for Motion
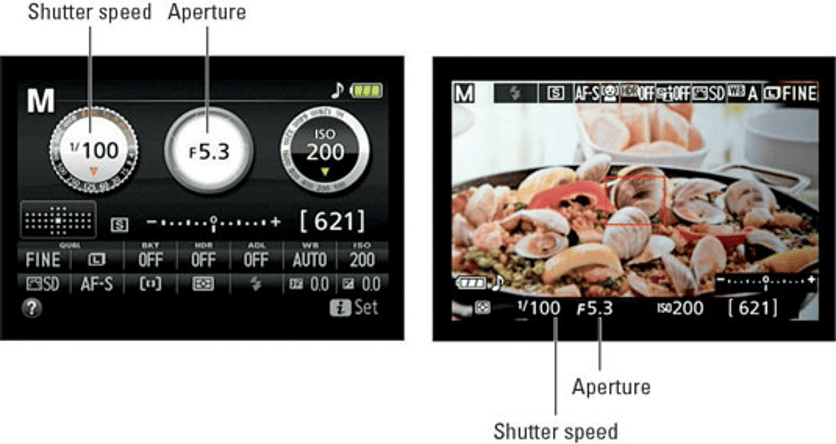
If your landscape includes moving elements like flowing water, passing clouds, or wind-blown grass, switch to Shutter Priority (S) mode. This lets you pick a specific shutter speed while the camera adjusts the aperture automatically. Turn the command dial to the right for faster speeds that freeze motion, or to the left for slower speeds that show movement as a blur. For silky-smooth water effects, try shutter speeds around 1/4 second or longer, but make sure you’re on a tripod to avoid any camera shake.
When shooting handheld, keep your shutter speed at 1/focal-length or faster (so at least 1/55 second with a 55mm lens) to avoid introducing blur from hand movement.
By working through these Nikon D5300 landscape settings, you’ll get a feel for how each mode shapes your final image. The D5300 is a flexible camera that rewards experimentation, so try different combinations and see what works best for the scenes you love to shoot.