Why the Canon M50 Is a Strong Landscape Camera
The Canon EOS M50 packs a lot of capability into a small mirrorless body. Its 24.1-megapixel APS-C sensor with a DIGIC 8 processor produces detailed, clean images at low ISO settings. Dual Pixel CMOS AF gives you fast, accurate autofocus across most of the frame. The electronic viewfinder works well in bright sunlight, and the fully articulating touchscreen lets you shoot from low angles without lying flat on the ground.
For landscape photography, the M50 offers everything you need: manual exposure control, RAW capture, a sharp sensor, and a lightweight body you can carry all day on a trail. Here’s how to get the best results.
Exposure Settings for Landscapes
Aperture Priority (Av) Mode
Set the mode dial to Av. You choose the aperture, and the camera handles shutter speed. For landscape work, set aperture between f/8 and f/11. This range delivers the sharpest results from EF-M lenses and keeps the entire scene in focus from foreground rocks to distant mountains.
Avoid going past f/16. Diffraction starts degrading sharpness at very narrow apertures, and the M50’s 24-megapixel sensor is resolving enough to show that softening clearly.
ISO: Keep It Low
Lock ISO at 100. The M50’s sensor is at its cleanest at base ISO, producing images with minimal noise and maximum dynamic range. If you’re handholding in dim conditions, ISO 200 or 400 is still perfectly usable. But with a tripod, there’s no reason to go above 100.
Metering and Exposure Compensation
Use Evaluative metering for most landscape scenes. It reads the full frame and does a solid job balancing exposure. For high-contrast situations like sunrise or sunset, dial in -0.3 to -1.0 stops of exposure compensation to protect bright areas. Blown highlights can’t be recovered, but underexposed shadows usually can.
White Balance
Set white balance to Daylight for standard outdoor scenes or Cloudy to add warmth during overcast conditions. Cloudy mode brings out the golden and amber tones in sunrise and sunset light. If you shoot RAW, white balance is fully adjustable in post-processing, so this becomes a creative choice rather than a technical one.
Picture Style
The Landscape picture style boosts saturation in greens and blues while adding a touch of sharpening. It’s a nice look straight out of camera for JPEG shooters. RAW shooters can ignore it since the picture style doesn’t bake into the raw data file.
Focusing Techniques
Touch AF in Live View
The M50’s touchscreen is one of its biggest advantages for landscape work. With the camera on a tripod, simply tap the area of the screen where you want to focus. The Dual Pixel AF locks on quickly and accurately. For maximum precision, pinch-to-zoom on the touchscreen to magnify 5x or 10x, check that your focus point is razor sharp, then fire the shot.
Manual Focus with Peaking
Switch to manual focus and enable Focus Peaking in the menu. This displays colored highlights on the edges that are in sharpest focus. It’s a great visual tool for confirming that your focus point is exactly where you want it, especially when shooting wide-angle scenes where depth of field is critical.
Tripod Setup and Stability
A lightweight travel tripod is the M50’s ideal companion. The camera body weighs about 390 grams, so you don’t need a heavy-duty tripod. A compact carbon fiber or aluminum model rated for 5 to 10 pounds handles the job with room to spare.
Use the 2-second self-timer or the Canon Camera Connect app on your phone as a wireless remote. This eliminates any vibration from pressing the shutter button. For long exposures, the electronic shutter option reduces internal vibration even further.
Using 4K for Landscape Video
The M50 shoots 4K at 24fps with a 1.6x crop. That crop factor narrows your field of view, so a wide-angle lens like the EF-M 11-22mm effectively becomes an 18-35mm in 4K mode. For landscape video, 4K captures incredible detail in rolling clouds, flowing water, and shifting light. Pair it with a tripod and a slow pan for cinematic results.
Full HD 1080p at 60fps uses the full sensor width, which gives you a wider view. If you want the broadest composition, shoot 1080p. If you want the most detail and plan to crop or stabilize in editing, go 4K.
Lens Options for Landscapes
The EF-M 15-45mm f/3.5-6.3 IS STM kit lens covers a useful range. At 15mm (24mm equivalent), it goes wide enough for most scenes. For truly expansive vistas, the EF-M 11-22mm f/4-5.6 IS STM is the go-to landscape lens for the M50 system. It’s sharp, lightweight, and has built-in stabilization.
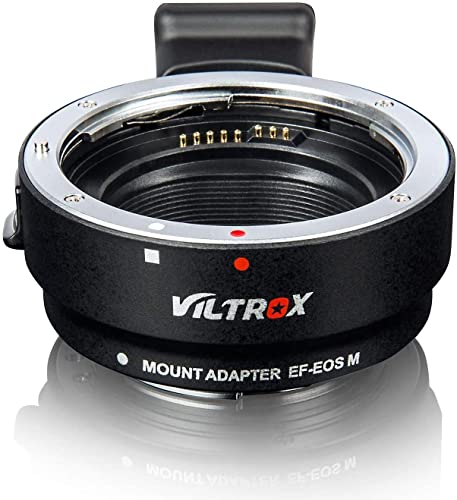
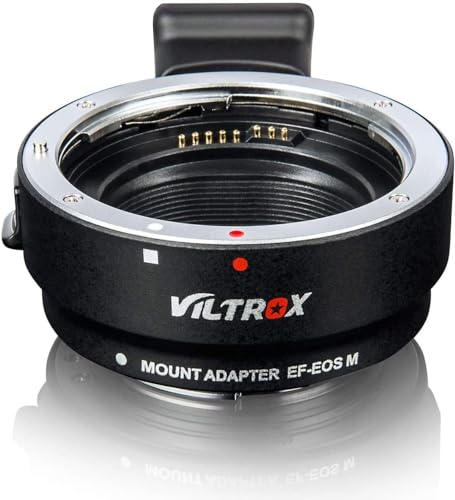
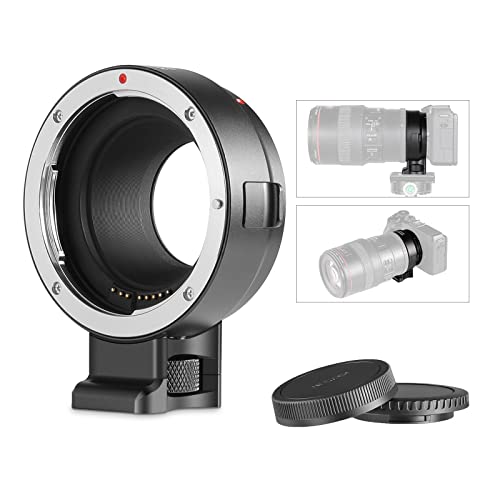
You can also use the EF-EOS M adapter to mount any Canon EF or EF-S lens. The EF-S 10-18mm f/4.5-5.6 IS STM is an affordable ultra-wide option that performs well on the M50 with the adapter.
Exposure Bracketing for HDR
The M50 supports Auto Exposure Bracketing with three frames at up to +/- 2 stops. Enable AEB in the shooting menu. The camera fires three shots in quick succession: one at your metered exposure, one darker, and one brighter. Merge the three frames in Lightroom, Photomatix, or any HDR-capable editor to produce a single image with full detail in both highlights and shadows.
Bracketing is especially useful for scenes with a bright sky and dark foreground, which is one of the most common challenges in landscape photography.
Panorama Technique
The M50 doesn’t have a built-in panorama mode, but creating panoramas manually is straightforward. Mount the camera on a tripod, level it carefully, and shoot a series of overlapping frames from left to right (or right to left). Overlap each frame by about 30 to 40 percent. Keep exposure consistent by switching to Manual mode and locking your settings across all frames. Stitch the images together in Lightroom, Photoshop, or a free tool like Microsoft ICE.
Composition and Timing
Golden Hour
Shoot during the first hour after sunrise or the last hour before sunset. The low sun angle creates warm, directional light that brings out texture in terrain and adds dramatic shadows. The M50’s EVF makes it easy to see exactly how the warm light affects your image in real time, which is an advantage over optical viewfinders that don’t preview white balance.
Foreground and Depth
Wide-angle landscape shots benefit from a strong foreground element. Position textured rocks, flowers, fallen branches, or shoreline details in the bottom third of the frame. This creates layers of depth that pull the viewer into the image.
Rule of Thirds
Enable the grid overlay in the M50’s display settings. Place horizons along the top or bottom grid line. Put standout features like lone trees, mountain peaks, or lighthouses at the intersection points. Avoid centering the horizon unless you’re shooting a perfect reflection.