The Blink XT2 is a wireless security camera powered by two AA lithium batteries that talks to your home network through a Blink Sync Module. Mounting it is dead simple: you screw a small plastic mount to whatever surface you want, then clip the camera into a ball-joint connector. Twist it to get your angle right, and you’re done. No wires, no electrician, and the whole thing takes maybe 10 minutes.
What makes the XT2’s design really nice is the quick-detach feature. The camera unclips from the mount without any tools. So you can reposition it, bring it inside for the night, or swap between different mounting spots whenever you want. The wall bracket stays put while the camera stays portable.
What’s in the Box: Mounting Hardware
Everything you need for a basic wall mount comes right in the box. Here’s a quick breakdown of each piece.
Included mounting kit: You get a plastic mount body with a ball-joint socket, a wall-mounting plate with two screw holes, the screws themselves, wall anchors for drywall, and an optional spacer/riser that adds a few extra degrees of tilt.
How the mount works: The mounting plate screws flat against your wall. The ball-joint mount clicks onto this plate. Then you slide the camera into the ball-joint mount until it snaps into place; you’ll hear and feel a solid click. The ball joint gives you roughly 90 degrees of tilt, so you don’t need to nail the angle on the first try.
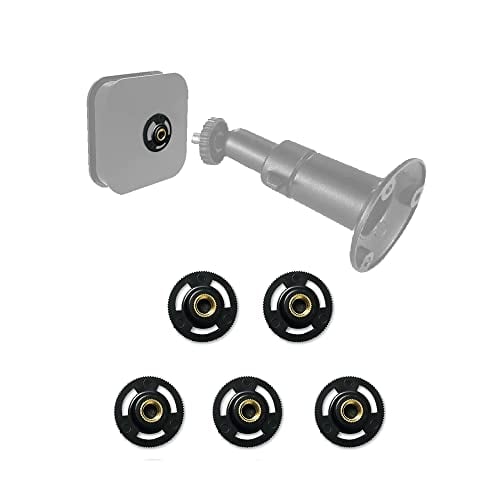
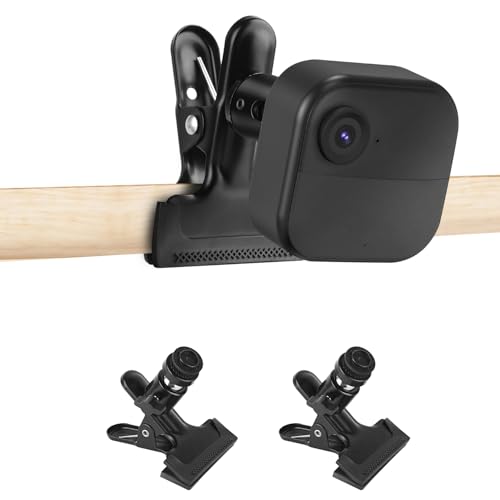
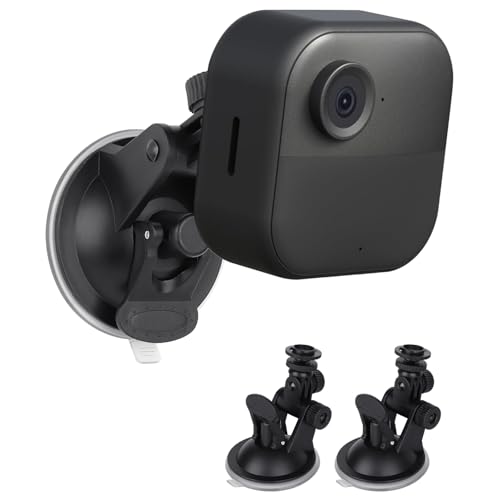
Third-party options: Since the Blink XT2 is a popular camera, there’s no shortage of aftermarket mounts: metal ones for extra durability, corner mounts for 90-degree wall junctions, gutter clips that don’t need screws, and magnetic bases for sticking on fridges or filing cabinets. They all use the same standard clip interface as the included mount.
Step 1: Set Up in the Blink App First
Like every smart camera, the XT2 needs to be connected to your account and Wi-Fi before you mount it anywhere permanent. Trust me on this one: setting it up while you’re standing near your router is way easier than trying to troubleshoot connectivity issues after you’ve already drilled holes 9 feet up a wall.
- Download the Blink app (iOS or Android) and either create an account or sign into your existing one.
- Add the XT2 to your Sync Module: The app will walk you through scanning the QR code on the camera’s back and pairing it with your Sync Module. That module is the hub all your Blink cameras talk through, so it needs to be powered on and connected to Wi-Fi first.
- Make sure everything works: Once added, open Live View in the app. You should see a clear feed. Walk in front of the camera to trigger a motion event and confirm that you get a notification and a recorded clip shows up in your timeline.
Step 2: Test Your Intended Position
Before you drill a single hole, hold or temporarily place the camera at your planned mounting spot. You’re checking two things: Wi-Fi signal strength and field of view.
Wi-Fi signal test: The XT2 talks to the Sync Module (not directly to your router), and the Sync Module connects to the router. Your camera should be within about 100 feet of the Sync Module with minimal walls or obstructions in between. Open Live View while holding the camera at the spot you picked. If the feed connects fast and streams smoothly, you’re good. If it buffers or drops, either move the Sync Module closer or pick a different camera location.
Field of view test: The XT2 has a 110-degree field of view. Hold it at the height where you plan to mount it and check Live View to see exactly what the camera captures. Make sure your priority area (driveway, walkway, door) is centered in the frame. Watch out for obstructions like eaves, decorations, or tree branches that might block the view.
Step 3: Mount the Base Plate
Once you’ve confirmed the position works, it’s time to install the mount permanently.
- Mark screw holes: Hold the mounting plate against the wall at your chosen spot with the “UP” arrow pointing toward the ceiling. Mark the two screw hole positions with a pencil.
- Drill and install: For wood or vinyl siding, drill pilot holes and drive the included screws directly. For drywall, drill the holes and tap in the included wall anchors first, then drive screws into those. For brick or concrete, you’ll need a masonry bit and the right anchors (you may need to buy those separately).
- Attach the ball-joint mount to the plate: If yours is a two-piece design (plate + ball joint body), click them together. Some XT2 mount versions come as a single piece.
- Snap the camera on: Slide the camera into the ball-joint clip until you hear and feel the click. Adjust the ball joint to aim the camera where you need it. Some mounts include a small thumbscrew on the ball joint to lock the angle once you’ve got it right.
Step 4: Optimize Settings After Mounting
With the camera installed and connected, it’s time to dial in the software settings for your specific spot.
Motion sensitivity: Start at the default (5 out of 10) and give it 2-3 days. Getting too many false alerts from passing cars, animals, or blowing leaves? Lower it. Missing events you care about? Bump it up.
Motion zones: The app lets you define rectangular zones within the camera’s field of view where motion detection is active. Use this to block out areas that trigger false alerts, like a busy street visible at the edge of the frame or a tree that sways in the wind.
Clip length: Motion-triggered recordings can run anywhere from 5 to 30 seconds (adjustable in the app). Shorter clips save battery; longer clips give you more context. Start at 15-20 seconds as a good middle ground.
Retrigger time: This is the delay between when one clip ends and when the camera can start another. A short retrigger (0-10 seconds) catches more events but drains the battery faster. A longer one (30-60 seconds) saves battery but might miss back-to-back events.
Battery Life and Maintenance
The Blink XT2 runs on two AA lithium batteries (included in the box). Blink says battery life is around two years under normal use, which works out to roughly 40,000 seconds of recorded video. Your actual mileage depends on how many motion events trigger each day, your clip length settings, how much you use Live View, and temperature.
Things that drain batteries fast: Frequent motion triggers (like a busy mounting location), long clip lengths, heavy Live View use (each session pulls significant power), and cold weather (lithium batteries lose capacity below freezing). If your battery life seems short, cutting clip length to 10 seconds and bumping up the retrigger time makes the biggest difference.
Swapping batteries: Unclip the camera from the ball-joint mount (no tools, just pull firmly). Open the battery compartment on the back. Pop in fresh AA lithium batteries (Energizer Ultimate Lithium or similar). Don’t use alkaline or rechargeable batteries since they don’t deliver consistent voltage. Snap the camera back onto the mount and you’re set.
How to Remove or Reposition
Taking the XT2 off its mount is just as easy as putting it on. The camera clips off the ball-joint with firm upward/outward pressure. No tools needed. The mounting plate stays screwed to the wall.
This makes the XT2 great for seasonal repositioning. You could have it watching your backyard pool in summer, then move it to the front door for package monitoring during the holidays. Install multiple mounting plates around your home, and you can snap the camera into whichever one makes sense at the time.
If you’re taking a mount down for good, just unscrew the mounting plate. The screw holes left behind are small enough to fill with a bit of drywall spackle for indoor spots.
Troubleshooting
Camera won’t connect to Sync Module: Check that the Sync Module is online (solid green and blue lights). Move the camera closer to the Sync Module to rule out range issues. Try restarting the Sync Module by unplugging it for 10 seconds.
False motion alerts: Lower the motion sensitivity slider in the app, shrink the motion zone to exclude problem areas, or add more retrigger time. The PIR sensor detects heat movement, so warm vehicles, animals, and even hot air from HVAC vents can set it off.
Blurry night video: The infrared LEDs on the front illuminate the scene in total darkness. If video looks hazy or washed out, check that nothing is sitting close to the lens and reflecting IR light back at it (a wall, railing, or window frame within a few inches). Wipe the lens with a soft microfiber cloth.
Mount wobbles after installation: Tighten the ball-joint thumbscrew more firmly. If the wall anchors are loose, pull them out, fill the holes with wood filler or a larger anchor, and reinstall.
This guide covers the Blink XT2. The mounting process is identical for the Blink Outdoor (the XT2’s successor), Blink Indoor, and Blink Mini (which uses a different desk-style mount). All Blink cameras share the same ball-joint mounting system and clip interface, so mounts work across the entire product line.