When you purchase through links on our site, we may earn an affiliate commission. Here’s how it works.
How to Install a Sensi Thermostat – Overview
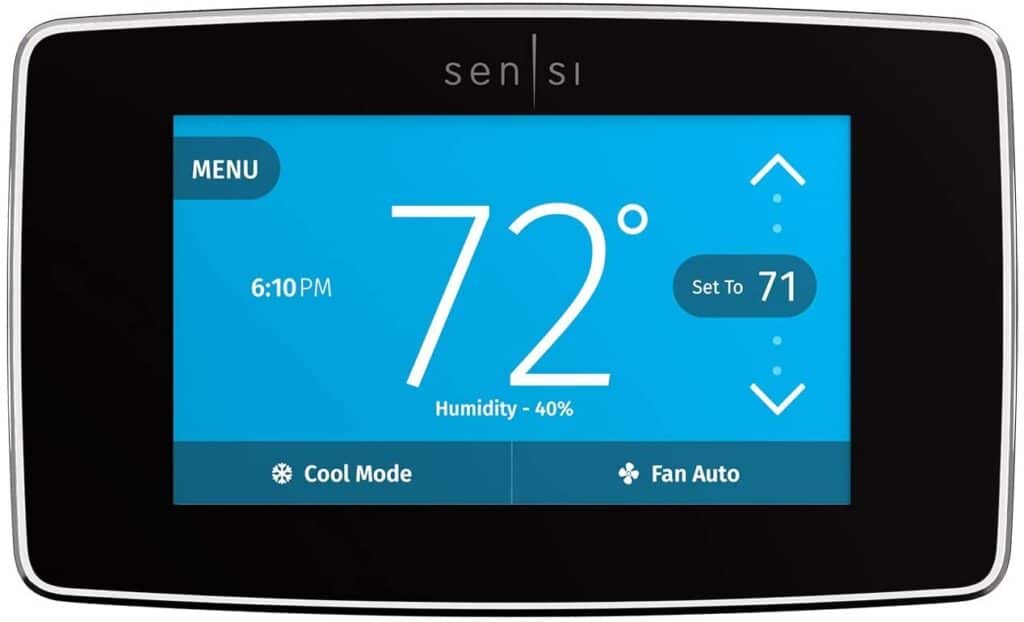
Sensi’s award-winning smart thermostat simplifies temperature regulation in your residence, enabling control from your mobile phone.
The Sensi smartphone app allows homeowners to manage configurable features and monitor their smart thermostats from virtually anywhere.
Sensi is easy to install and compatible with several popular smart home platforms.
The Sensi thermostat stands out among the various smart thermostat options available today.
Step-By-Step Guidelines on How to Install a Sensi Thermostat
Installing a Sensi thermostat takes only a few minutes and requires basic tools. Before starting, ensure you have the necessary tools.
Assemble Your Tools
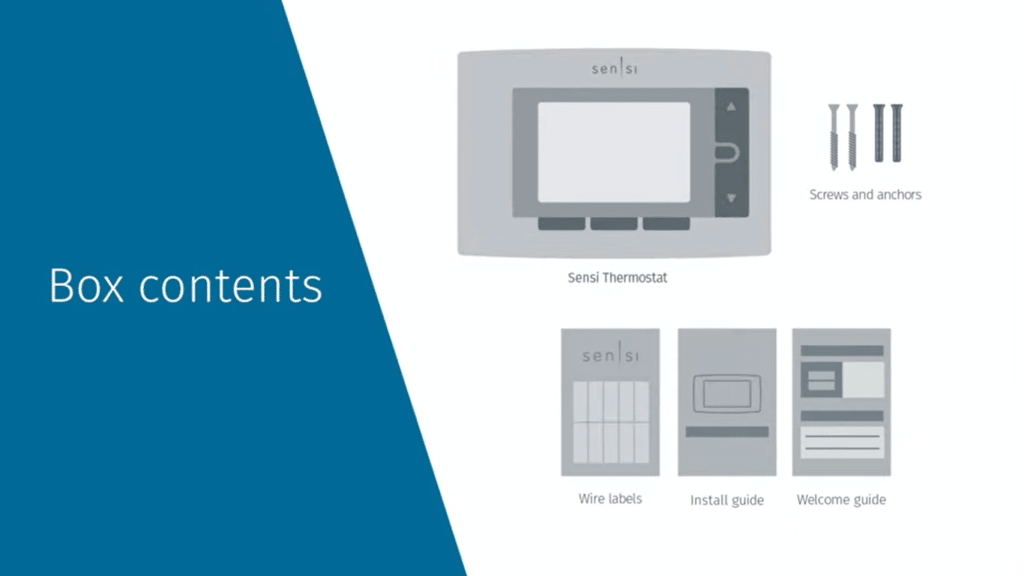
Assembling
In addition to the box contents, prepare the following:
- Sensi thermostat password, found in the guide
- Mobile phone or tablet
- Email address and password
- Screwdriver
- Wi-Fi network name and password – Ensure your network operates at 2.4 GHz
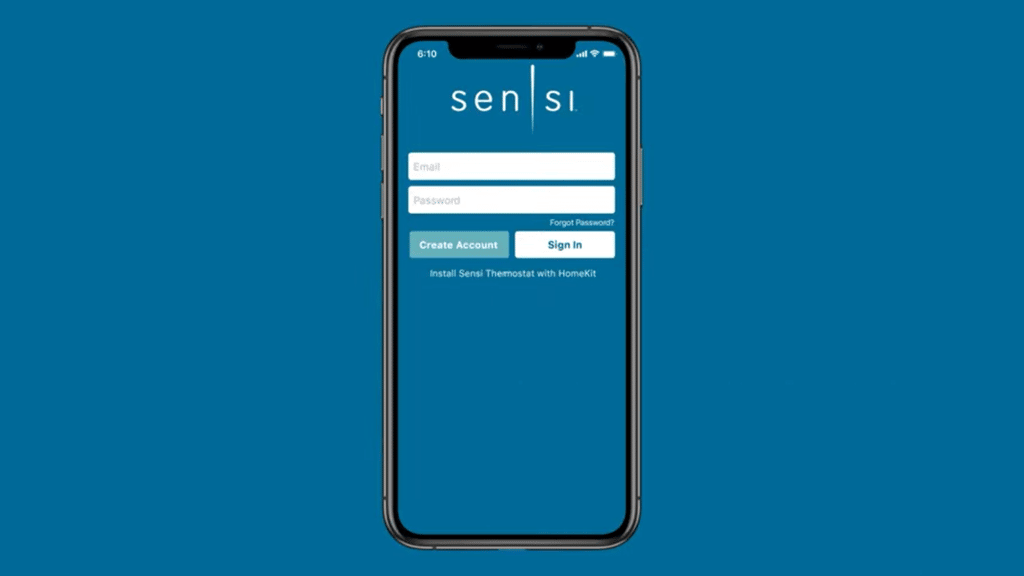
Download the Sensi App
The free app is a mobile control for your thermostat, allowing remote access. Download the app from Google Play or the App Store.
Create an account using an easily accessible email address to link to your Sensi account information.
Sensi App
Click + to Add Your Thermostat.
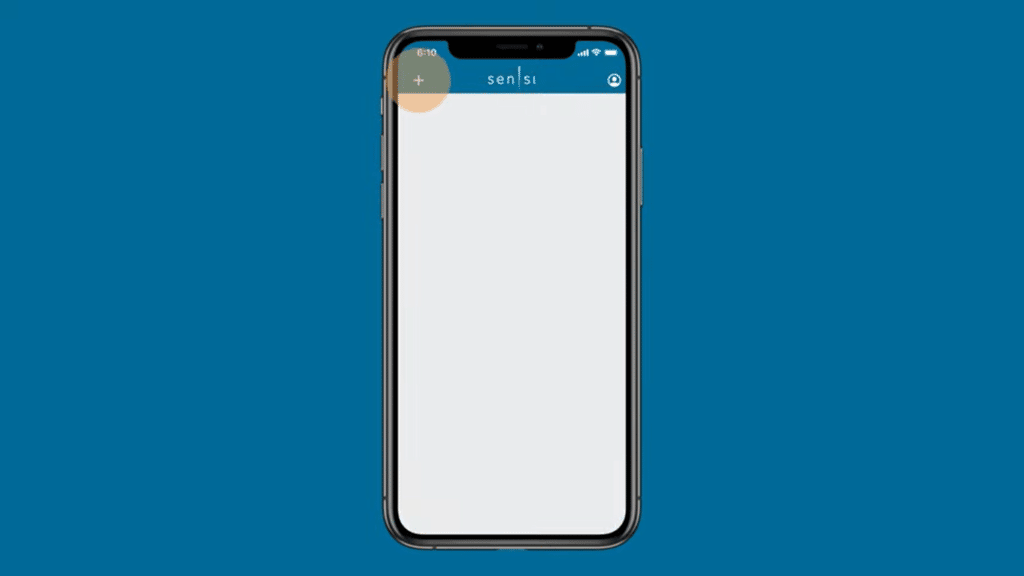
Select your thermostat model (the model number is on the back of the faceplate).
Choose the Install Path
Upon first login and model selection, the app asks if the thermostat is installed. Choose “No, it needs to be installed” or “Yes, it is on the wall.”
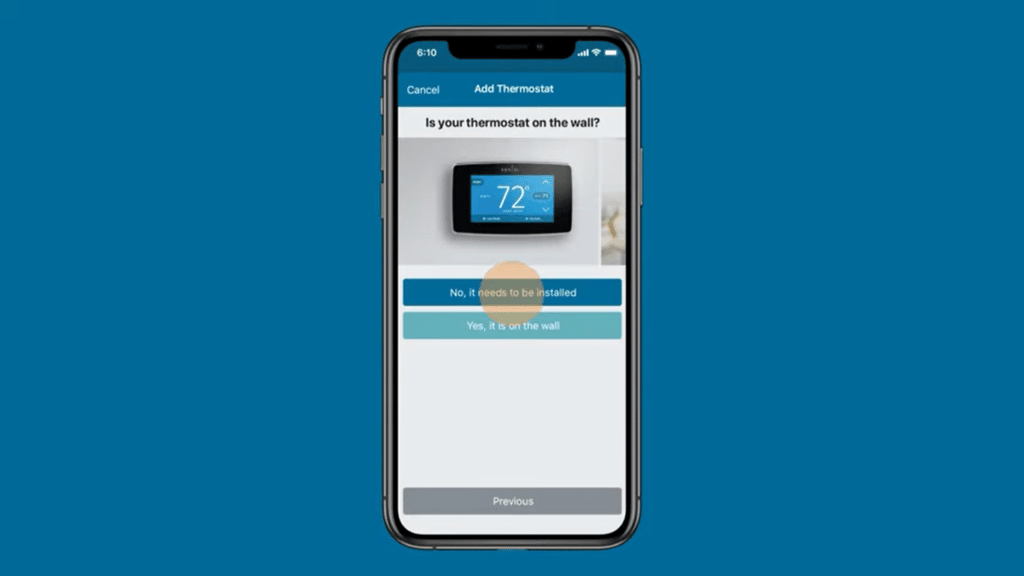
Install Path
For DIY installations, select the first option for a step-by-step guide.
Turn Off the Power
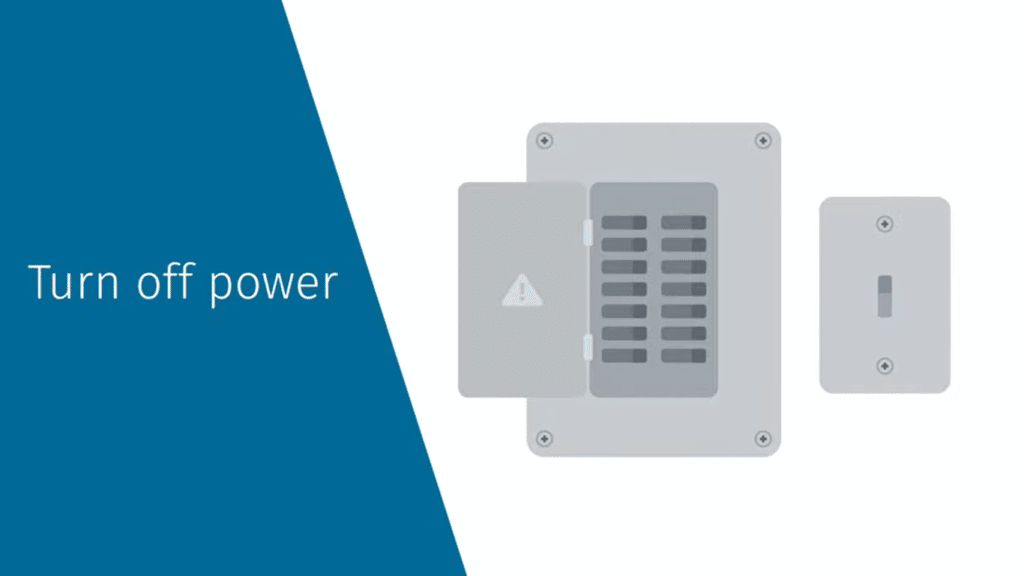
Turn the Power Off
Ensure the HVAC system is off before handling thermostat wires.
Remove Any Existing Thermostat Covers
Remove covers from any existing thermostat to proceed with Sensi installation.
Take a Photo of Your Wiring
Take a Photo of Wiring
Take a photo of the current thermostat wiring for future reference. Remove wiring from your old thermostat; Sensi includes a built-in jumper wire.
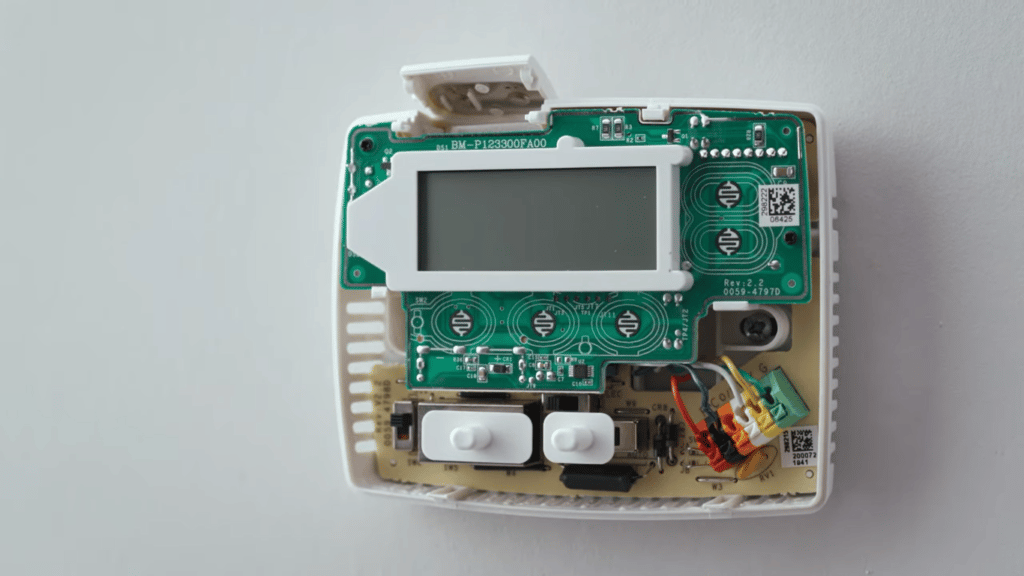
Tag Your Wires with the Provided Wire Labels
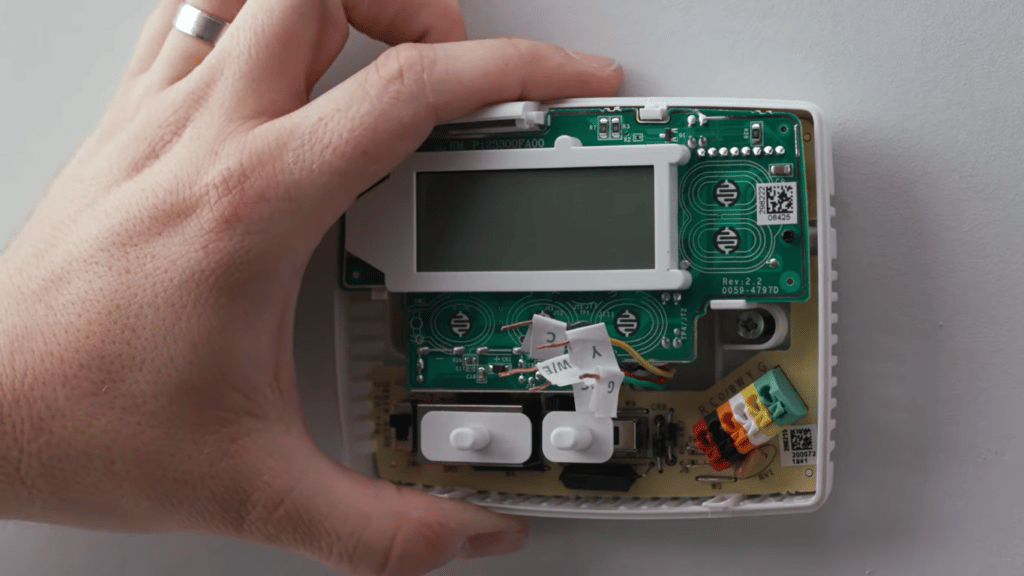
Tag the Wires
After labeling all wires, remove the original thermostat base and secure the Sensi base with the provided screws.
Wiring
Insert the labeled wires into the corresponding terminals on the Sensi base. Secure each wire with a screwdriver to ensure proper contact.
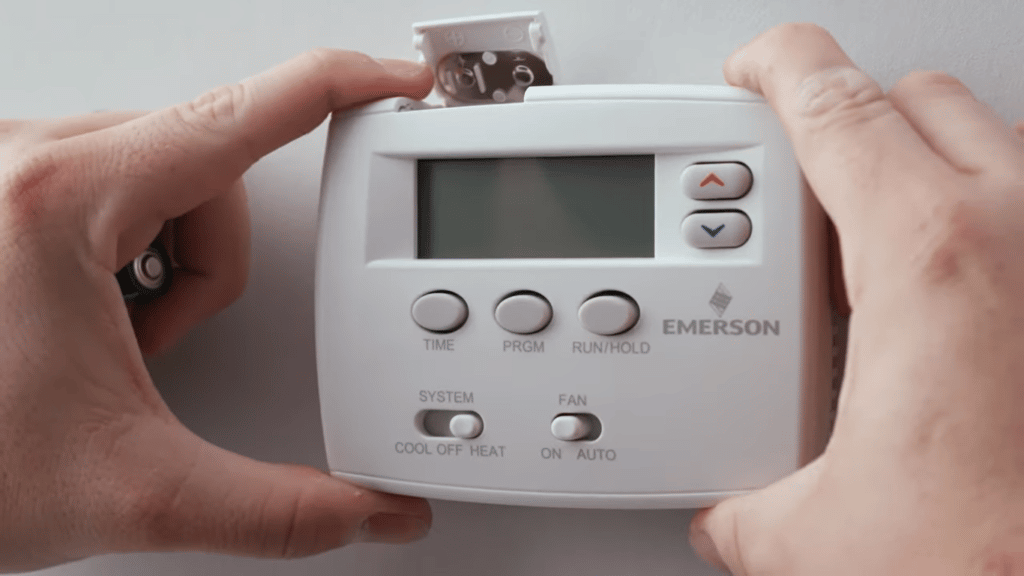
Put the Cover in Its Place
Attach the front display to the base until it clicks into place.
Switch the Power back on
Turn the power back on to your HVAC system.
Connect to Wi-Fi
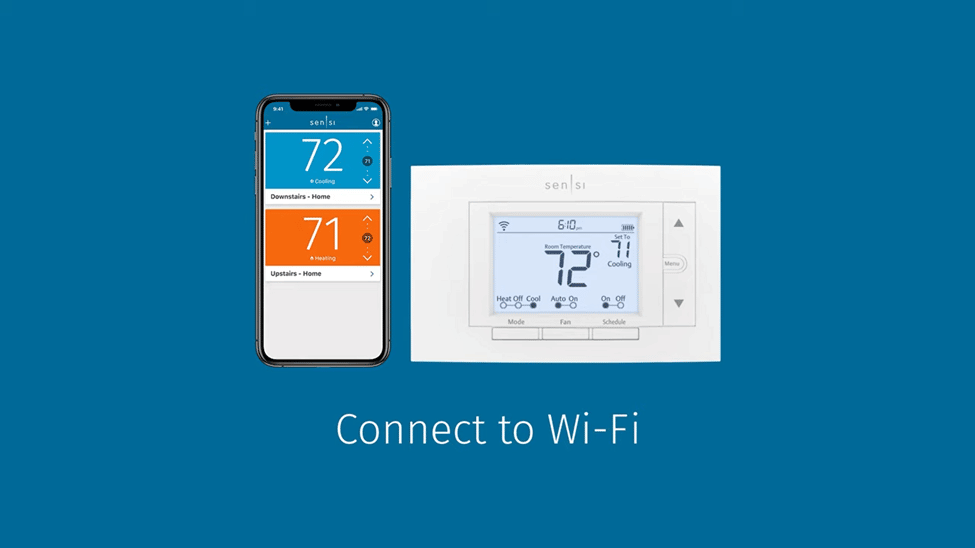
Connect to Wi-Fi
Use the Sensi app to connect the thermostat to Wi-Fi. The process varies slightly based on your device and app version. Enter the Sensi password to connect to your Wi-Fi network. Name your thermostat and proceed to “Next.”
After connection, register your device. Choose “Locate Me” or manually enter your address and continue to “Next.”
If installed by a contractor, enter their details; otherwise, proceed by clicking “Next.”
Begin Using Sensi
Click “Start Using Sensi,” and you’re all set.

Begin Using
Using Other Devices to Access Your Sensi Thermostat
The app allows the management of thermostats under your Sensi account without a device limit. Sharing your Sensi account credentials grants access to your thermostats. You can also update your email password through the app.
Multiple Thermostat Installation
Install multiple thermostats using the Sensi app by following the described steps for each unit.
Install each thermostat individually and add it to your Sensi account using the plus sign on the app’s main screen.
Final Words
Installing a Sensi thermostat might seem lengthy, but it is straightforward, quick, and manageable. Following these steps, you can remotely control your thermostat from anywhere using the Sensi app.
See Also
Best Smart Thermostat for Alexa