When you purchase through links on our site, we may earn an affiliate commission. Here’s how it works.
How to Check WiFi Router History on Android
The internet is woven into nearly everything we do, from work and school to entertainment and communication. WiFi routers sit at the center of most home and office networks, shared across phones, tablets, laptops, and smart devices. With so many people using a single connection, it is natural for the network administrator to wonder what kind of browsing activity is happening on their network.
In this guide, we walk through how to check WiFi router history on Android, including the tools and DNS-based methods that make it possible.
Why Would You Want to Check WiFi History?
Wireless internet connections give multiple users and devices access to the web through a single router. Monitoring what happens on that network is not always straightforward, though, and there are several legitimate reasons someone might want visibility into browsing activity.
The router administrator could be a parent who wants to know what content their child is accessing, or a business owner concerned that employees are spending work hours on personal browsing. There are also security-related reasons: checking whether unauthorized users are on the network, or whether suspicious sites are being visited from connected devices.
Here are some common motivations for checking WiFi history:
Our article on modem router combo covers related ground and is worth a look.
- Browser history on individual devices may not show enough detail about which sites were visited.
- Users can delete their own browser history, removing any trace of their activity from the device itself.
- Incognito mode and VPNs allow users to hide browsing activity entirely. Incognito browsing leaves no local record, and VPNs mask the IP address so the activity is invisible on the network level as well.
- Administrators may want to confirm whether other users on the network are monitoring their own activity.
Methods for Checking WiFi Router History on Android
When multiple devices connect through a router every day, there are real reasons to keep an eye on what is happening across the network. While the most common way to check router logs is through a PC browser or the router’s built-in admin panel, it is also possible to access similar information from an Android phone.
The most reliable approach involves using DNS-based monitoring tools or specialized network monitoring apps designed for Android. Below, we walk through a DNS-based method that works well.
How to Check WiFi Router History Using OpenDNS
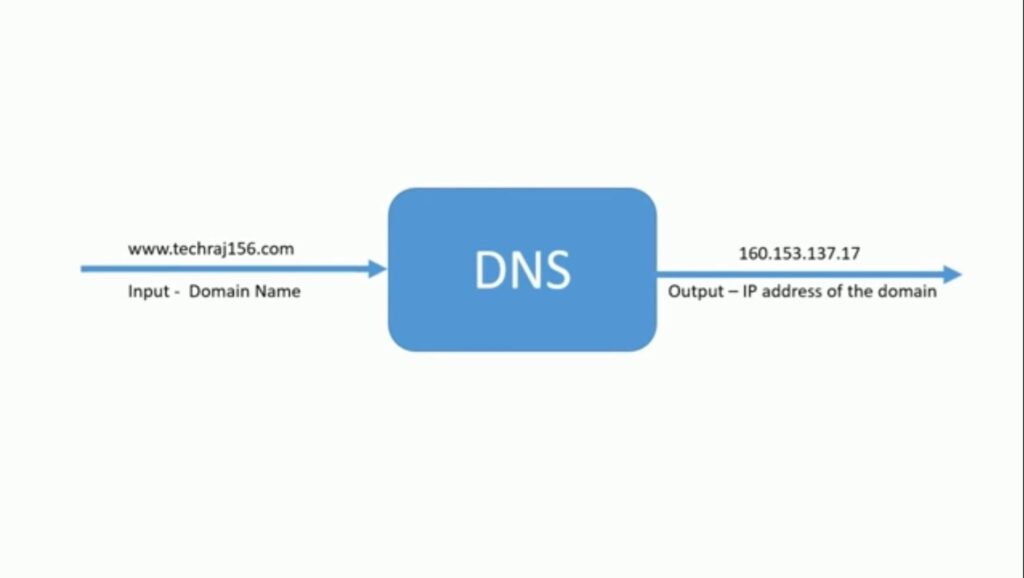
Domain Name Service (DNS) is the system that translates website domain names into IP addresses so your browser knows where to go. Normally, DNS requests go to your internet provider’s default servers. But you can redirect them through OpenDNS, which gives you the ability to monitor and filter internet traffic on your network.
How to Check WiFi Router History on Android
OpenDNS is free to set up and provides domain-level visibility into what websites are being accessed on your network.
We put together a full guide on mesh WiFi routers that pairs well with this.
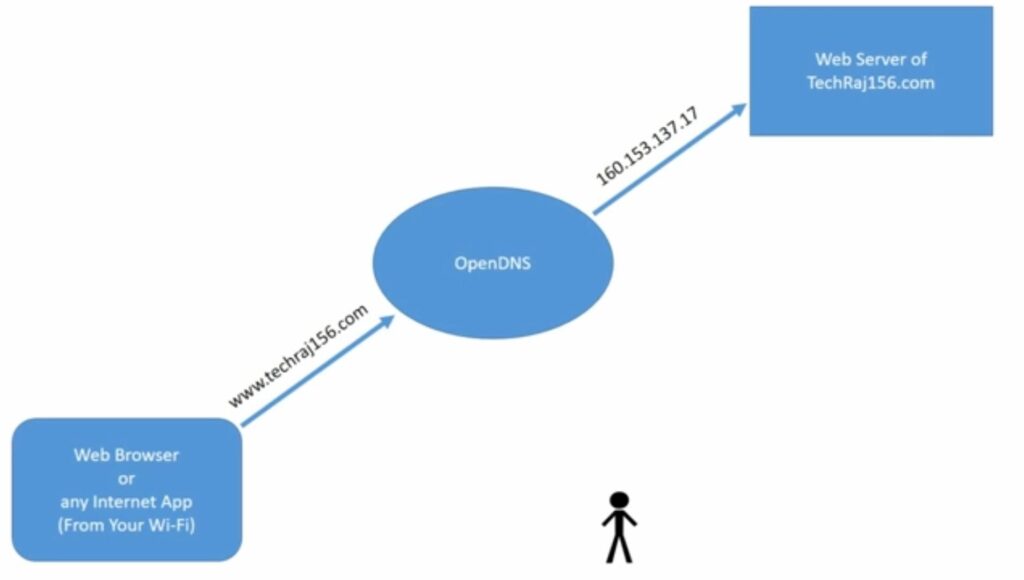
To set up OpenDNS for filtering and monitoring internet traffic on your Android device, follow these configuration steps. The process is not difficult, but you do need to change your DNS settings manually.
- From your Android home screen, open the Settings app. Navigate to Wi-Fi (or “Network & Internet” on newer Android versions). You should see a list of available WiFi networks within range.
- Find the WiFi network your phone is currently connected to and long-press on it. Two options should appear: Forget and Modify Network. Tap Modify Network.
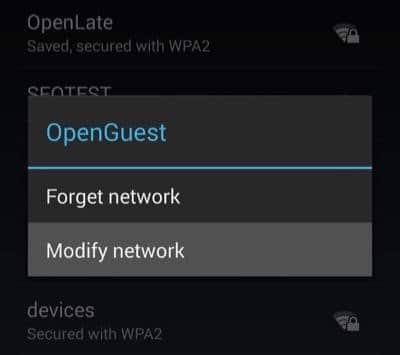
- Depending on your phone model, you may need to expand an Advanced Settings section to see the DNS fields. This step varies slightly between manufacturers and Android versions.
- Change the IP settings from DHCP to Static. This unlocks the DNS configuration fields so you can enter custom DNS server addresses.
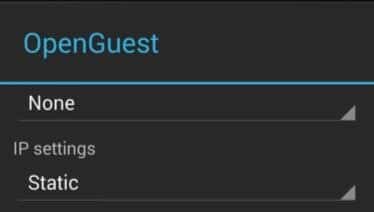
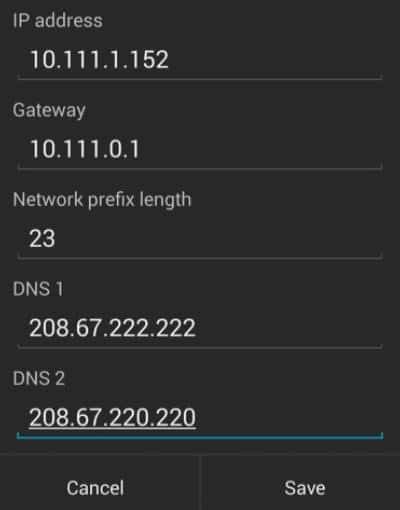
- Your phone will still automatically get its IP address from the router. In the DNS 1 and DNS 2 fields, enter the OpenDNS resolver addresses: 208.67.222.222 and 208.67.220.220.
How to Check WiFi Router History on Android
- Save the settings. Your Android device is now routing DNS requests through OpenDNS instead of your ISP’s default servers.
- Head to the OpenDNS website and create a free account. Follow their instructions to link your network to your account for logging and filtering.
Once everything is configured, OpenDNS provides domain-level analytics and visibility into internet traffic. Keep in mind that it shows which domains were accessed, not detailed page-by-page browsing histories. For most monitoring needs (parental controls, network security, general oversight) this level of detail is more than enough.
Things to Keep in Mind
Monitoring WiFi activity is something that concerned parents, business owners, and network administrators all have legitimate reasons to do. Safety and accountability are usually the primary motivations.
It is possible to configure remote access to your WiFi router’s admin panel for monitoring purposes, though that requires careful setup and attention to security so you do not accidentally expose your network settings to outsiders. The OpenDNS method described above is a safer and more accessible option for most people, and it works from any Android phone connected to your network.
If your internet connection is part of the equation, it helps to know your options. Check which providers are available in your area.
If you need deeper monitoring (such as tracking individual device activity or logging specific URLs), consider dedicated network monitoring software or a router that supports advanced logging features. Many modern mesh routers include built-in parental controls and activity reports through their companion apps.