When you purchase through links on our site, we may earn an affiliate commission. Here’s how it works.
Kasa Smart Plug Setup
The Kasa smart plug is a popular choice for those looking to control fans and lamps via their smartphones, especially because it is frequently on sale. This article will guide you through setting it up and exploring its capabilities.
If you have recently searched for a smart plug and sought the most affordable option from a reputable brand, the Kasa Smart Plug is likely your best bet.
You can find it for around $20 on sale on Amazon. But how do you set it up? No need to worry—we’ll cover what you can do with it once it’s set up.
Set-Up Process
- Begin by downloading the Kasa app for your Android or iOS smartphone. This is the official companion application for Kasa smart home devices.
- After installing the app, open it and click ‘Create Account’ in the bottom left corner.

Kasa Smart Plug Setup – Create Account
- Enter your email address, create a password, and click ‘Create Account.’
- Confirm your email address by clicking the confirmation link sent to your inbox. Once done, return to the Kasa app and click the ‘Continue’ button.
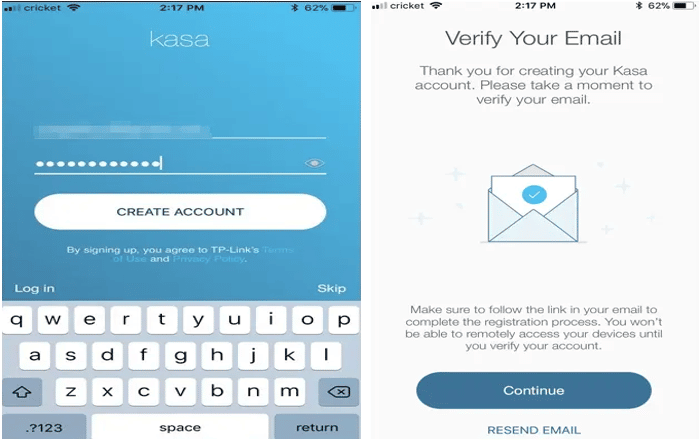
Continue
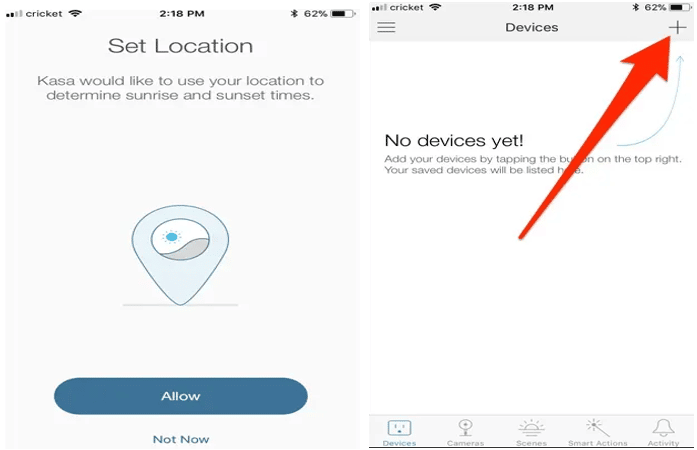
- Decide whether you want to allow the app to access your location. This enables setting a schedule for the smart plug based on sunrise and sunset. If you don’t need this feature, sharing your location is unnecessary.
- Once on the app’s main screen, click the plus (+) button in the upper right corner to set up your Kasa smart plug.
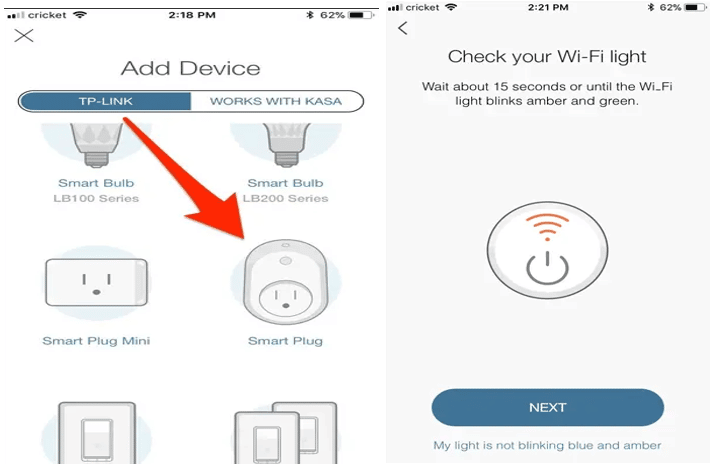
- Scroll through the list and select the device you’re setting up.
- Plug the Kasa smart plug into a power outlet and wait a few seconds for it to boot up. When the Wi-Fi logo lights up and flashes orange and green, click the ‘Press’ button in the app twice.
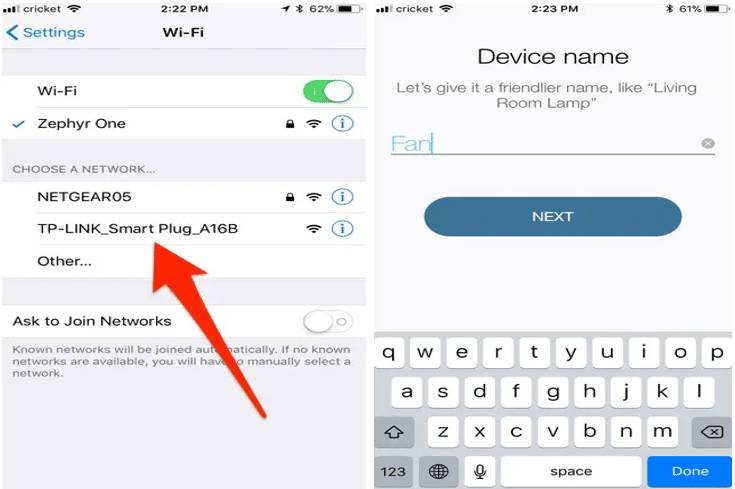
- Access the Wi-Fi settings on your phone and connect to the Wi-Fi emitted by the smart plug. Afterward, return to the app.
- Name your smart plug and then click ‘Next.’
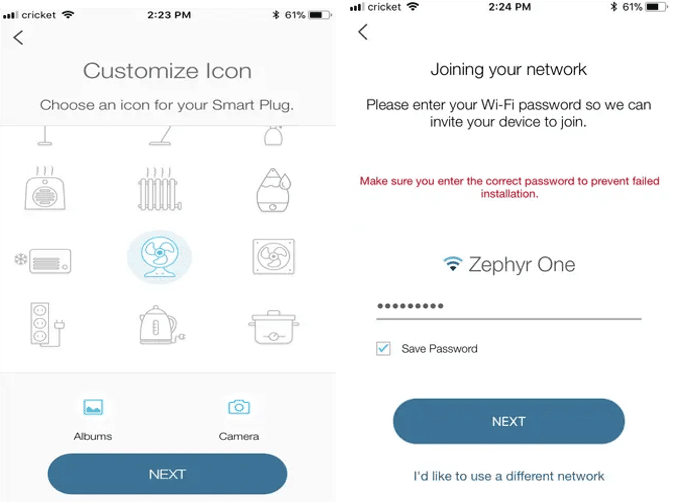
- Choose an icon for the smart plug; this step is optional but enjoyable. You can also select a photo from your camera roll. After selecting an icon, click ‘Next.’
- The smart plug will then join your home Wi-Fi network. Enter your password and press ‘Next.’ If you prefer a different network, select ‘I’d like to use a different network.’
Customize
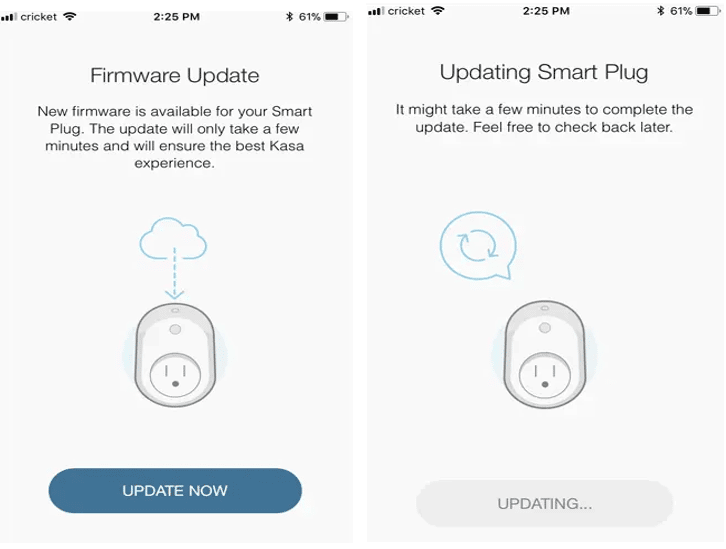
- Click ‘Update Now.’
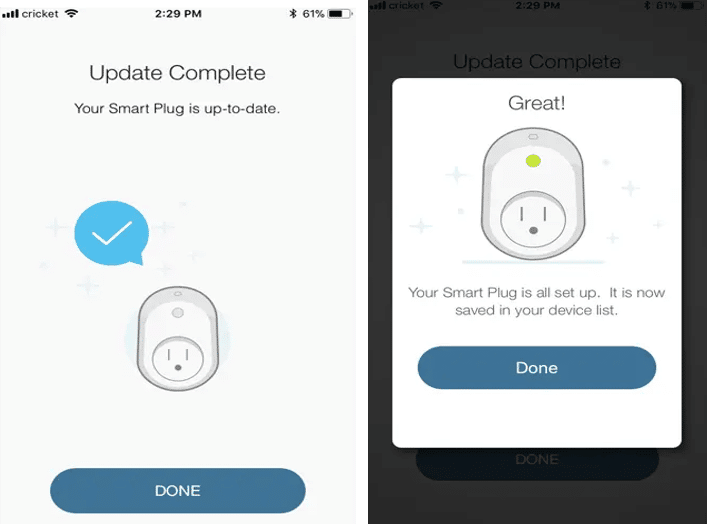
- Once the update completes, click ‘Done.’
- Click ‘Done’ again.
- The smart plug will now appear on the app’s main screen. You can turn it on and off using the power button in the app.
- Clicking on the smart plug reveals more details about its usage.
- Selecting ‘Total Runtime’ displays information about the smart plug’s duration, including 7-day and 30-day averages and totals.

Kasa Smart Plug Setup
What Features Do You Get When You Link The Smart Plug With The Kasa App?
Linking the Kasa Smart Plug with its companion app provides a clear overview of the devices connected to your home. TP-Link has designed the Kasa Smart Plug with scheduling capabilities, allowing the plug to activate at specific times. If you own other Kasa devices, you can create scenes like Good Morning, Good Night, and Movie Night.
Some Kasa smart plugs offer energy consumption monitoring, a useful feature if you have numerous appliances and tech in your home. Although the Kasa Mini does not provide detailed breakdowns, it offers 30-day and 7-day averages to help you track energy usage over time.
Final Thought
In conclusion, the Kasa Smart Plug can significantly enhance your daily life, but proper setup is crucial. Ensure you follow all the steps diligently, and your Kasa smart plug will be operational quickly.
See Also
How to Connect Smart Switch to Wifi