The Nikon P1000 comes with a 125x optical zoom, which is the longest zoom range on any camera ever made. Its lens spans a 24mm to 3000mm equivalent focal length, and Dynamic Fine Zoom pushes that to 6000mm. Nothing else on the consumer market gets anywhere near this.
So what does 3000mm actually look like? You can fill the entire frame with the moon and see individual craters. You can identify a bird sitting 200 yards away. On a clear, still night, you can capture Saturn’s rings. This camera was built around one extraordinary ability.
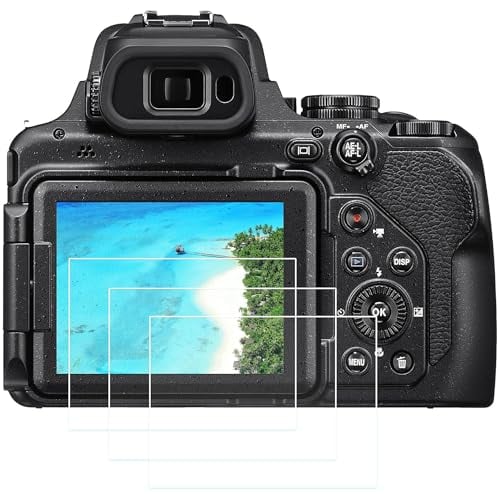
The P1000 is a bridge camera, which means the lens is fixed to the body. You can’t swap glass. It weighs about 3.1 pounds, records 4K video, has a vari-angle touchscreen and electronic viewfinder, and pairs with your phone through Bluetooth and Wi-Fi using Nikon’s SnapBridge app. Street pricing falls between $900 and $1000.
But a 125x zoom also creates problems most photographers never deal with. Camera shake at 3000mm is brutal. The maximum aperture at full zoom is f/8, which limits how much light reaches the small sensor. And the field of view at 3000mm is so narrow that finding your subject feels like peering through a drinking straw. This guide covers the settings and techniques that make the P1000 actually usable at the extremes it was designed for.
Nikon P1000 Key Specs and What They Mean
| Spec | Detail |
|---|---|
| Sensor | 1/2.3″ 16MP BSI CMOS |
| Lens | 24-3000mm equivalent, f/2.8-8 |
| Zoom range | 125x optical, 250x Dynamic Fine Zoom |
| ISO range | 100-6400 |
| Video | 4K UHD 30fps, 1080p 60fps |
| Image stabilization | Dual Detect VR (lens-shift) |
| Screen | 3.2″ vari-angle LCD |
| EVF | 0.39″ OLED electronic viewfinder |
| Weight | 3.1 lbs / 1415g (with battery and card) |
| Battery life | Approx. 250 shots (EN-EL20a) |
| Storage | SD / SDHC / SDXC |
| Connectivity | Wi-Fi, Bluetooth (SnapBridge) |
The spec that gets the most questions is the sensor. A 1/2.3-inch 16MP sensor is small. Physically, it’s much smaller than what you’ll find in a flagship smartphone, let alone a mirrorless camera. By 2026 standards, 16 megapixels is modest. But the resolution handles social media, web publishing, and prints up to about 11×14 inches just fine.
The real weakness is low-light performance. Smaller sensors collect less light per pixel, and noise shows up fast above ISO 800. At ISO 1600 you’ll notice grain and lost detail. At ISO 3200 and above, image quality falls off significantly. In bright conditions, the P1000 performs well. In dim light, it struggles.
None of that matters if you’re buying this camera for what it actually is. The P1000 exists because of the zoom. No interchangeable lens system gives you 3000mm equivalent in a single body you can carry in a backpack. The zoom range is the whole point, and everything else is secondary.
Best Nikon P1000 Settings for Wildlife Photography
Wildlife photography with the P1000 means shooting at extreme focal lengths where every setting choice either helps you nail a sharp shot or guarantees a blurry mess. At 2000mm and above, the margin for error is razor-thin. These settings give you the best chance.
Shooting mode: Aperture Priority (A). Turn the mode dial to A. Shoot at f/5.6 to f/8 for the sharpest results at long focal lengths. The lens performs best about one stop down from wide open. At full 3000mm zoom, the maximum aperture is f/8, so you’re locked there anyway. Between 1000mm and 2000mm, try f/6.3 for a good balance of sharpness and light.
Auto ISO with a ceiling. Open the shooting menu and turn on Auto ISO. Set the maximum to ISO 800 for the cleanest files. If you’re working in overcast conditions or shade, bump the ceiling to ISO 1600 and accept a small noise trade-off. Going above ISO 1600 on this sensor should be a last resort.
Autofocus: AF-C with subject tracking. Switch to Continuous AF (AF-C) so the camera keeps adjusting focus as animals move. Turn on subject tracking so the AF system follows the animal across the frame. Single AF (AF-S) locks focus once and won’t adjust if the animal shifts even slightly. It’s basically useless for anything alive.
Drive mode: Continuous shooting. The P1000 fires at 7 frames per second at full resolution. Hold down the shutter button and let it rip. Wildlife moments last fractions of a second, and a burst of 10-15 frames dramatically improves your odds of catching the right moment.
Vibration Reduction (VR) settings. Set VR to Normal when shooting stationary or slow-moving subjects. Switch to Active VR when you’re panning with a moving animal handheld. Active mode compensates for larger, slower body movements like walking or breathing while letting you follow the subject smoothly.
Back-button focus. Reassign autofocus activation from the shutter button to the rear AF button. This separates metering from focusing. You track the animal with your thumb on the AF button and fire the shutter independently. When the animal stops, lift your thumb to lock focus. This prevents accidental refocusing right when you press the shutter.
The snap-back zoom button. This feature isn’t optional at extreme zoom. Press and hold the side button to temporarily zoom out for a wider view so you can relocate your subject. Release the button and the camera snaps back to your original focal length. At 3000mm, your field of view is about 0.7 degrees. You will lose your subject without snap-back zoom. Learn to use this button reflexively.
How to Photograph the Moon with Nikon P1000
Moon photography is the P1000’s signature trick. No other handheld camera can fill the frame with the lunar surface the way this one does. The results are genuinely impressive: visible craters, maria, and terminator detail that would normally require a telescope and a dedicated astro camera.
Zoom to 3000mm for a large, detailed lunar disc. If you want even tighter framing, turn on Dynamic Fine Zoom to reach 6000mm. At 6000mm you lose some resolution since the camera is digitally cropping, but the moon is bright enough that the results are still striking.
Use Manual mode (M). The moon is a sunlit object against a black sky. Auto exposure will read the dark sky and massively overexpose the moon, blowing it into a featureless white disc. Manual mode is the only reliable approach.
Starting settings: ISO 100, f/8, 1/125 second. Review the image on the LCD and adjust from there. If the moon looks too bright, increase the shutter speed to 1/250s. If it looks too dark, slow down to 1/60s. The Looney 11 rule (a variation of the Sunny 16 rule for sunlit objects) suggests ISO 100, f/11, 1/100s as a baseline. Both starting points work. Pick whichever you prefer and fine-tune.
| Moon phase | ISO | Aperture | Shutter speed | Notes |
|---|---|---|---|---|
| Full Moon | 100 | f/8 | 1/250s | Brightest phase – use faster shutter to avoid blowing highlights |
| Half Moon (Quarter) | 100 | f/8 | 1/125s | Good balance of light across the terminator line |
| Crescent Moon | 100 | f/6.3 | 1/60s | Less sunlit surface – open up slightly or slow shutter |
| Waxing/Waning Gibbous | 100 | f/8 | 1/160s | Similar to full moon but slightly dimmer – adjust to taste |
Use a tripod. Camera shake at 3000mm is extreme. Even your heartbeat transmits through your hands into the camera. A sturdy tripod isn’t a suggestion here. It’s a requirement for sharp lunar photos.
Use the 2-second self-timer or a remote shutter release. Pressing the shutter button with your finger creates vibration that takes a full second to dampen at 3000mm. The 2-second timer lets you press the button, remove your hands, and let vibrations die before the shutter fires. A Bluetooth or wired remote shutter release is even better.
Turn VR off on a tripod. This sounds counterintuitive, but VR systems can actually introduce micro-vibrations when the camera is already stable on a tripod. The stabilization mechanism hunts for movement that isn’t there and creates tiny oscillations. Turn it off whenever the camera is on a solid support.
Use manual focus with focus peaking. Autofocus can hunt on the moon because the contrast edges are subtle at extreme magnification. Switch to manual focus. Turn on focus peaking in the menu so the camera highlights in-focus edges with a colored outline. Zoom in on the LCD using the playback magnification and fine-tune until crater rims are razor-sharp.
How to Shoot Birds in Flight with Nikon P1000
Photographing birds in flight is the hardest thing you can do with the P1000. The extreme zoom creates a field of view so narrow that keeping a moving bird in the frame is genuinely difficult. Professionals with $15,000 setups struggle with birds in flight. With the P1000’s small sensor and slow maximum aperture, you need technique, patience, and realistic expectations.
Start at a lower zoom. Don’t try to find a flying bird at 3000mm. Start at 500mm to 1000mm where the field of view is wide enough to actually locate the bird. Once you’ve got it in the frame, gradually zoom in. Trying to jump straight to maximum zoom is an exercise in frustration.
Use snap-back zoom constantly. The side button is your lifeline. When you lose the bird (and you will lose it repeatedly), press and hold snap-back to zoom out, find the bird, and release to return to your shooting focal length. Build this into your muscle memory until it’s automatic.
Shooting mode: Shutter Priority (S) at 1/1000 second minimum. Birds in flight move fast and their wings move faster. Anything slower than 1/1000s will produce motion blur on the wings. For small, fast birds like swallows or kingfishers, use 1/2000s or faster. Shutter Priority lets you lock in the shutter speed while the camera handles aperture and ISO.
AF-C with subject tracking. Continuous autofocus is mandatory. Turn on subject tracking so the camera tries to follow the bird as it moves through the frame. Single-point AF is too precise for a fast-moving target. One slight movement and you lose the lock.
Continuous high shooting mode. Hold the shutter down and let the buffer fill. Out of a burst of 20 frames, you might get 3 to 5 keepers. That’s normal. The hit rate for birds in flight with any camera is low, and with the P1000 it’s lower than average because of the narrow field of view and slower autofocus.
Shoot RAW+JPEG. Set the image quality to RAW+JPEG so you capture the NRW raw file alongside a processed JPEG. RAW files give you far more flexibility to recover highlights, adjust exposure, and reduce noise in post-processing. With the P1000’s small sensor, you need every bit of editing room you can get.
Be honest with yourself about the limits. The 1/2.3-inch sensor and f/8 maximum aperture at full zoom mean the camera needs bright daylight to produce clean images of birds in flight. Overcast skies force the ISO up. High ISO on this sensor means noise and soft detail. Shoot on sunny mornings and you’ll get results that surprise you. Shoot on gray afternoons and you’ll be disappointed. That’s the trade-off for 3000mm in a $1000 package.
Nikon P1000 Video Settings for Best Quality
The P1000 records 4K UHD video at 30 frames per second and 1080p at 60 frames per second. For most purposes, 4K at 30fps delivers the best detail. If you need slow-motion capability, 1080p at 60fps gives you smooth half-speed playback when edited into a 30fps timeline.
Zoom works during video recording. The motorized zoom operates smoothly and quietly enough for usable footage. You can zoom from 24mm to 3000mm in a single continuous take. This makes the P1000 surprisingly effective for nature documentaries, birdwatching recordings, and observation-style footage where you need to pull in tight on a distant subject.
Use an external microphone. The P1000 has a 3.5mm microphone input jack. The built-in microphone picks up lens motor noise, hand contact, and wind. A simple shotgun microphone or lavalier plugged into the mic jack dramatically improves audio quality. If you’re recording wildlife sounds or narrating your footage, an external mic is well worth the $30 to $50 investment.
VR mode: Active. For handheld video, switch VR to Active. This mode compensates for the larger, slower body movements typical of handheld shooting, like walking, breathing, and panning. Normal VR mode is tuned for still photography and doesn’t damp the slow oscillations that make handheld video unwatchable.
Manual exposure for consistency. Auto exposure during video causes distracting brightness shifts as you pan across scenes with different lighting. Set Manual mode for video, dial in your exposure, and lock it. If light conditions change significantly, adjust manually between shots rather than letting the camera hunt.
Recording limits. The P1000 caps each clip at 29 minutes in 4K. This is common across consumer cameras and relates to import tariff classifications rather than any technical constraint. If you need continuous recording beyond 29 minutes, you’ll need to start a new clip.
Heat management. Extended 4K recording generates heat, and the P1000’s body isn’t designed for sustained video sessions. After 15 to 20 minutes of continuous 4K recording in warm conditions, the camera body gets noticeably warm. If it overheats, you’ll see a warning and the camera may shut down recording. Take breaks between long clips, and avoid shooting in direct sunlight on hot days when possible.
Nikon P1000 Tips for Getting Sharp Photos at Maximum Zoom
Sharpness at extreme focal lengths is the central challenge of shooting with the P1000. Everything works against you: camera shake is amplified, the aperture is narrow, atmospheric conditions interfere, and the small sensor is unforgiving of technical errors. These practices separate sharp images from mush.
Use a tripod above 1500mm. Below 1500mm, VR and good handheld technique can produce sharp results. Above 1500mm, camera shake overwhelms the stabilization system. A tripod is almost mandatory. If a full tripod isn’t practical, a monopod provides meaningful stabilization and is fast to deploy in the field.
Remote shutter or 2-second timer. The physical act of pressing the shutter button introduces vibration. At extreme zoom, that vibration shows up as a slight blur across the entire frame. Use a remote shutter release via Bluetooth, a wired cable release, or the 2-second self-timer to eliminate this completely.
Shoot in bright daylight. The f/8 maximum aperture at full zoom needs plenty of light. Bright, direct sunlight gives the camera enough light to keep ISO low and shutter speed fast. Overcast conditions force the camera to raise ISO or slow the shutter, and both degrade image quality on this sensor. If the light is marginal, zoom back to a shorter focal length where the aperture opens wider.
Keep ISO at 800 or below. The P1000’s sensor produces its best results between ISO 100 and 400. ISO 800 is acceptable with minor noise. Anything above ISO 800 introduces visible grain and reduces fine detail. This is the single biggest constraint on the camera’s versatility. The sensor simply can’t handle high ISO the way larger-sensor cameras can.
VR settings matter more than you think. On a monopod, use VR Normal. On a solid tripod, turn VR off completely. VR Normal on a tripod can cause the stabilization element to oscillate slightly, producing images that are softer than they should be. Test this yourself: shoot the same subject with VR on and off from a tripod and compare the results at 100% magnification. The difference is real.
Watch for heat shimmer. At extreme distances, air rising from warm ground creates visible distortion in your images. Wavy, soft, shimmering detail that no amount of technique can fix. This isn’t a camera problem. It’s physics. Heat shimmer is worst on hot afternoons when the sun has been baking the ground for hours. For the sharpest images at extreme range, shoot in the early morning before the ground heats up. Cool, still air produces the cleanest atmospheric conditions.
Shoot RAW (NRW format). The P1000 saves raw files in Nikon’s NRW format. RAW files preserve all the data the sensor captures before the camera applies noise reduction, sharpening, and compression. This gives you maximum flexibility to sharpen, denoise, and adjust exposure in editing software like Lightroom, Capture One, or Nikon’s free NX Studio. With a sensor this small, the extra editing headroom from RAW files makes a visible difference in final image quality.
Frequently Asked Questions
Is the Nikon P1000 good for beginners?
Yes, with a caveat. The P1000’s Auto mode works well for casual shooting, and the vari-angle screen makes framing easy. But getting the best results from the extreme zoom range requires understanding manual exposure, autofocus modes, and stabilization techniques. A beginner can pick up the camera and shoot immediately, but the learning curve for 3000mm photography is steep regardless of experience level. The camera doesn’t make extreme telephoto photography easy. It makes it possible.
Can you see planets with the Nikon P1000?
Yes. The P1000 can photograph Jupiter and its four Galilean moons, Saturn’s rings, and the phases of Venus. Mars appears as a distinct orange disc during close approaches. You won’t see surface detail the way a dedicated telescope can, but the P1000 produces recognizable planetary images that no other consumer camera can match. Best results come from shooting on clear, still nights with the camera on a sturdy tripod, using manual focus at maximum zoom.
Does the Nikon P1000 shoot RAW?
Yes. The P1000 saves raw files in Nikon’s NRW format. You can set the camera to shoot RAW only, JPEG only, or RAW+JPEG simultaneously. NRW files can be processed in Adobe Lightroom, Capture One, DxO PhotoLab, and Nikon’s free NX Studio software. RAW files are significantly larger than JPEGs. Expect about 20-25 MB per NRW file compared to 5-8 MB for a fine JPEG, so a larger SD card is recommended if you shoot RAW regularly.
Is the Nikon P1000 worth it in 2026?
If you want the longest zoom on any camera, the P1000 has no competition. Nothing else reaches 3000mm in a single body. For moon photography, distant wildlife observation, birdwatching documentation, and any situation where reach matters more than image quality, the P1000 is the only option. If you want the best image quality, low-light performance, or fast autofocus for action photography, a mirrorless camera with interchangeable lenses is a better investment. The P1000 is a specialist tool. It does one thing that nothing else can do. If that one thing is what you need, it’s absolutely worth it.
What SD card is best for the Nikon P1000?
A UHS-I SDXC card with at least 64 GB capacity works well for most users. SanDisk Extreme or Samsung EVO Select in 64 GB or 128 GB sizes offer good speed at reasonable prices. If you shoot 4K video regularly, step up to a UHS-I U3 or V30-rated card to ensure smooth recording without dropped frames. The P1000 doesn’t support UHS-II speeds, so there’s no benefit to buying a more expensive UHS-II card. A 128 GB card holds roughly 5,000 fine JPEGs or about 90 minutes of 4K video.
Can you attach filters or lenses to the Nikon P1000?
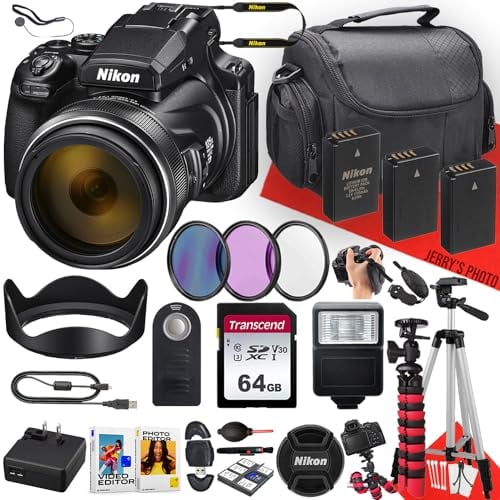
The P1000 has a 77mm filter thread on the front of the lens. You can attach standard 77mm screw-on filters directly: UV filters for lens protection, circular polarizers for reducing glare and boosting contrast, and neutral density filters for long exposures or video in bright light. Nikon doesn’t make teleconverters for the P1000 (the 3000mm reach makes them unnecessary), but some third-party manufacturers sell wide-angle adapter lenses that attach to the filter thread for a wider field of view at the short end of the zoom range.
![77mm Lens Cap Cover for Nikon COOLPIX P1000 16.7 Digital Camera (for Accessories),HUIPUXIANG [2 Pack]](https://www.technowifi.com/wp-content/uploads/2026/08/77mm-lens-cap-cover-for-nikon-coolpix-p1000-16-7-digital-camera-for.jpg)