When you purchase through links on our site, we may earn an affiliate commission. Here’s how it works.
How to Set Up Apple HomeKit – Getting Started
Apple’s HomeKit, while not as popular as Google’s Assistant and Amazon’s Alexa ecosystems, offers significant advantages, especially in its seamless integration with Apple’s platforms.
You can leverage Apple HomeKit alongside Amazon Alexa or Google Assistant, as many smart home devices compatible with HomeKit also support these platforms.
Using accessories across multiple services incurs no penalty, allowing for an integrated smart home experience that utilizes the strengths of each platform.
Setting up and making the most of your Apple HomeKit devices is straightforward, and here’s how you can do it.
What Do You Need
You need compatible Apple hardware to use Apple HomeKit and the Apple Home app. Specifically, an iPhone or iPad is necessary as the setup process relies on the Apple Home app.
Additionally, while not mandatory, a hub such as an Apple TV or HomePod enhances your HomeKit experience. It serves as the system’s brain, enabling remote control of your smart home devices and allowing for automation features.
Finally, ensure your smart home devices are HomeKit-compatible, as this is typically indicated on the product’s packaging or online description.
The Setup Process
- Open the Home App on your iPhone or iPad and tap the plus (+) sign.
- Select ‘Add Accessory‘ from the menu.

How to Set Up Apple HomeKit
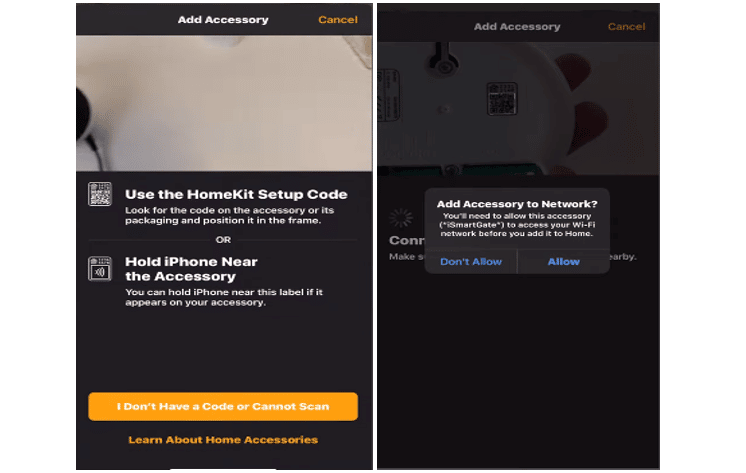
- Scan the eight-digit HomeKit code or QR code on the device or its documentation with your camera.
- If you have an iPhone 7 or later, hold your device near the accessory to add it.
- Select your device when it appears on the screen.
- If prompted to ‘Add Accessory to Network,’ choose ‘Allow.’
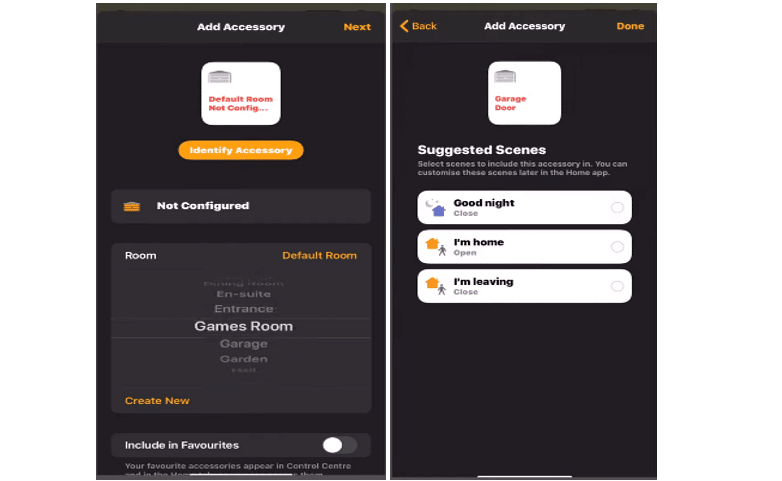
- Name and assign your device to a room for easier identification and Siri control within the Apple Home App.
- Conclude the setup by tapping ‘Next,’ then ‘Done.’
Organize Devices by Rooms and Zones
To facilitate device management and Siri control, organize your gadgets by room and create zones, such as downstairs or upstairs.
- Open the Home App and tap the plus (+) sign.
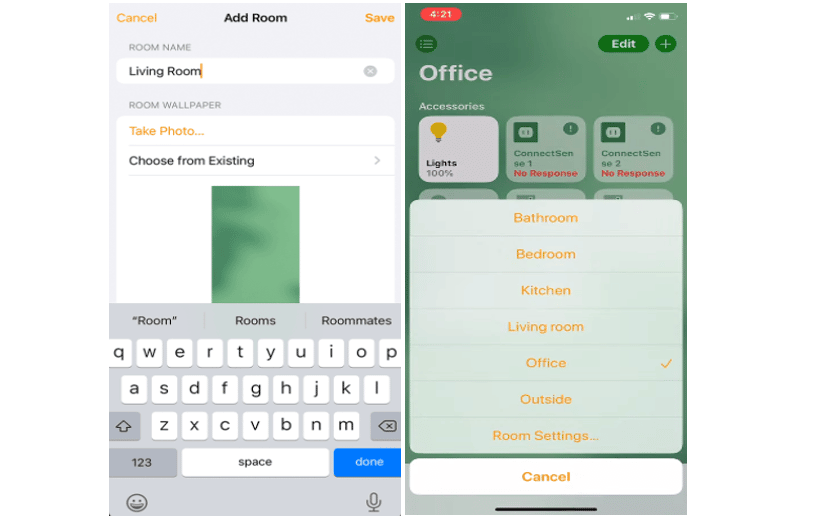
- Choose ‘Add Room.’
- Name your room and tap ‘Save.’
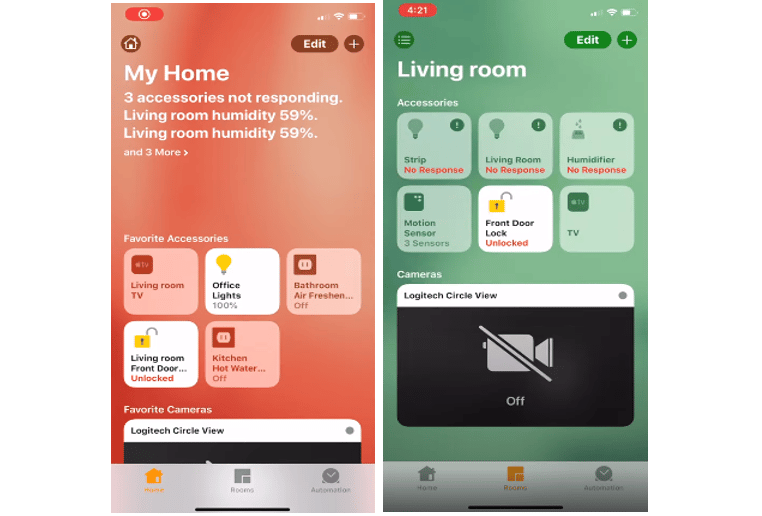
- Open the Rooms tab and scroll on your screen to switch between rooms.
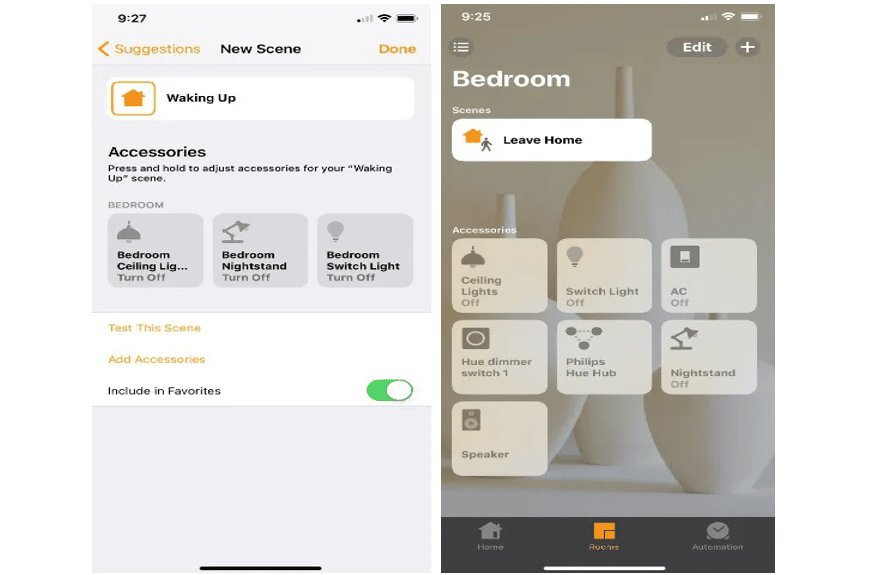
Creating Scenes
Scenes in Apple HomeKit allow you to group actions to activate simultaneously, functioning like macros for your home.
To create a scene:
- Tap the plus (+) sign at the top of your screen, then select ‘Add Scene.’
- Choose a preset or create a custom scene, selecting a name, icon, involved devices, and their actions when triggered. For example, a “leave home” scene might turn off all lights and fans, whereas a “movie” scene could dim the lights and power on your popcorn maker.
Sharing HomeKit Access
HomeKit devices are initially linked to the Apple ID of the person who sets them up. To share control of your devices:
- Go to the main Home settings page accessible by pressing the house-shaped logo in the upper left corner of the “Home” tab.
- From there, you can invite other users to join your home and grant them control over the smart devices.

How to Set Up Apple HomeKit
Final Thought
Apple HomeKit offers numerous options for device control, including Siri voice commands across various Apple devices and manual controls in the Home App, enhancing your smart home experience.
See Also