Why Your Arlo Camera Might Stop Recording
Arlo cameras are designed to record when they detect motion. When that stops working, it’s usually not a hardware failure. Most of the time, it comes down to a setting that got changed, a weak Wi-Fi signal, a drained battery, or a subscription issue. Before you start worrying about a broken camera, work through these troubleshooting steps. The fix is almost always something simple.
Step 1: Check the Arm/Disarm Mode
This is the most common reason for Arlo cameras not recording, and it’s the easiest to overlook. If your Arlo system is set to Disarmed, no cameras will record anything, regardless of their individual settings.
Open the Arlo app on your phone or log into my.arlo.com on a browser. Look at the mode indicator on the main dashboard. If it says Disarmed, tap it and switch to Armed or one of your custom modes.
If you use Geofencing or a Schedule, check those too. Geofencing automatically disarms the system when your phone is detected at home. If your phone’s location services are acting up, the system might think you’re home when you’re not (or vice versa). Schedules can also leave gaps where the system is disarmed during times you expect it to be active.
Step 2: Verify Motion Detection Settings
Each Arlo camera has its own motion detection sensitivity, and if it’s set too low, the camera might not trigger on smaller movements.
Adjusting Sensitivity
1. Open the Arlo app and go to Settings for the camera that’s not recording.
2. Find Motion Detection and check the sensitivity slider.
3. If the slider is set low (below 50%), bump it up to around 70 to 80% and test.
4. Walk in front of the camera and wait 10 to 15 seconds to see if a recording starts.
On some Arlo models, there’s also a motion detection test feature. Enable it, walk through the camera’s field of view, and look for the LED light to flash. If it flashes, the camera is detecting motion correctly and the issue is elsewhere.
Check Activity Zones
If you’ve set up Activity Zones (available on Arlo Pro and newer models with a subscription), the camera only records motion that happens inside those zones. If your zones are too small or don’t cover the right areas, the camera might ignore activity happening just outside the zone boundary.
Open the camera settings, go to Activity Zones, and review the green highlighted areas. Adjust or expand them if needed. Try removing all zones temporarily to test whether that fixes the recording issue.
Step 3: Check Battery and Power
A low battery can cause Arlo cameras to stop recording, go offline, or behave erratically.
– Open the Arlo app and check the battery level for each camera. If it’s below 15%, charge it or swap in a fresh battery.
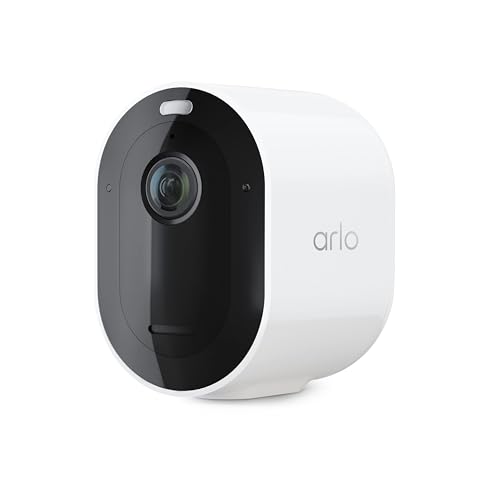
– For wired Arlo cameras (like the Arlo Pro connected to the charging cable or the Arlo Essential wired model), make sure the power adapter is securely plugged in at both ends.
– Check the cable itself. USB charging cables wear out, and a frayed or loose cable can cause intermittent power issues.
– If you’re using solar panels with your Arlo, verify that the panel is getting enough sunlight and that the connection is clean and dry.
Step 4: Test Wi-Fi Signal Strength
Arlo cameras need a stable Wi-Fi connection to upload recordings and send alerts. If the signal is weak or dropping out, the camera might detect motion but fail to save the clip.
How to Check Signal Strength
In the Arlo app, go to the camera’s Device Settings and look for signal strength or connection quality. Three bars is good. One or two bars means the camera is struggling to stay connected.
Improving the Signal
– Move your router closer to the camera, or move the camera closer to the router.
– Remove obstacles between the camera and the router. Thick walls, metal objects, and large appliances can block or weaken Wi-Fi signals.
– Add a Wi-Fi extender or mesh network node near the camera’s location. If you need help with this, check out our guide on how to connect Arlo camera to WiFi extender.
– If you’re using an Arlo base station (SmartHub), position it centrally between your router and your cameras.
Step 5: Update Firmware and Check Storage
Firmware Updates
Outdated firmware can cause recording failures, especially after Arlo pushes a server-side update that expects cameras to be on the latest version.
1. Open the Arlo app and go to Settings > My Devices.
2. Select the camera and look for a Firmware section.
3. If an update is available, install it. The camera will restart after the update.
4. Wait 5 minutes after the restart before testing, since the camera needs time to re-sync.
Storage: Cloud Plan or Local
Arlo cameras store recordings in the cloud (with a subscription) or locally on a USB drive connected to the SmartHub or base station. If your cloud storage is full, new recordings won’t save.
– Check your Arlo Secure subscription status. If it’s expired or lapsed, cloud recording stops. You can verify your plan in the app under Settings > Subscription.
– If you’re using local storage via a USB drive on the SmartHub, check whether the drive is full. Format or swap it if needed.
– Arlo’s free plan (if your device still qualifies) typically only stores a limited number of recordings. Older clips get deleted automatically to make room, but if the system is behind, new clips may get dropped.
Reset and Re-Sync the Camera
If none of the above steps fix the problem, try resetting and re-syncing the camera to your base station or account.
Soft Reset
Remove the battery (or unplug the power) for 30 seconds, then reinsert it. Let the camera boot up completely and reconnect to Wi-Fi. This clears temporary glitches without erasing your settings.
Factory Reset
If the soft reset doesn’t help, you can do a full factory reset:
1. Find the sync/reset button on the camera (usually a small recessed button on the back or bottom).
2. Press and hold it for about 10 seconds until the LED blinks amber.
3. Release the button. The camera is now in setup mode.
4. Open the Arlo app, remove the camera from your device list, and add it back as a new device.
5. Follow the on-screen instructions to pair it with your base station or Wi-Fi network.
After re-syncing, set up your motion detection rules, activity zones, and recording modes again. Test by walking in front of the camera to confirm it records properly.
When to Contact Arlo Support
If you’ve gone through every step and the camera still won’t record, the issue might be hardware-related. Look for physical signs of damage: a cracked lens cover, water intrusion, or corroded battery contacts. If the camera is still under warranty, Arlo support can walk you through additional diagnostics and may offer a replacement. You can reach them through the Arlo app, the support section of arlo.com, or by calling their customer service line.
Most recording issues are fixable within a few minutes, though. Start with the arm/disarm mode (it catches more people than you’d expect), check the Wi-Fi signal, and work your way down the list. The camera is almost always fine. It’s usually just a setting.