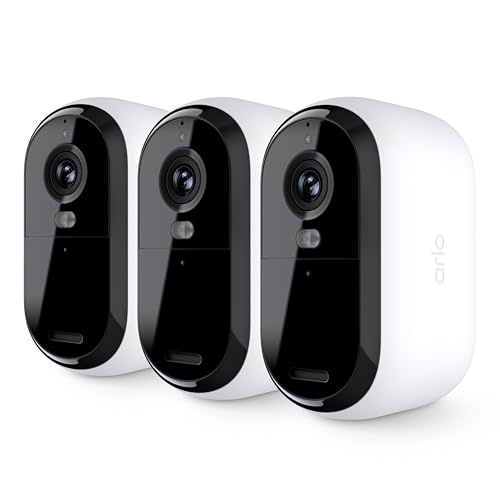
The Arlo Essential is a wire-free security camera that connects directly to your Wi-Fi router. No SmartHub needed. No base station to plug in. You take it out of the box, charge it up, open the Arlo Secure app, and walk through a guided setup that takes about 10 to 15 minutes.
Still deciding between Arlo and Ring? Our Ring vs Arlo comparison walks through the real differences in video quality, battery life, and monthly costs.
That simplicity is what makes the Essential line stand out. Arlo built it for people who want solid outdoor or indoor security footage without running cables or setting up a separate hub. The camera pairs over 2.4 GHz Wi-Fi and starts sending motion alerts to your phone right after setup wraps up.
This guide walks through every step from unboxing to getting your first motion notification. It also covers mounting placement, Wi-Fi requirements, Arlo Secure subscription options, smart home integration with Alexa, Google Home, and Apple HomeKit, plus fixes for the most common setup problems.
For Google Home camera options, see our Google Home compatible cameras list.
What’s in the Arlo Essential Camera Box
You’ll find the camera, a magnetic mount with a ball joint, mounting screws and drywall anchors, a charging cable, and a quick start guide. Newer models (2nd Gen and later) come with a USB-C cable. Older first-gen units use micro-USB.
There’s no SmartHub or base station in the box. The Arlo Essential hooks up directly to your home Wi-Fi on the 2.4 GHz band. That’s different from the Arlo Pro and Ultra lines, which rely on a SmartHub as a bridge between camera and router. With the Essential, you’ve got one less piece of hardware to worry about.
Arlo currently sells three Essential models. The 2nd Gen Outdoor records in 2K resolution and is the most popular pick. The XL version uses identical hardware but has a bigger battery for longer run time. The Indoor Camera is a smaller, plug-in unit built for shelf or wall mounting inside your home.
| Model | Resolution | Battery Life | Weather Rating | Price Range |
|---|---|---|---|---|
| Arlo Essential 2nd Gen Outdoor | 2K | Up to 4 months | IP65 (weather-resistant) | $99 – $129 |
| Arlo Essential XL | 2K | Up to 8 months | IP65 (weather-resistant) | $129 – $149 |
| Arlo Essential Indoor Camera | 2K | Plug-in (continuous power) | Indoor only | $49 – $79 |
All three models share the same app experience and support the same subscription plans. The differences boil down to battery size, weatherproofing, and whether you need outdoor toughness or an indoor form factor.
How to Set Up Arlo Essential Camera Step by Step
- Charge the camera fully before opening the app. Plug the included USB-C cable into the port on the back and connect the other end to any USB power adapter. The front LED glows amber while charging and turns solid blue when the battery hits 100 percent. A full charge from empty takes around three to four hours.
- While the camera charges, grab the Arlo Secure app for your phone. It’s available in the iOS App Store and Google Play. If you had the older Arlo app installed, make sure to update it. The Arlo Secure app replaced the legacy version and includes all current features.
- Open the app and create a new Arlo account or sign in to an existing one. New accounts need an email address and password. Arlo sends a verification email before you can move forward.
- Once you’re signed in, tap the plus (+) icon in the upper corner to add a new device. Select “Arlo Essential” from the camera model list. The app guides you through the rest with on-screen prompts.
- The app will ask you to scan the QR code on a sticker attached to the camera. Point your phone’s camera at the code. If scanning doesn’t work (damaged sticker, bad lighting), you can type in the serial number printed next to it instead.
- Next, connect the camera to your Wi-Fi network. The app shows your available networks. Pick your 2.4 GHz network and enter the password. The Arlo Essential doesn’t support 5 GHz Wi-Fi. If your router broadcasts a single combined network name for both bands, the app usually handles band steering on its own. More on this in the Wi-Fi section below.
- After the Wi-Fi connection goes through, the camera downloads a firmware update. This typically takes 5 to 10 minutes depending on your internet speed. Don’t unplug the camera or close the app during this step. The LED blinks while the update installs, and the camera reboots automatically when it’s done.
- The app then asks you to name the camera and assign it to a room. Use something descriptive like “Front Door” or “Backyard” so it’s easy to identify when you have multiple cameras. After naming, the app runs a positioning wizard that shows the live view so you can adjust the angle before locking the mount in place.
Where to Mount Arlo Essential Camera for Best Coverage
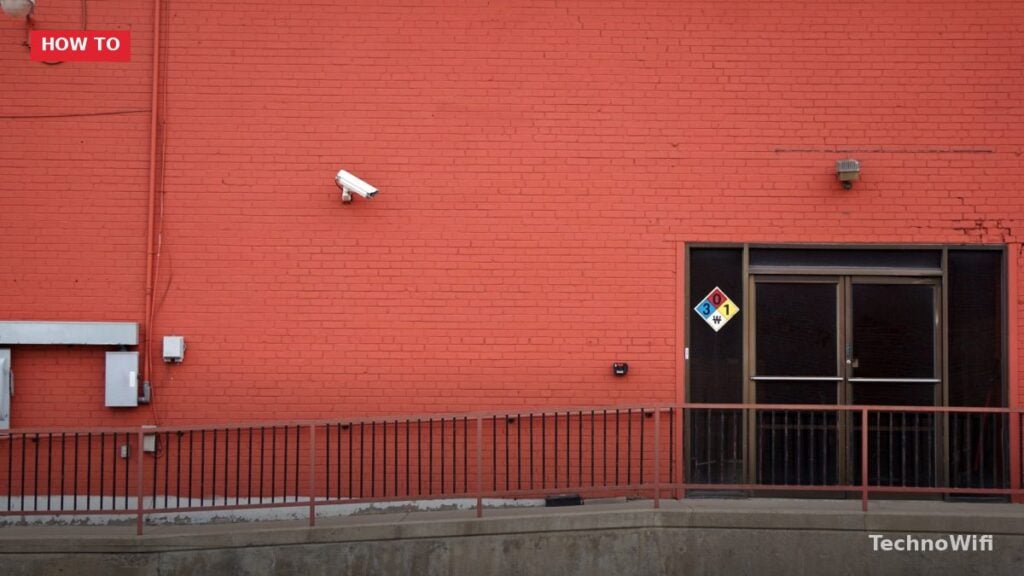
Height matters more than most people think. Arlo recommends mounting the Essential between 7 and 10 feet off the ground. At that height, the passive infrared (PIR) motion sensor gets the widest detection spread. Too low, and the sensor misses people until they’re right on top of it. Too high, and the steep downward angle shrinks the detection range.
Tilt the camera slightly downward once it’s mounted. A gentle downward angle gives the PIR sensor the best shot at catching motion as people walk across the field of view. The sensor picks up side-to-side movement better than head-on approaches, so position the camera where foot traffic crosses the frame rather than walking straight toward the lens.
Don’t point the camera directly into the sun or at bright outdoor lights. Strong backlighting washes out the image and can mess with motion detection. East-facing cameras catch harsh morning sun, and west-facing ones get hit in the afternoon. If you can’t avoid those orientations, mount the camera under an eave or overhang to shade the lens.
Before drilling into the wall, check the Wi-Fi signal at your planned spot. Open the Arlo Secure app, head to camera settings, and look for the signal strength indicator. Three bars is great. Two bars works but might cause occasional buffering during live view. One bar means you should move the camera closer to the router or bring in a Wi-Fi extender.
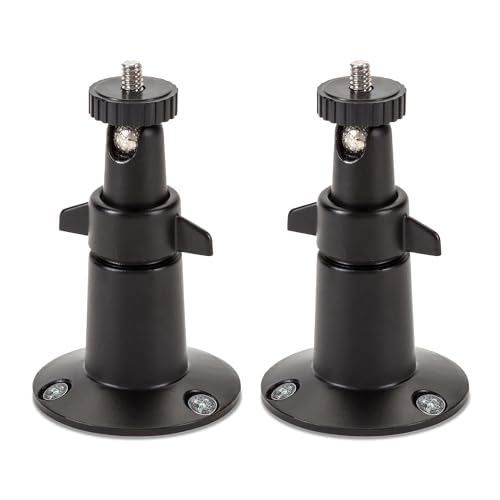
The magnetic mount snaps onto a metal plate that you screw into the wall. Once the plate is up, the camera attaches magnetically and the ball joint lets you swivel it in any direction without tools. Angle adjustments after installation are quick and easy.
For indoor use, the Essential Indoor Camera sits on a flat surface like a shelf or table, or you can wall-mount it with the included hardware. Keep indoor cameras away from windows. The infrared night vision LEDs bounce off glass and create a bright glare that ruins the image. If you need to watch through a window, turn off the infrared LEDs in the app settings.
The Arlo Essential 2nd Gen has a 130-degree field of view. At 10 feet from the camera, that covers roughly 15 feet of horizontal space. At 20 feet, coverage widens to about 30 feet. That’s wide enough for a standard front porch or a single-car driveway entrance without needing extra cameras.
Arlo Essential Camera Wi-Fi Requirements
The Arlo Essential only connects to 2.4 GHz Wi-Fi networks. No 5 GHz support. This trips up a lot of people during setup because most modern routers broadcast both bands under one network name, and your phone might be on 5 GHz while the camera needs 2.4 GHz.
If your router combines both bands into one name, the Arlo Secure app usually handles band steering during setup and points the camera to the right band automatically. If setup keeps failing, log into your router’s admin page and temporarily split the bands into two separate names. Connect the camera to the 2.4 GHz network, finish setup, then merge the bands back together if you prefer a single network name.
For reliable 2K streaming and cloud uploads, each camera needs at least 2 Mbps upload speed. If you’re watching live view while the camera is also pushing a clip to the cloud, you’ll need more headroom. Multiple cameras multiply the bandwidth requirement.
| Activity | Minimum Speed | Recommended Speed |
|---|---|---|
| Live view (single camera) | 1.5 Mbps upload | 3 Mbps upload |
| Cloud recording (single camera) | 2 Mbps upload | 4 Mbps upload |
| Live view + cloud upload (simultaneous) | 3 Mbps upload | 5 Mbps upload |
Router placement directly affects camera performance. Thick walls, metal objects, and large appliances between the router and camera weaken the signal. If the camera mounts far from the router, a mesh Wi-Fi system helps a lot. Mesh systems like Eero, Google Nest Wifi, and TP-Link Deco spread coverage evenly across your home and yard, killing the dead spots that cause Arlo cameras to drop connections or buffer during live view.
If you’re adding several Arlo cameras, check that your router can handle the device count. Each camera is an always-connected IoT device. Older routers start struggling once you go past 15 to 20 connected devices. A modern Wi-Fi 6 router handles the load much better.
Arlo Secure Subscription Plans for Essential Camera
Arlo changed its free plan in early 2024. The free tier no longer includes cloud recording for new accounts. Without a subscription, you still get live view, two-way audio, and basic motion alerts on your phone. But the camera won’t save recorded clips to the cloud, so if you miss an alert, the footage is gone.
The Arlo Secure plan runs $7.99 per month and covers a single camera. It adds 30-day cloud recording, which means every motion-triggered clip is saved and accessible in the app for 30 days. You also get activity zones, letting you draw specific areas in the camera’s field of view where motion detection stays active. Smart notifications use AI to figure out whether the motion came from a person, vehicle, animal, or package and label the alert accordingly.
Arlo Secure Plus costs $17.99 per month and covers unlimited cameras on your account. It includes everything from the single-camera plan plus 24/7 emergency response through Arlo’s monitoring partners and Arlo Safe, a family safety feature with location tracking and crash detection on your phone.
New Arlo Essential cameras bought at retail include a 3-month free trial of Arlo Secure. The trial kicks in during initial setup in the app. After 3 months, you decide whether to subscribe or drop down to the free tier.
| Feature | Free | Arlo Secure ($7.99/mo) | Arlo Secure Plus ($17.99/mo) |
|---|---|---|---|
| Live view | Yes | Yes | Yes |
| Two-way audio | Yes | Yes | Yes |
| Motion alerts | Yes | Yes | Yes |
| 30-day cloud recording | No | Yes | Yes |
| Activity zones | No | Yes | Yes |
| Smart notifications (person/vehicle/animal/package) | No | Yes | Yes |
| Number of cameras covered | Unlimited | 1 camera | Unlimited |
| 24/7 emergency response | No | No | Yes |
| Arlo Safe (family safety) | No | No | Yes |
If you own more than one Arlo camera, the Secure Plus plan saves you money fast. Two cameras on individual Secure plans cost $15.98 per month. Three cameras run $23.97. Secure Plus covers all of them for a flat $17.99.
How to Connect Arlo Essential Camera to Alexa and Google Home
The Arlo Essential works with Amazon Alexa, Google Home, and Apple HomeKit. That means you can view camera feeds on smart displays, trigger recordings through automations, and control the camera with voice commands.
To connect with Alexa, open the Alexa app on your phone. Go to “More” then “Skills and Games.” Search for “Arlo” and tap “Enable to Use.” Sign in with your Arlo account credentials to link the two services. After linking, tap “Discover Devices” so Alexa can find your cameras. Each camera shows up as a device you can assign to a room in the Alexa app.
For Google Home, open the Google Home app and tap the plus (+) icon. Select “Set up device” then “Works with Google.” Search for “Arlo” in the brand list and sign in with your Arlo account. Your cameras will appear in the Home app and can be assigned to rooms.
Apple HomeKit support is available on the Arlo Essential 2nd Gen. To turn it on, open the Arlo Secure app, go to camera settings, and look for the HomeKit option. The app generates a HomeKit setup code. Open the Apple Home app, tap “Add Accessory,” and scan or enter that code. Once paired, the camera feed appears in the Home app and responds to Siri commands.
Voice commands work on smart displays with screens. Say “Alexa, show me the front door” on an Echo Show and the camera’s live feed pops up. Say “Hey Google, show me the backyard” on a Nest Hub and it does the same thing. On HomePod or Apple TV, ask Siri to show a specific camera.
Both Alexa and Google Home let you work Arlo cameras into routines and automations. You could set a routine that triggers a camera recording when a smart door sensor opens, or have the camera feed automatically appear on your smart display when a doorbell rings. These routines are set up in the Alexa or Google Home apps, not in the Arlo app.
Arlo Essential Camera Not Connecting to Wi-Fi
The number one cause of Arlo Essential setup failures is the camera trying to connect to a 5 GHz network. The Essential only supports 2.4 GHz. If your router uses one name for both bands, the camera might try joining the wrong band and fail without any clear error message. Split your bands temporarily in router settings, connect the camera to the labeled 2.4 GHz network, and merge them back afterward.
Distance from the router matters during initial setup even if you plan to mount the camera far away later. For the pairing process, bring the camera within 10 to 15 feet of the router. After setup finishes, you can move it to its permanent spot.
A basic restart fixes a lot of connection problems. Unplug your router, wait 30 seconds, plug it back in, and let it fully boot. Then restart the camera by pressing and releasing the sync button on top. Wait for the LED to stop blinking before trying again in the app.
Check that the camera has the latest firmware. If the camera partially connected but keeps dropping, a firmware update might fix the instability. In the Arlo Secure app, go to camera settings and look for available updates. Install any pending update and let it complete fully.
For a factory reset, press and hold the sync button for at least 10 seconds until the LED flashes amber. This wipes all settings and lets you start fresh. You’ll need to re-add the camera in the app from scratch after a reset.
Wi-Fi passwords with unusual special characters (ampersands, angle brackets, quotation marks) sometimes cause the Arlo app to choke during the credential handshake. If your password includes characters like these and setup keeps failing, try temporarily changing your Wi-Fi password to something with only letters and numbers. Complete the Arlo setup, then change it back.
One easy thing to overlook: Bluetooth. The Arlo Secure app uses Bluetooth during initial pairing to communicate with the camera before Wi-Fi kicks in. If Bluetooth is turned off on your phone, the app can’t find the camera. Check your phone’s settings and make sure Bluetooth is on before starting setup.
Frequently Asked Questions
Does the Arlo Essential camera need a SmartHub?
No. The Arlo Essential connects directly to your home Wi-Fi router on the 2.4 GHz band. A SmartHub isn’t included and isn’t required. That’s one of the big differences between the Essential line and the Pro or Ultra series, which do need a SmartHub. The direct Wi-Fi connection makes setup simpler and means one fewer device plugged into your router.
How long does the Arlo Essential battery last?
The standard Arlo Essential 2nd Gen lasts up to 4 months on a single charge with typical use. The XL model roughly doubles that to about 8 months. Real-world battery life depends on how many motion events the camera records daily, how often you pull up live view, and the temperature outside. Cold weather takes a noticeable toll on battery life. If the camera records 20 or more clips per day, expect it to drain faster than Arlo’s official estimates.
Can Arlo Essential camera work without a subscription?
Yes, but with some limitations. Without a paid Arlo Secure subscription, you get live view, two-way audio, and basic motion alerts. You won’t get cloud recording, activity zones, or smart notifications that tell you whether it was a person, vehicle, animal, or package. If you miss a motion alert on the free plan, there’s no saved clip to go back and watch.
Is the Arlo Essential camera weatherproof?
The outdoor models (2nd Gen and XL) have an IP65 weather resistance rating. They can handle rain, snow, dust, and direct sun. The operating temperature range is -4F to 113F (-20C to 45C). The Arlo Essential Indoor Camera is not weatherproofed and should only be used inside.
Can I use Arlo Essential camera indoors?
Yes. The outdoor Arlo Essential models work fine indoors. Just turn off the infrared night vision LEDs in the app if you put the camera near a window, because the infrared light reflects off glass and washes out the image. Arlo also sells a dedicated Essential Indoor Camera that plugs into a wall outlet for continuous power and has a smaller profile suited for shelf or table placement.
How many Arlo cameras can I connect to one account?
Adding entry alerts? Check our best door sensors for Alexa.
For a full comparison of the two biggest smart home ecosystems, check our Google Home vs Alexa guide.
A single Arlo account supports up to 25 cameras. But your router and internet bandwidth become the practical limit before you reach 25. Each camera needs roughly 2 Mbps of upload bandwidth for reliable cloud recording. Five cameras need 10 Mbps upload at minimum. Check your internet plan’s upload speed and your router’s device capacity before adding cameras beyond what your network can comfortably handle.