When you purchase through links on our site, we may earn an affiliate commission. Here’s how it works.
Nikon D5300 DSLR is one of the most sought-after DSLRs on the market.
After exploring the intricacies of Live View autofocusing on your Nikon D5300, follow these steps to utilize this feature effectively.
Steps for Autofocus in Live View Shooting on Nikon D5300 DSLR Are As Follows:
1. Select the Focus mode and AF-area mode.
Ensure both settings are adjusted via the control strip displayed on the camera’s screen upon pressing the ‘i’ button.
Not all settings are available in specific exposure modes. The autofocus system becomes more responsive in AF-F mode, actively tracking the focus point.
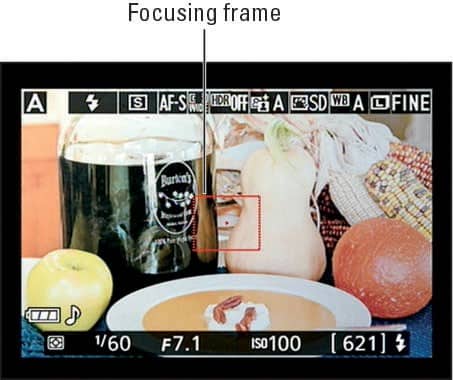
2. Frame your subject in Live View for autofocus on the Nikon D5300 DSLR.
In the Wide Area or Normal Area, the frame appears red. If a face is detected, the focus frame prioritizes the closest person, indicating their face with a bracket.
3. If the camera does not focus on a face, it displays a red frame, similar to long-range shots.
In AF-F mode, the frame turns green when the subject is in focus. The frame color changes with each reset by the user.
4. Adjust the frame using the multi-selector tool to move up, down, right, or left, ensuring your subject is perfectly framed.
The face-priority mode employs a double-lined yellow focusing frame to focus on the intended subject, ensuring precise accuracy.
Press’ OK’ in Wide Area and Normal Area modes to center the focus point.
5. In Subject Tracking AF-Area mode, press the OK button to initiate focus tracking.
Subjects, especially people, may move, requiring you to halt tracking and reframe when they re-enter the scene.
Press OK once to stop tracking, and press it again to resume after correctly reframing.
6. In AF-S Focus mode, initiate autofocusing by pressing the shutter button halfway until the focus frame turns green, indicating a successful focus adjustment.
The frame’s appearance varies with the AF-Area mode, and different focus modes yield distinct outcomes.
In AF-S mode, a beep sound (if not disabled) signifies that the focus is locked. To disable the beep, navigate to the Shooting/Display options in the Custom Setting menu.
In AF-F mode, the focus adjusts to the subject’s movements. If focus is lost, the frame may turn red, yellow, or white until it becomes green and stops blinking, indicating successful subject identification.
Maintain half-press on the shutter button to lock focus.
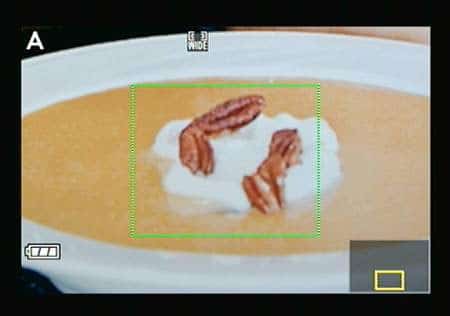
7. Verify focus accuracy by pressing the zoom button to magnify the target image.
Each press zooms in for a closer look, with a small thumbnail and a yellow highlight box indicating the viewed image section.
Press the zoom-out button to return to the standard image size, readying your Nikon D5300 DSLR for autofocus in live view shooting.
See Also