
How to Fine-Tune White Balance Settings on the Nikon D5300
The white balance on Nikon D5300 is a feature that can make a real difference in the accuracy of your photos’ colors. The D5300 is a popular DX-format DSLR with a 24.2-megapixel sensor and F-mount lens system. It also offers Full HD video recording, 5 fps continuous shooting, and built-in Wi-Fi and GPS.
One of its standout features is the ability to fine-tune white balance beyond the standard presets. This means you can dial in exactly the right color tone for your shooting environment, whether you’re dealing with warm tungsten lighting or cool daylight. Here’s how to do it.
Open the Shooting Menu
To get started on your Nikon D5300:
- Press the Menu button on the back of the camera.
- This opens a list of all available menus and settings.
- Scroll through the options until you find the Shooting Menu (it has a camera icon).
- Select the Shooting Menu to continue.
Find the White Balance Option
Inside the Shooting Menu, you’ll see several options for controlling how your images are captured.
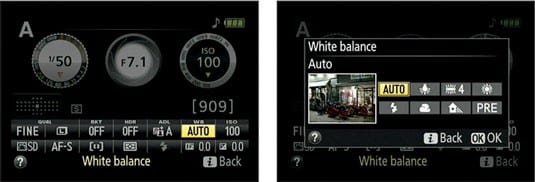
- Scroll down to find the White Balance setting.
- It will highlight as you scroll over it.
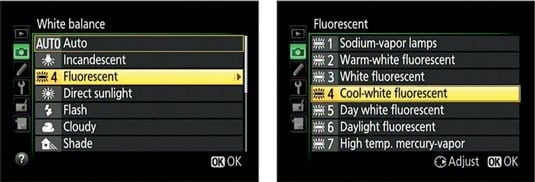
- Press OK to open the White Balance settings.
Access the Fine-Tune Screen
Once you’re in the White Balance menu on your Nikon D5300, you’ll see the standard presets (Auto, Daylight, Cloudy, Shade, and others). To fine-tune any of these:
- Highlight the white balance preset you want to adjust.
- Press the multi-selector to the right.
- This opens the fine-tuning adjustment screen.
Adjust the Color Grid
You’ll now see a color grid with two axes of adjustment:
- Green to Magenta (vertical axis)
- Blue to Amber (horizontal axis)
Use the multi-selector to move the marker across the grid. Each step shifts the white balance slightly in that direction. This gives you precise control over color shifts in your photos.
Confirm Your Adjustment
- Once you’re happy with the position of the marker, press OK to save your setting.
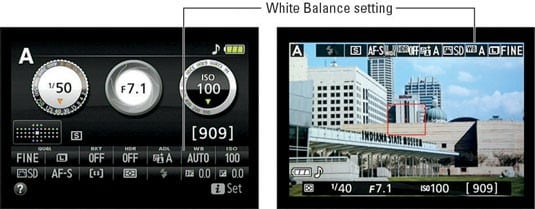
- An asterisk (*) will appear beside the white balance icon on the display, letting you know that fine-tuning is active.
Creating a Custom White Balance Preset
Beyond fine-tuning the built-in presets, the D5300 also lets you create a custom white balance using the PRE option. This is especially useful when you’re shooting under mixed or unusual lighting.
To create a custom preset:
- Select PRE (Preset Manual) from the white balance menu.
- Point the camera at a white or neutral gray surface under the same lighting you’ll be shooting in.
- The camera measures the light and creates a custom white balance based on what it sees.
This method gives you the most accurate color reproduction for any specific lighting situation.
When Should You Fine-Tune White Balance?
White balance is one of the first things to adjust for color accuracy. Here are some situations where fine-tuning helps:
- Indoor events with warm overhead lighting that the Auto setting doesn’t fully correct.
- Outdoor shoots during golden hour when you want to keep some warmth but not too much.
- Product photography where color accuracy is critical for matching real-life appearance.
- Mixed lighting scenarios (like a room with both window light and fluorescent bulbs).
Getting the white balance on Nikon D5300 right at the time of shooting saves you time in post-processing and gives you better-looking images straight out of the camera.