When you purchase through links on our site, we may earn an affiliate commission. Here’s how it works.
Nikon Z7 Portrait Photography Settings
Getting the most out of your Nikon Z7 Portrait Photography settings takes some hands-on tweaking, but the results are worth it. The Z7 is a 45.7-megapixel full-frame mirrorless camera with 5-axis in-body image stabilization (IBIS), a native ISO of 64, and Eye-Detection AF. That’s a powerful combination for portrait work. But the default settings aren’t optimized for portraits right out of the box.
This guide walks you through five steps to configure your Nikon Z7 specifically for portrait photography. You’ll adjust the mode dial, save custom user settings, dial in ISO sensitivity, fine-tune focus modes, and set up face and eye detection. If you pair the Z7 with a good portrait lens that offers optical image stabilization with up to 5 stops, you’ll have a setup that delivers sharp, professional portraits consistently.
Portrait Pictures Taken By Nikon Z7
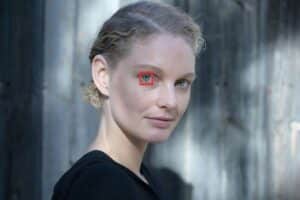
Nikon Z7 Portrait Photography settings
Setting Up Your Nikon Z7 for Portrait Photography
Step 1. Locating the Camera Mode Dial
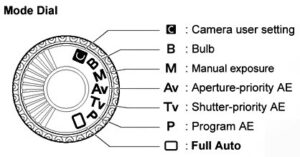
Nikon Z7 Portrait Photography settings – mode dial
On the top-left corner of the Nikon Z7, you’ll find the PASM mode dial. There’s a lock button right beside it to prevent accidental changes. The dial gives you access to the standard shooting modes: Aperture Priority (A), Shutter Priority (S), Program (P), and Manual (M).
Beyond those, you’ll also see U1, U2, and U3 positions. These are user-configurable presets, and U2 is a great slot to dedicate to your Nikon Z7 portrait photography setup. You can customize every setting, save it to U2, and switch to it instantly whenever you need to shoot portraits.
For portrait work, start in Aperture Priority mode. This lets you control depth of field directly while the camera handles shutter speed. Set your aperture between f/1.8 and f/4 depending on how blurred you want the background. Once you’re happy with the setup, save it to U2 so you can recall it on the fly.
Step 2. Modifying U2 Settings
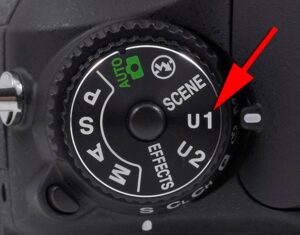
Nikon Z7 Portrait Photography settings – U2 settings
Saving your settings to U2 is straightforward. First, configure all the settings you want (aperture, ISO, focus mode, AF area, etc.). Then go to the Setup Menu (the wrench icon). Navigate to “Save User Settings,” select U2, and hit “Save Settings.”
Here’s something to keep in mind: the Z7 saves whatever settings are active at the moment you save. If you make changes while shooting in U2 mode, those changes are temporary. The camera reverts to your saved U2 settings every time you power cycle. So make sure you’ve got everything dialed in before you save, and re-save if you decide to make permanent adjustments.
This is actually a nice safety net. You can experiment freely during a shoot, knowing that turning the camera off and on again brings you back to your saved baseline.
Step 3. Switching On ISO Sensitivity Settings
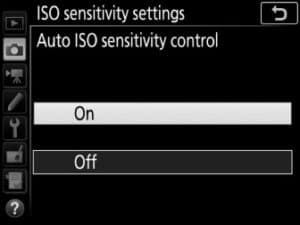
Nikon Z7 Portrait Photography settings – ISO
The Z7’s native ISO starts at 64, which is unusually low and great for portrait photography in good light. It gives you maximum dynamic range and the cleanest possible files from that 45.7MP sensor.
For Nikon Z7 portrait photography in daylight, set your base ISO to 64. Then turn on Auto ISO Sensitivity Control. This is a powerful feature – it lets the camera bump up the ISO automatically as lighting conditions change, so you don’t have to constantly adjust it yourself.
Set the maximum ISO sensitivity to 6400. The Z7 handles noise well up to this point, and keeping a ceiling prevents the camera from pushing too high in dim conditions. The auto-ISO system means you can focus on composition and your subject’s expressions rather than worrying about exposure. Set the minimum shutter speed to Auto, and the camera will balance everything for you.
If you’re shooting in a studio with controlled lighting, you can skip Auto ISO and just lock in ISO 64 for the cleanest possible files.
Step 4. Other Settings under the Photo Shooting Menu
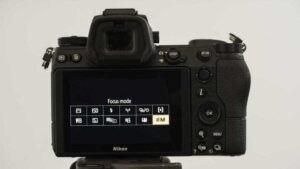
Nikon Z7 Portrait Photography settings – other settings
The default focus mode on the Z7 is AF-S (Single Servo AF). That’s fine for subjects who are standing still, but portraits often involve movement – people shifting weight, turning their heads, leaning in.
If your subject is stationary, AF-S works well. But for Nikon Z7 portrait photography with moving subjects, switch to AF-C (Continuous Servo AF). In AF-C mode, when you half-press the shutter button, the camera continuously adjusts focus to follow your subject’s movement. This is especially helpful for candid or environmental portraits.
Set the AF Area Mode to Single-Point AF for precise control. This lets you place the focus point exactly where you want it – typically on the subject’s near eye. The tight focus area also helps produce a clean separation between your subject and the background blur.
Make sure Vibration Reduction is turned on if your lens supports it. Also enable Flicker Reduction in the shooting menu. Flicker reduction helps when shooting under artificial lighting (like fluorescent or LED), preventing uneven exposure bands across your frames.
Step 5. Changing the Custom Setting Menu
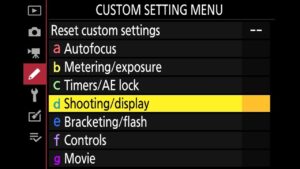
Nikon Z7 Portrait Photography settings – custom setting menu
The Custom Setting Menu has a few options that make a big difference for portrait photography.
First, turn on Auto-Area Face/Eye Detection. This is one of the Z7’s standout features. The camera detects faces in the frame and locks focus on the nearest eye. For group portraits, it picks up multiple faces. For single subjects, it tracks their eye even as they move around the frame. In busy or cluttered backgrounds, this feature helps the camera ignore distractions and stay locked on your subject’s face.
Next, set the shutter type to Mechanical. The mechanical shutter avoids the rolling shutter artifacts that the electronic shutter can introduce with fast-moving subjects. It also gives you flash sync capability, which matters if you’re using off-camera lighting for portraits.
Turn on the AF-Assist Illuminator. In darker environments, this small light on the front of the camera body helps the autofocus system lock on to your subject. It’s not bright enough to bother your subject, but it makes a noticeable difference in low-light AF accuracy.
Finally, keep Exposure Delay Mode off. It’s useful for landscape work on a tripod, but for portraits, the delay between pressing the shutter and the shot firing will cause you to miss fleeting expressions.
Wrapping Up
With these five steps, your Nikon Z7 is set up and ready for portrait work. The combination of a 45.7MP sensor, native ISO 64, and Eye-Detection AF gives you a camera that’s well-suited to capturing sharp, detailed portraits. Take a few test shots to make sure everything feels right, and then get shooting. The more you practice with these Nikon Z7 portrait photography settings, the more natural the workflow becomes.
