Adjusting Nikon D90 Portrait Settings
Getting great portrait shots with the Nikon D90 takes more than pointing and clicking. Good Nikon D90 portrait settings are all about keeping your subject sharp while softening the background into a smooth, creamy blur. Here’s a step-by-step walkthrough of the settings you’ll want to use.
How to Shoot Still Portraits With Nikon D90
Step 1: Setting the Mode Dial
Nikon D90 portrait settings mode dialTurn your D90’s mode dial to A (Aperture Priority Auto Exposure). Pick the lowest f-stop number your lens allows to get the most background blur possible. The more distance between your subject and whatever is behind them, the stronger that blur effect will be. If you’re not comfortable shooting in Aperture Priority, you can switch to the Portrait scene mode instead.
Step 2: Zoom In
Zooming in on your subject reduces the depth of field, which makes the background even softer. Stay away from very short focal lengths for portraits. Wide-angle lenses at close range tend to distort facial features, making noses look bigger and faces look rounder than they really are.
For a different take, see our guide on celebrity portraits.
Step 3: Keep the Flash Off for Indoor Portraits
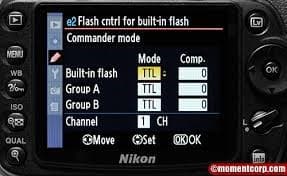
For indoor portraits, turning off the flash usually gives you softer, more flattering light and helps avoid red-eye. In Aperture Priority mode, just close the built-in flash unit. In Portrait mode, press and hold the flash button while rotating the main command dial to the off position.
Step 4: Turn the Flash On for Outdoor Portraits
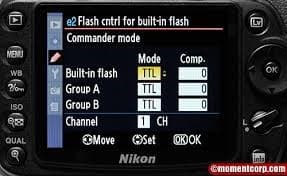
Outdoors, a little fill flash can brighten your subject’s face, especially in harsh sunlight where shadows fall under the eyes and chin. In Aperture Priority mode, press the flash button to pop it up. In Portrait mode, use the fill flash setting. For evening or nighttime portraits, try slow sync mode or the red-eye reduction setting.
If you want to go deeper, we have a separate guide on Canon g7x mark iii portrait.
Step 5: Focusing and Exposure Metering
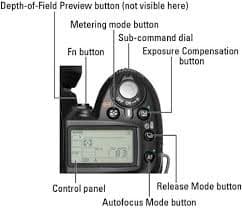
Half-press the shutter button to lock autofocus and set the exposure. Make sure the active autofocus point sits on your subject’s face, ideally on the eyes. If the autofocus isn’t landing where you want it, switch your lens to manual focus and dial it in yourself.
Step 6: Take the Shot

Once everything looks good in the viewfinder, press the shutter button all the way down. The D90 does a great job with portraits when you nail the settings, giving you sharp subjects against that trademark blurred background that makes portraits pop.