When you purchase through links on our site, we may earn an affiliate commission. Here’s how it works.
How to Adjust Nikon D7500 Portrait Settings
The Nikon D7500’s 20.9 MP CMOS sensor frames flawless pictures. Its cropped sensor adjusts the lens focal length from DX to the equivalent 35mm full-frame focal length. The camera’s advanced white balance and wide sensitivity range facilitate stunning portrait photography.
Compared to the Canon EOS Rebel T5i, the D7500 offers a higher resolution, more AF points, and the capability to shoot 1080/60p video, unlike the Rebel T5i’s 1080/30p.
Understanding the Nikon D7500’s features is essential for mastering portrait photography. Here are some tips to help you do so.
Portrait Photography Settings on Nikon D7500: How to Shoot Portrait Using Nikon D7500
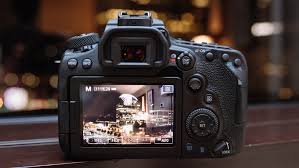
Step 1. Articulating Touch Screen Monitor
The Nikon D7500’s 3.2” high-resolution (922K-dot) tilting touch-screen LCD Monitor allows easy navigation and customization. It supports text entry via an on-screen keyboard, Spot White Balance selection, and autofocus area selection during Live View. The touch screen simplifies image review and navigation.
Step 2. Group Area AF
Group Area AF focuses on the subject using a selected group of focus points, ideal for challenging subjects. The Nikon D7500 utilizes five AF Points in a cross-shaped pattern to ensure focus on the subject rather than the background.
Step 3. Electronic Front Curtain Shutter
Activate the Electronic Front Curtain Shutter via Custom Setting D4 to reduce camera shake and blur in portraits and macro photography. Use it with Mirror Up (Mup) Release Mode for optimal results.
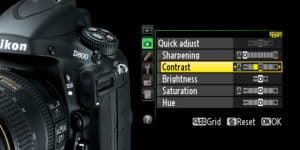
Step 4. Picture Controls
The Auto Picture Control lets the camera choose the best settings. Videographers favor the flat picture control for its post-processing flexibility. Picture Control also includes a Clarity Parameter and Brightness adjustment for detailed customization.
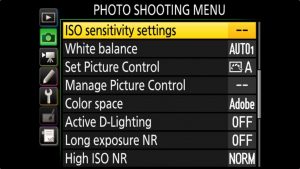
Step 5. White Balance Improvements

Nikon D7500 Portrait Settings – White Balance
The Nikon D7500 offers two White Balance settings with ‘Keep warm’ and ‘Normal Lighting colors’ options to enhance outdoor portraits with a warm glow. It supports up to six Preset (PRE) White Balance settings and Live View Spot White Balance measurement.
The Nikon D7500 is a top choice for portrait photography. By experimenting with these settings, you can capture perfect portraits.
See Also