When you purchase through links on our site, we may earn an affiliate commission. Here’s how it works.
How to connect the Canon t6i to the computer to upload photos?
The All-new Canon t6i has recently made its way into the elite list of best entry-level DSLRs and we can certainly give credit to its superb performance and stunning features for the same.
While sporting a 24MP sensor and DIGIC 6 processor, the camera also brings along a vari-angle screen and built-in wifi and NFC.
Now, once you have captured some amazing shots with your Canon t6i, you might want to edit or store those images on your computer.
So, before you go ahead and do this, you must first learn about ‘how to connect Canon t6i to computer’. Speaking of establishing a connection with the computer, you can do it either via WIFI or a USB cable.
Steps to connect Canon t6i to computer via USB
Before getting along with the rest of the process, you first require a USB cable to connect the Canon t6i to the computer.
Now, this is where you have to buy a high-quality USB cable that doesn’t let you lose any data during the connection or transfer process.
Step 1. Turn on the Computer and the Camera
You have to ensure that the camera is switched off as all the previous activities need to be closed before establishing a fresh connection with the computer.
Once confirmed, you can now switch on both the Camera and the computer.
Step 2. Connect the USB cable to the camera and the computer
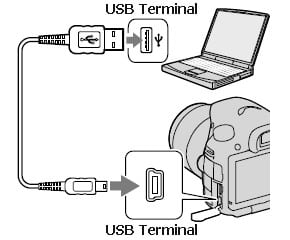
How to connect Canon t6i to computer – USB cable
Once the devices are switched ‘On’, you now need to insert both ends of the USB cable into the respective ports in the Camera and the Computer.
After the connection has been established, wait for your computer to identify the camera as a storage device.
Step 3.
You are good to go with the image transfers.
Once the Computer has recognized the Canon t6i as a storage device, you can now open the camera device on your computer and start transferring your favorite images and videos.
Please ensure that the camera is connected to a power source as the image transfer process might take some time and this would further make the battery drain fast.

How to connect Canon t6i to computer – upload
Steps to connect Canon t6i to computer via wifi
Step 1. Downloading the EOS utility software on the computer
Now you don’t need to switch off the camera like you were supposed to do in case of connecting Canon t6i to the computer via USB.
Still, do ensure that the camera is connected to a power source in case the battery is low.
Once done, you are now required to install the EOS Utility software on your computer (refer to Canon’s official website for the download link).
How to connect Canon t6i to computer – Canon EOS Utility
Step 2. Enabling the wifi option in Camera
To set up the wifi function in your Canon t6i, you simply need to first go to Setup Menu 3 in the main menu settings and then set the wifi option to ‘Enable’.
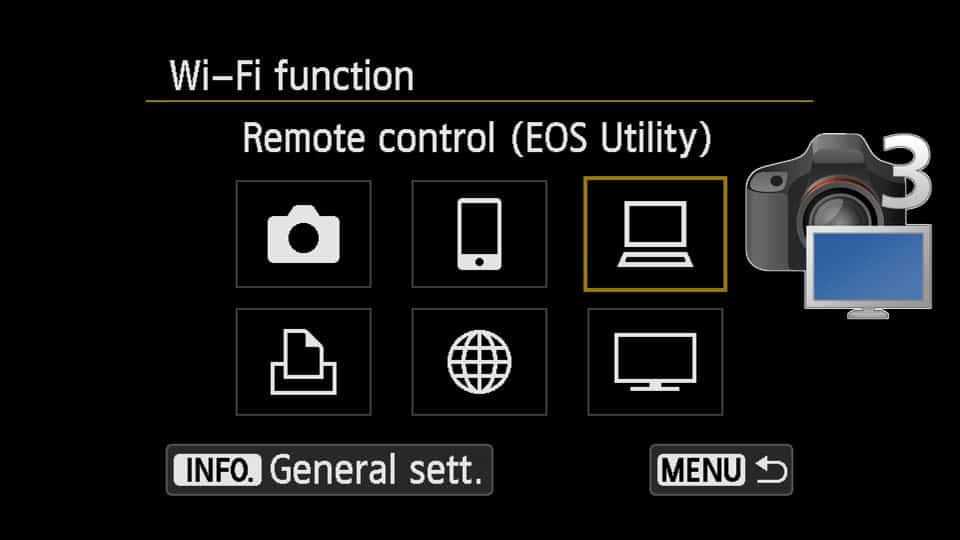
Right below the same, you can locate a ‘wifi function’ option from where you can select the option that signifies a PC.

How to connect Canon t6i to computer – enable wifi option
Step 3. Select EOS utility as the type of connection
Once you have enabled the wifi connection in your camera, you are now required to initiate the wifi pairing by choosing the EOS utility as the type of connection.
Once done, you now need to follow the given steps on the camera menu to rightly configure the network settings.
At the end of the same process, the Canon t6i would prompt you to initiate the pairing on the computer. Now, this is where you have to run the EOS utility software on your computer.
How to connect Canon t6i to computer – select EOS utility as the connection type
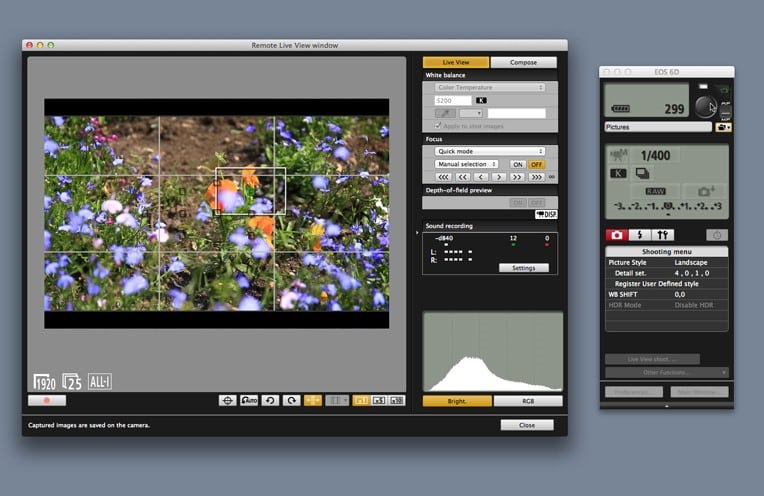
Step 4. Running the EOS utility launcher
Canon has recently added a Canon utility launcher in the latest EOS utility software that will start right away once the EOS utility software detects ‘No camera connected to the computer via USB’.
The software automatically assumes that as there are no active connections via USB, a wifi connection can be established between the computer and the camera.
Simply click the ‘Pairing over wifi/LAN’ to let the computer show any camera device that is detected on the network during the wifi pairing setup.
You will now get a dialog box that will ask you to select your Canon t6i on the network.

How to connect Canon t6i to computer – EOS utility launcher
Step 5. Establishing the connection between the Camera and the Computer
Once you have selected the right camera to connect Canon t6i to the computer, you simply have to click ‘Connect’.
The computer will now prompt a message on the screen while asking you to check the instructions on your camera.
You can now find some new settings and instructions on your camera’s LCD and this means that your camera is successfully paired with the computer.
So now that you have a better idea regarding ‘ how to connect Canon t6i to computer’, start sharing, storing, or editing your favorite images or videos without any issues.
See Also