Nikon D5600 Wedding Photography Settings
There’s an old saying that a great photographer can take breathtaking pictures with any camera. That’s true to a point, but if you’re still building your skills, having the right Nikon D5600 wedding photography settings gives you a real advantage on the big day.
Wedding photography is one of the toughest gigs out there. You can’t ask the couple to redo the first kiss or re-walk the aisle. Every moment is one-take, and your settings need to be ready before it happens.
The good news? The Nikon D5600 is a solid camera for wedding work. Here are the settings for Nikon D5600 wedding photography that’ll help you nail the shots.
Recommended Settings for Nikon D5600 Wedding Photography
Step 1. Getting the Key Manual Settings Right
Auto mode can get the job done in a pinch, but switching to manual control gives you much better results at weddings. Two modes to focus on: shutter priority and aperture priority.
Shutter Priority Mode
Set your shutter speed to 1/500th of a second for the big moments, like the couple’s first look, the ring exchange, or the kiss. For more relaxed scenes like the walk-around or laughter during toasts, you can lower the speed a bit.
Aperture Priority Mode
Interested in this area? We go deeper in our Nikon D7500 wedding photography guide.
Your aperture setting depends on the shot. For couple portraits, stick between f/1.4 and f/2.8. This creates that soft, dreamy background blur that clients love. For wider shots of the venue or large group photos, bump the aperture value higher.
Step 2. Getting the Right Depth of Field
This is what separates experienced wedding photographers from beginners. When clients talk about wanting that “dreamy, magical” feel in their photos, they’re describing shallow depth of field.
To get it on the Nikon D5600, use a low f-stop number. This softens the background and foreground while keeping your subject tack-sharp. It draws the viewer’s eye right where you want it.
Step 3. Adjusting the ISO Sensitivity
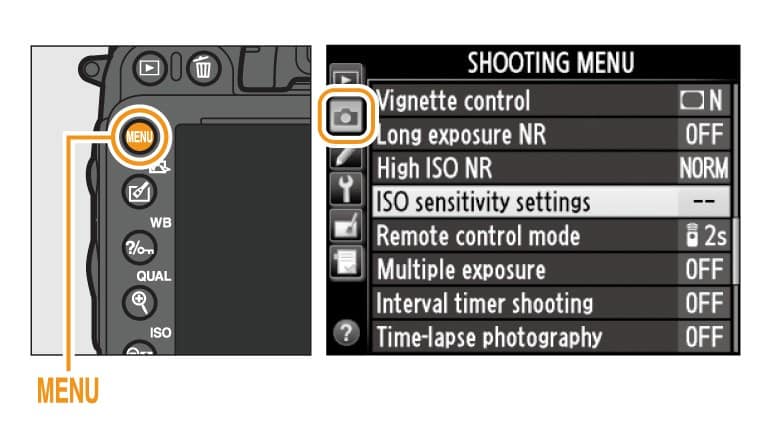
ISO depends on the lighting at the venue. For dimly lit receptions or indoor ceremonies, set ISO between 400 and 1600. If the wedding is in a well-lit space or outdoors during the day, ISO 400 will carry you through most of the shoot.
Keep in mind that lower ISO means less grain in your images. Only push it higher when you genuinely need the extra light sensitivity.
For the complete picture, our Nikon D5600 portrait photography settings guide fills in the gaps.
Step 4. Use Flash
You can’t shoot a wedding without flash, especially in reception halls or churches with low lighting. The Nikon D5600 has a built-in flash and a hot shoe mount for an external unit.
An external flash gives you more power and flexibility, like the ability to bounce light off ceilings for softer illumination. Before buying one, check that it’s compatible with your D5600.
Step 5. Other Accessories
Beyond the camera body, pack the gear that’ll keep you covered for any situation.
Tripod
A tripod keeps your camera steady during ceremonies, group shots, or any time you’re stuck in one spot. When space is tight at a wedding venue, stability from a tripod can save a shot.
Lenses
The right lens makes a bigger difference than most beginners realize. A quality zoom lens lets you capture tight portraits from across the room and wide venue shots without swapping gear.
For Nikon D5600 wedding photography, these lenses are worth considering. Check out this list of the best Nikon lenses for wedding photography.
- Nikon 24-70mm f/2.8G
- Nikon 35mm f/1.4G
- Nikon 50mm f/1.8G
- Nikon 58mm f/1.4G
- Nikon 70-200mm f/2.8E FL VR
- Nikon 85mm f/1.4G
- Nikon 105mm f/1.4E
- Nikon 105mm f/2.8G VR Micro