Arlo has put a lot of work into keeping their cameras secure from outside threats. But no connected device is completely bulletproof. If your camera talks to the internet over WiFi, there’s always some risk that someone could try to intercept that connection.
The company says their cameras are built to resist hacking and snooping. That’s mostly true, but here’s the thing: the base station communicates with your cameras over WiFi, and that wireless link can be a weak point. Even if the camera hardware itself is locked down, the data traveling between devices might be vulnerable if you haven’t set things up properly.
It’s also worth keeping in mind that a secure device doesn’t automatically mean the data it sends is safe. The camera might be locked tight, but if the connection between the camera and your WiFi access point isn’t properly secured, that data could be exposed.
Let’s walk through the most common ways hackers go after Arlo cameras, and what you can do to shut them out.
How to Protect Your Arlo Cameras From Hackers
Step 1. Change the Default Password
This is the easiest way someone can get into your Arlo camera, and it’s also the easiest to prevent. If your camera is still running with the factory password, you’re practically leaving the front door open.
How hackers exploit default passwords on surveillance cameras
Here’s how it usually works. An attacker finds the camera’s IP address, then pulls up the login page for your camera brand. From there, they run a password tool loaded with lists of common default passwords (sometimes called “dictionaries”) until one works.
The reason this method succeeds so often? Plenty of Arlo owners never bother changing the default password that came with the camera. It takes less than a minute to change it, and it blocks this entire category of attack.
Knowing how this works puts you in a better position to protect your system from the start.
When choosing a new password, make it at least 12 characters long. Mix uppercase letters, lowercase letters, numbers, and symbols. Avoid anything related to your name, address, or birthday. A password manager can generate and store strong passwords so you don’t have to memorize them all.
Step 2. Change Your Default User ID
Hackers don’t just go after passwords. They also try to guess the default user ID, which many people leave unchanged after setup.
Once they have the user ID, they can potentially access your entire security system and even reset your account. Change the default user ID on your security cameras as soon as you set them up.
Security researchers have pointed out that once someone has your user ID, getting to your phone numbers, email addresses, and other personal information becomes much easier.
The default user ID is often something generic like “admin” or “user.” Change it to something unique that can’t be easily guessed. This simple step eliminates one of the two pieces of information an attacker needs to log into your system.
Step 3. Enable Two-Factor Authentication
Two-factor authentication (2FA) adds a second layer of security on top of your password. Even if someone cracks your login credentials, they still can’t get in without the second verification step.
Arlo supports 2FA through the Arlo app. Once enabled, you’ll receive a verification code via text message or email every time someone tries to log in. If the code doesn’t match, the login gets blocked.
Turning on 2FA takes about two minutes in the app settings and makes your account dramatically harder to break into. It’s one of the most effective security steps you can take, and there’s no good reason to skip it.
Step 4. Keep Your Firmware Updated
Skipping firmware updates is like ignoring a recall notice on your car. Old firmware means old security holes, and hackers know exactly how to find and exploit them through command line access.
Not long ago, a major security camera manufacturer discovered flaws in their own devices. They patched the issue quickly, but the incident showed how important it is to stay current. Always keep your firmware up to date.
Arlo pushes firmware updates automatically through the app, but you should still check manually from time to time. Open the Arlo app, go to Settings, then Device Info, and look for any pending updates. If an update is available, install it right away.
Firmware updates don’t just fix security holes. They also improve camera performance, add new features, and fix bugs that might be affecting video quality or connectivity.
Step 5. Lock Down Your WiFi Network
If a hacker can’t get into your camera directly, the next move is going after your WiFi network instead.
Your cameras and the network constantly exchange data over WiFi. If someone breaks into your wireless network, they can intercept that traffic. Securing remote access to your Wi-Fi is a must if you want to keep the whole system safe.
Here are the key steps to locking down your network:
Use WPA3 encryption. If your router supports it, WPA3 is the strongest wireless encryption standard available in 2026. If your router only supports WPA2, that’s still acceptable, but avoid WEP at all costs. WEP can be cracked in minutes.
Change your router’s default admin password. Just like your Arlo camera, your router comes with a factory password. Change it immediately.
Create a separate network for your smart home devices. Most modern routers let you set up a guest network or VLAN. Put your cameras, smart speakers, and other IoT devices on this separate network. That way, even if one device gets compromised, the attacker can’t jump to your personal computers and phones.
Disable WPS (Wi-Fi Protected Setup). WPS makes connecting devices easier, but it also creates a security hole that’s well documented and easy to exploit.
Turn off remote management on your router. Unless you have a specific reason to manage your router from outside your home network, keep this turned off.
Step 6. Monitor Your Camera Activity Logs
The Arlo app keeps a log of account activity, including logins, setting changes, and device additions. Check this log every few weeks. If you see logins from unfamiliar locations or at odd hours, that’s a sign someone else might have access to your account.
You can also set up email notifications for new logins. If you get an alert about a login you didn’t make, change your password immediately and review your 2FA settings.
Step 7. Physical Security Matters Too
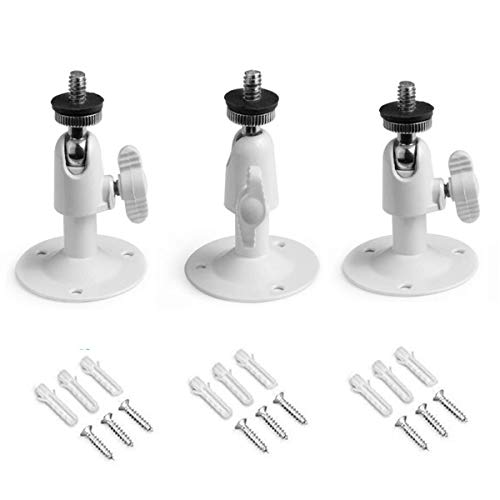
Don’t forget about the physical side of things. Mount your outdoor cameras high enough that someone can’t easily reach them and tamper with the hardware. If a camera is within arm’s reach from the ground, a determined intruder could simply cover the lens, disconnect the power, or steal the camera entirely.
Use tamper-resistant screws if your mount supports them. Some third-party mounts include anti-theft brackets that make it much harder to remove the camera without the right tools.
The Bottom Line on Protecting Arlo Cameras From Hacking
Hacking is illegal, and there are serious consequences for anyone who tries it. The tips above should serve as a wake-up call for Arlo camera owners to take extra care when setting up user IDs and passwords for their security cameras.
The good news is that Arlo takes security seriously and continues to improve their encryption and authentication systems. By following the steps outlined here, changing default credentials, enabling 2FA, keeping firmware updated, and securing your WiFi network, you make it extremely difficult for anyone to compromise your cameras.
Security is never a one-time setup. It’s something you maintain over time. Review your settings every few months, stay on top of updates, and keep an eye on your activity logs.
See Also