When you purchase through links on our site, we may earn an affiliate commission. Here’s how it works.
How to Setup Orbi Router? – Overview
If you are looking for a fast, reliable, and robust WiFi network, then Netgear’s Orbi WiFi system is the best solution for you. Unlike an ordinary WiFi extender, an Orbi WiFi system gives you stable connectivity.
It works alongside your existing modem or can replace your existing WiFi router, connecting directly to your modem to provide a mesh WiFi network. As a result, you will get faster and more powerful connectivity.
Today, we are going to show you the setup procedure of Orbi’s WiFi system, i.e., the main router and the Satellite. If you have purchased the Orbi Router, then the following step-by-step tutorial will help you to set up and sync the router easily.
What is an Orbi Router?
The Orbi is an advanced mesh Wi-Fi system designed to provide seamless internet connectivity across your home, suitable for users requiring high-speed Internet. Netgear’s Orbi Router can be purchased as a single router or with the system per your requirements.
Opting for a multi-pack Orbi system, such as a 3-pack, can enhance coverage across larger homes, providing a uniform and reliable connection.
The setup involves configuring the primary Orbi router and adding Orbi satellites (not other routers) to extend the Wi-Fi coverage. You can expand your network by adding Orbi satellites to enhance coverage and ensure smooth, high-speed connectivity.
One of the key benefits of the Orbi system is its straightforward installation process and its ability to deliver consistent, high-speed internet connectivity without interruptions. If you love to watch movies and TV Shows on your Television, then Orbi Router is a must-have thing to get a smooth streaming experience.
If you are curious to know how to set up an Orbi Router, then here we have prepared a detailed tutorial for you. Follow the guidelines to set up the Orbi Router quickly.
3 Easy Steps to Setup Orbi Router
Note: The Orbi system can be configured using any device with a web browser or through the Orbi app available on iOS and Android devices. You can also use the web browser to set up the Orbi Router with your home’s Wi-Fi system.
The setup procedure is quite easy, all you have to do is just follow the below-given steps wisely. You can also use the official Orbi app to set up this WiFi router system.
Out of all the available methods, the Web-browser method is relatively easy as it gives you more options with easy instructions to quickly set up the Router.
Section 1: Setting up the Main Router
1. Unplug the modem and wait for 30 seconds before plugging it back in. This step, often referred to as power cycling, can help ensure a clean start for the setup process but does not always guarantee a new IP address.

How to Setup Orbi Router – Setting up the Main Router
2. Plug the Ethernet cable from the Modem into the Orbi Router’s Ethernet port, i.e., the Yellow-colored port. The Yellow-colored port is available only on the Main Router and not on the Satellite.

How to Setup Orbi Router – Setting up the Main Router – Ports
3. Plug the power cable to the main router using the power adapter. The power cable is given inside the box.
4. Once you connect everything mentioned above, turn on the Power button.
5. Press the Power button, which is given at the backside of the Router. As soon as you press the Power button, the green flashlight will turn on.
6. Once the router is turned on, the white LED flashes on the main Orbi Router.
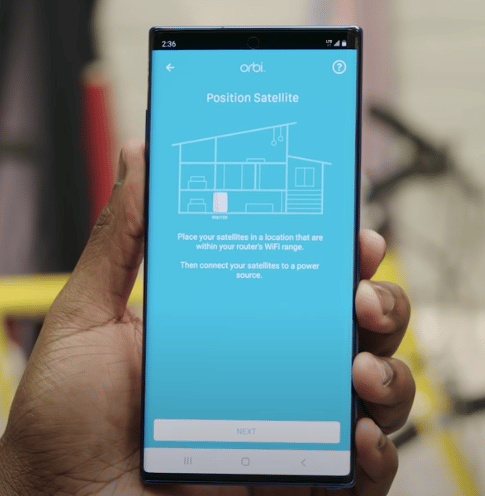
Section 2: Setting up the Satellite
Note: To get the best connectivity, you are requested to install the Satellite in the center area of your home. It gives you faster and more reliable connectivity with no interruptions.
1. Plug the Satellite into a power adapter and turn the power switch on.

How to Setup Orbi Router – Setting up the Satellite – Power adapter
2. After turning on the power switch, press the power button at the Satellite’s backside.
3. As soon as you press the power button, the green light starts flashing.
4. The LED light on the Orbi’s Satellite turns white.
5. The Satellite’s LED flashes three colors in the first three minutes. Here is what each color indicates:
- Solid Blue: A solid blue light on the satellite indicates a strong connection to the main router.
- Amber (Orange): When the LED light of the Satellite turns Amber, it means the WiFi router and the Satellite are synced properly and the connection between these two devices is fair. Amber light suggests you take the Satellite device a bit closer.
- Magenta (Pinkish Purple): A magenta light on the satellite indicates a problem syncing to the main router, requiring troubleshooting.
Refer to the user manual in the box for more information about the light indicators on the main router and the satellite.
Section 3: Setup the Orbi W-Fi Router
In this section, we will set up the Orbi WiFi Router. As noted above, multiple methods are available to set up the WiFi router. You can use the mobile app available to download on App Store for iOS users and Google Play Store for Android users. PC users can use the browser to set up the WiFi router.
1. Launch the web browser or the application. Ensure the web browser or the application is connected to the Orbi Network.
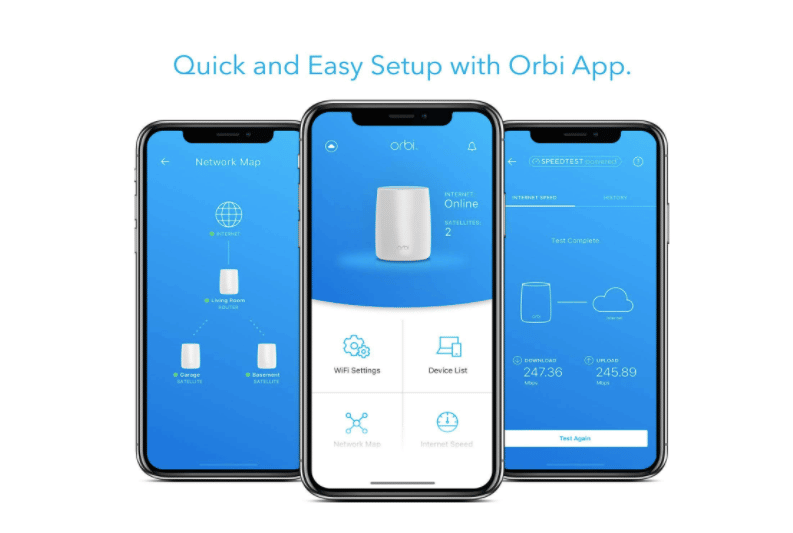
Setup WiFi Router – Step 1
2. Go to orbilogin.com i.e. the official login page of Orbi. A login window will be displayed. Or open the application on your mobile phone.

Setup WiFi Router – step 2
3. In the login window, you must enter the Username and Password. If you do not have an account, you can create a new account from the mobile app easily.
Username: admin
Password: Enter the password that you use while setting up the Router.
4. Select the QR Code option from here and scan the code given at the router’s backside. This makes the setup and configuration process much easier for you.

How to Setup Orbi Router – Setup WiFi Router – step 4
5. Follow the on-page instructions to select the area of the satellite on the page.
Setup Orbi WiFi Router – Step 5
Note: Ensure the Orbi Router is connected to a power source. If the power button is off, turn it on to establish the connection. You can select the Satellite area on the mobile app while configuring the main router.
6. Click the Next button and follow the given instructions. Wait for 3 minutes to complete the setup procedure. The Orbi Router’s light will turn on white.
7. Press the Sync button to sync the Satellite device with the main router. The application will also detect the Satellites connected to the main router. You just need to click the add Satellite option to add new satellites to the router.
Note: Do not turn off the Orbi Router during the setup process. If you turn off the main router, follow the setup procedure again.
Conclusion:
Setting up an Orbi Router is pretty easy, requiring no specific skills.
All you have to do is follow the instructions in the above tutorial and follow the on-page instructions displayed on your screen while setting up the router.
Your Orbi Router and Satellite will be configured automatically. For more information about setting up the main router, you are requested to follow the instructions given in the user manual.
See Also