When you purchase through links on our site, we may earn an affiliate commission. Here’s how it works.
How to Use Canon EOS M50 Manual Focus
How to Use Canon EOS m50 Manual Focus
Knowing how to use Canon EOS M50 Manual Focus is a skill every owner of this camera should pick up. It’s worth getting a solid understanding of the camera’s features and settings before you purchase a Canon M50, and manual focus is one of the most important ones.
The Canon M50 is a great option for anyone looking for a camera with strong features at a reasonable price. It comes with an electronic viewfinder, an LCD touchscreen monitor that swivels to different angles, and the Canon M50 manual focus mode that gives you full control over where the camera focuses.
This camera isn’t just good-looking – it also has a very compact body, making it easy to carry around for all-day shoots or travel photography.
If you are one or want to be become a professional photographer you must check out this manual focus lens for Canon M50
All About Using Manual Focus with Canon M50
Having a great camera is never enough on its own. You need to actually learn how the features work to get the most out of your gear.
Learning how to use the Canon M50 manual focus mode is key if you want to fully experience what this camera can do. Once you get comfortable with manual focus, you’ll be able to pull off shots that autofocus simply can’t handle – things like shooting through glass, focusing in low light, or nailing precise focus for video work. It’ll also help you get smooth 120p footage without the camera hunting for focus mid-shot.
Step 1. MF Peaking Settings
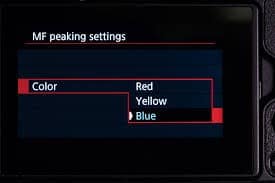
Canon EOS m50 Manual Focus – MF peaking settings
The first thing to do when setting up Canon M50 manual focus is to check your camera settings. Press the Settings button, which is located in the middle of the control dial on the back of the camera. This opens the menu where you’ll configure the focus peaking options that make manual focusing much easier.
Step 2. Go with 4K Recording Mode
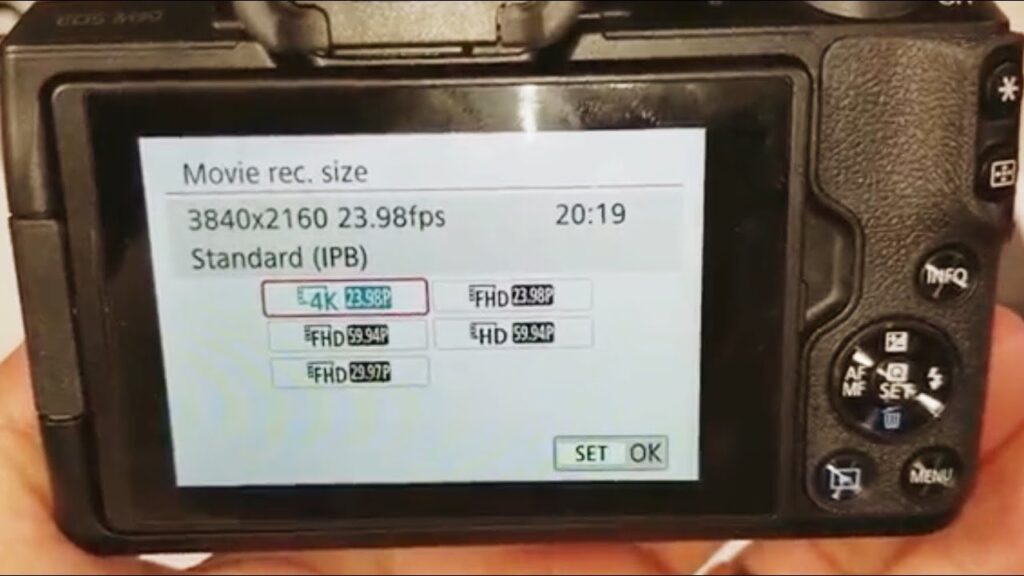
Canon EOS m50 Manual Focus – 4K recording mode
After pressing the settings button, make sure your recording mode is set to 4K. This gives you the sharpest video output the camera can produce.
Next, set your shutter speed to 1/50. Then zoom out the lens to 15mm. This keeps you at an f/3.5 aperture, which is a nice sweet spot for getting good depth of field while still letting in plenty of light.
Step 3. Switch to Manual Focus
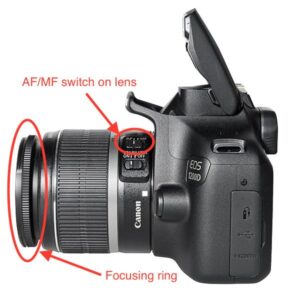
Canon EOS m50 Manual Focus – switch to manual focus
To switch to manual focus, press the left side of the control dial. This toggles the camera from autofocus to Canon M50 manual focus.
At this point, you’ll want to turn on the focus peaking mode. Focus peaking highlights the edges that are in sharp focus, making it way easier to tell what’s sharp and what’s not. Here’s how to set it up:
- Go to the menu.
- Click on the shooting settings and then on MF peaking settings.
- Click on the ‘on’ option for the peaking. Make sure that the level is high.
- Then choose the color you desire. The color red is the most visible among all the options, so it is good for a beginner to choose red. In case your object is red already, such as a strawberry, then you can select blue.
Step 4. Look for the Highlighted Areas
Canon EOS m50 Manual Focus – blue areas
After completing these steps, look at your screen for the colored highlights. The highlighted areas on the screen are what’s currently in focus.
For example, if you’re shooting a red object and chose blue as your peaking color, you’ll see blue outlines appear on the parts of the object that are in sharp focus. As you turn the focus ring, the highlighted areas shift, showing you exactly where your focus plane is. This makes it really easy to nail focus without guessing.
Step 5. Ring and Spin
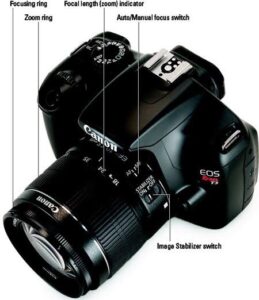
Since the camera is now in manual focus, you have full control over the focus ring on your lens. Spin it however you like to find your focus point.
Setting a shallow focus distance is great for beginners who want that blurry background look. To set a shallow focus distance, spin the ring on the lens to your left as far as it’ll go.
Now that we’re talking about lenses, make sure to pick the best lens for your Canon M50. The kit lens works fine for learning, but a fast prime like a 22mm f/2 or a 32mm f/1.4 will give you much better results with manual focus, especially in low light.
After spinning the ring, move the camera toward or away from your subject until you see it come into focus on the screen. You’ll see the peaking highlights appear on the parts of the subject that are sharp.
Once you’ve got focus locked in, you’re ready to shoot. It really is that straightforward to adjust Canon M50 manual focus. It takes a bit of practice to get fast at it, but once you’ve done it a few dozen times, it becomes second nature.