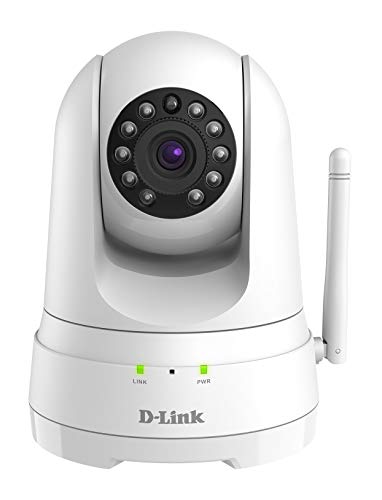
D-Link cameras are a solid pick for home security, and one of their best features is cloud recording. If you’ve got a D-Link camera and want to start saving footage to the cloud, here’s what you need to know.
D-Link’s Camera Recorder lets you record video and watch live playback at the same time. You can also store camera footage on up to two USB external hard drives, set up motion-based recording, and capture high-quality audio. The whole system is compact and easy to place just about anywhere.
Cloud recording is especially useful if you want to access your footage from a phone or tablet when you’re away from home. Instead of relying on a local SD card or hard drive that could be stolen or damaged, your videos are stored on remote servers and available anytime.
Steps to Record Your D-Link Camera to the Cloud
Step 1. Open the mydlink app and sign into your account.
Step 2. Tap the menu icon in the upper left corner.
Step 3. Select Cloud Recording.
Step 4. Tap Subscribe.
Step 5. Choose an Available Plan.
D-Link offers several cloud recording plans in 2026. The basic tier gives you a set number of recording days with limited camera support, while the premium tier covers more cameras and offers longer storage. Check the mydlink app for current pricing and plan details.
Step 6. Tap Subscribe Now.
Step 7. Click OK.
We put together a full guide on how to save ip camera video to the cloud that pairs well with this.
Step 8. Tap Next.
Step 9. Select the camera you want to enable for cloud recording and tap on the tick mark in the top right.
Step 10. Confirm by tapping the tick symbol again.
Step 11. Set up recording on the camera.
Once recording is enabled, you should see a small cloud icon on the camera’s live view in the app. That means your footage is being uploaded. You can verify by going back to the Cloud Recording section and checking the recording history.
Adding More Cameras with Cloud Recording
If you’ve got multiple D-Link cameras and want to add them to your cloud plan, the process is quick.
Step 1. Tap the menu icon on the top left.
Step 2. Select the Cloud Recording Option.
Step 3. Tap the gear icon to open settings.
Our what security cameras work with Google Home walkthrough covers this from a different angle.
Step 4. Select the additional camera(s) for Cloud Recording, then tap the tick mark.
Step 5. Tap Set a Rule.
Step 6. Open settings again.
Step 7. Tap the + icon on the bottom right to add a rule for the new camera.
Step 8. Choose the event for automation and tap Next.
Step 9. Select the desired action for automation and tap Next.
Step 10. Confirm by tapping the tick button.
Step 11. Review the set Rules for the cameras.
Setting Up Automation Rules
Automation rules are one of the more useful features in the mydlink app. They let you define what happens when a specific event is detected. For example, you can set a rule that starts cloud recording whenever motion is detected in a certain zone, or trigger a notification when sound is picked up.
Here are some common automation setups:
Motion detection recording: The camera starts recording to the cloud whenever it detects movement. This is the most popular option and works well for front doors, driveways, and garages.
Scheduled recording: Set specific time windows for recording. This is useful if you only want cloud footage during certain hours, like overnight or while you’re at work.
Sound detection alerts: Get a push notification when the camera picks up loud sounds. This can be helpful for detecting glass breaking, alarms, or unexpected noise.
You can stack multiple rules on the same camera, so you’re not limited to just one trigger. Mix and match to create a setup that fits how you actually use your cameras.
Why Go with D-Link
D-Link makes a range of cameras that go beyond basic models, including HD Wi-Fi cameras that deliver affordable, feature-packed home monitoring. These cameras support cloud recording and work with Google Assistant and Alexa, so they fit right into a connected home setup.
The mydlink app makes it easy to set up and manage your cameras. You can watch live video from anywhere, get instant alerts, and keep tabs on your property around the clock.
The app supports free local recording with a microSD card and offers several subscription tiers depending on your storage needs.
In 2026, D-Link continues to update its camera firmware and app with improved motion detection algorithms and better integration with third-party smart home platforms. The cameras also support ONVIF, which means you can use them with compatible third-party NVR systems if you ever want to switch away from D-Link’s own cloud service.
Troubleshooting Common Issues
If cloud recording isn’t working as expected, try these fixes:
Camera Not Appearing in the App
Make sure the camera and your phone are on the same Wi-Fi network during initial setup. If the camera still doesn’t show up, restart both the camera and the app, then try again.
Recordings Not Uploading
Check your internet upload speed. Cloud recording requires a stable connection with at least 1 to 2 Mbps of upload bandwidth per camera. If your connection is slow or unstable, recordings may fail to upload or appear choppy.
Subscription Not Activating
If you subscribed but the cloud icon doesn’t appear, log out of the mydlink app, wait a minute, and log back in. Sometimes the app needs a refresh to pull in the updated subscription status.
FAQs
- How to record on the D-Link camera?
It’s pretty straightforward. Select the camera name, enter the username and password for the camera’s web configuration, and choose OK to add the camera to the software. Then select the always record option to start recording automatically.
- Is the mydlink app available for free?
Yes, the mydlink Lite app is free and gives you connectivity options to monitor your surroundings. It’s also designed to work well on tablets.
- Can I use local and cloud storage at the same time?
Yes. D-Link cameras that support microSD cards can record locally and to the cloud simultaneously. This gives you a backup if your internet goes down. Local recordings continue even when the cloud connection is interrupted.
Wrapping Up
That covers everything you need to record D-Link camera footage to the cloud. The mydlink app makes the process quick, and once you’re set up, your footage is safely stored and accessible from anywhere.
Cloud recording adds a layer of protection that local storage alone can’t match. Even if someone takes the camera, your footage is already saved off-site. For the small monthly cost of a cloud plan, that peace of mind is hard to argue with.