When you purchase through links on our site, we may earn an affiliate commission. Here’s how it works.
How to Connect Canon Rebel T7i to a Computer
Connect the Canon T7i to your computer to transfer photos and videos and access additional functions like remote shooting.
Before starting, ensure the EOS Utility software is installed on your computer. This software facilitates communication between your computer and the Canon Rebel T7i.
You will also need a high-speed interface cable to transfer high-resolution files efficiently:
Connect your Canon Rebel T7i to the computer using a compatible interface cable.
Connecting Your Canon T7i to Your Computer
Step 1.
Ensure your camera is off and not connected to your computer. Use an AC adapter kit ACK-E8 for a reliable power source during the connection process.
Step 2.
Connect the interface cable to your camera.
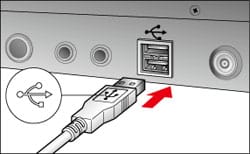
Connect Canon Rebel T7i to computer
Step 3.
Open the EOS Utility software on your computer. You will see options for downloading images, remote shooting, and adjusting camera settings.
Connect Canon Rebel EOS T7i to computer
Step 4.
Select “Download images to computer” and confirm by clicking OK.
Step 5.
When prompted, click on Settings to specify download preferences.
Step 6.
Choose your preferred settings for image download and hit OK.
Step 7.
Start automatically downloading images, which will be saved in the computer’s Pictures folder. The Digital Photo Professional (DPP) software will automatically display the downloaded images.
Upon completion, close the EOS Utility app, turn off your camera, and disconnect it from the computer.
To Download Selective Pictures:
- Select Download images to computer.
- Choose Select and download.
- Pick the images you want to download.
- Click Download.
- Choose a destination folder.
- Confirm by clicking OK.
- The downloaded images will appear in the Quick Preview window.
Decompressing Files on Your Computer:
For Windows Users
Follow the on-screen instructions to install the software after clicking on the installer file.
Windows 7/8.1/10
Go to Control Panel → Devices and Printers → Double-click the camera icon → Change general settings → Select TAKE NO ACTION for device connection actions.
For MAC Users
Double-click the dmg file to start the installation, then follow the on-screen instructions to complete the process.
- Restart your computer if prompted.
Before downloading images, ensure your camera and computer are correctly configured.
Four Methods to Connect Canon Rebel T7i to a Computer:
- Card Reader
- USB Cable
- EOS Utility App
- WiFi (Canon Camera Connect)
#1 Using a Card Reader for Image Download
Insert the camera’s memory card into a card reader connected to your computer. Use the Digital Photo Professional software for image download.
#2 Connecting via USB Cable
- Ensure EOS software is installed.
- Use a dedicated USB cable for the Canon Rebel T7i.
- Connect the cable to the camera’s digital terminal and your computer’s USB port.
- Transfer images using the EOS Utility software.
#3 Functions of EOS Utility Software:
- Transfer images to the computer.
- Adjust camera settings.
- Remote shooting.
To download the EOS Utility software:
- Visit the official Canon website: www.canon.com/icpd.
- Select your region and download the software.
#4 Using WiFi with Canon Camera Connect
Android devices with NFC can easily connect to the Canon Rebel T7i. Use the Canon Camera Connect app for a seamless WiFi connection with other devices.
Additional Functions:
Remote shooting and changing camera settings from your computer are possible with a connected interface cable.
Conclusion
Connecting the Canon Rebel T7i to a computer enhances your photography workflow. Use the official Canon interface cable for reliable connectivity.
For more information, visit the Canon Rebel EOS T7i Review and learn how to transfer photos and perform remote shooting with your camera.