When you purchase through links on our site, we may earn an affiliate commission. Here’s how it works.
If you are trying to connect your Canon 5D Mark IV to a computer but don’t know how to do it, don’t worry. Here is a step-by-step tutorial on the subject.
Speaking of the all-new Canon 5D Mark IV, this beast sports a full-frame, high-speed CMOS sensor that is perfect for all your photography needs.
Still, connecting it to a computer or laptop can be cumbersome, but not anymore, as the guidelines below certainly help you in this context.
Steps to connect Canon 5D Mark IV to computer via USB
Before you get along with the rest of the process, ensure you have a high-quality USB cable to connect Canon 5D Mark IV to the laptop.
Step 1.
First, ensure that the camera and computer are turned off and that no unfinished activity or program runs on the same device. Once you are sure about this, turn both devices on.
Step 2.
Once the devices are switched on, you must connect them using a USB cable by inserting both ends into their respective ports.
Once both devices have established a connection, wait for the computer to identify your camera as a storage device.
Step 3.
Once the camera has been identified as a storage device on the computer, you can start transferring your favorite images and videos.
Now that you know how to connect the Canon 5D Mark IV to a computer via USB, we will walk you through another method of establishing a connection: via Wi-Fi.
Recommended steps to connect Canon 5D Mark IV with computer via WIFI
Step 1. Download the EOS utility software on your computer
First, you must download EOS utility software to transfer the image and videos between both devices (you can download the same from Canon’s official website).
Conversely, if the camera battery is low, connect it to a power source.
Step 2. Enable the wifi feature in the camera

to connect Canon 5D Mark IV to the computer – wifi feature
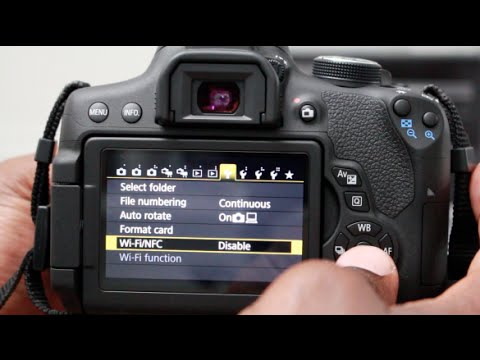
To enable the Wi-Fi feature in your Canon 5D Mark IV, you must go to Setup menu 3 of the main menu settings and set the Wi-Fi feature to ‘Enable.’
You must select the icon signifying the PC right beneath the same option.
Step 3. Selecting EOS utility as the connection type

to connect Canon 5D Mark iv to the computer – wifi function
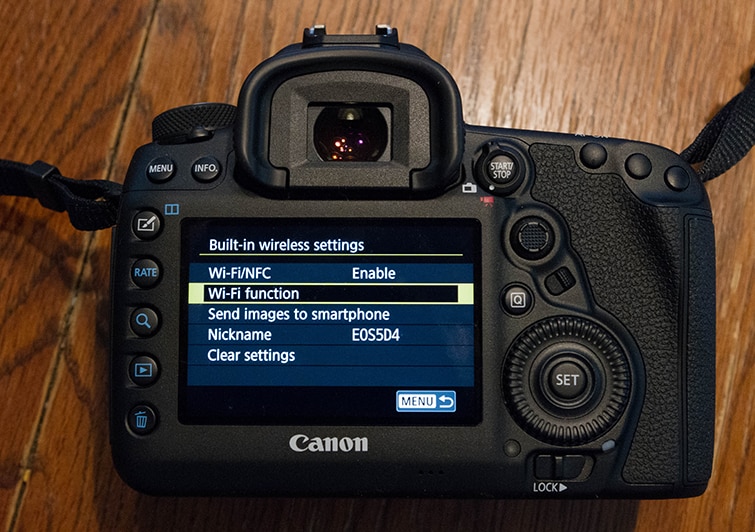
You need to initiate the wifi pairing process by choosing the EOS utility as the type of connection in the camera settings.
Once done, go by the instructions in the camera to configure the network settings carefully.
Once you complete the configuration process, you will be prompted to start the pairing process on the computer.
You only need to run the EOS utility software on your PC now.
Step 4. Run the EOS utility launcher
This EOS utility launcher is Canon’s latest offering for establishing an easy Wi-Fi connection between the camera and a computer.
Once the EOS utility software detects no active USB connections between both devices, it will establish a Wi-Fi connection to connect the Canon 5D Mark IV to the computer.
You must choose the ‘ Pairing over Wi-Fi/LAN’ option. During the same process, the computer will show any active camera devices.
Once it locates your Canon 5D Mark IV, it will ask you to select the device on the computer.
Step 5. Establish the connection between Canon 5D Mark IV and the computer

connect canon 5D Mark IV to the computer – canon 5D Mark IV wifi
Once you have selected your Canon 5D Mark IV as the camera device on the computer, you have to choose the ‘ Connect’ option.
You will get a prompt message regarding connection establishment on the computer, asking you to check your Canon 5D Mark IV for further instructions.
The Canon 5D Mark IV’s LCD contains some new instructions and settings, which confirm that the Wi-Fi connection has been successfully established between both devices.
Your camera is now connected to the computer, and you can start sharing images and videos between both devices.
See Also


