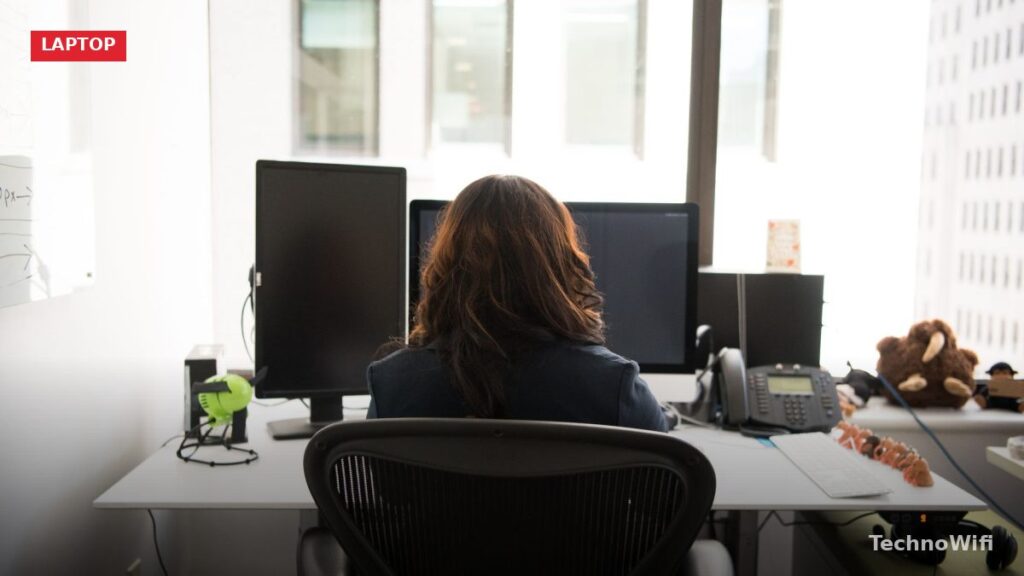
Adding a second monitor to your laptop is one of the fastest ways to boost productivity. A dual-screen setup lets you keep a document open on one screen while referencing something else on the other. You can write code on the laptop and test it on the external display, or run a video call on one screen and take notes on the second.
The setup takes about five minutes on Windows 10 and Windows 11. You need one cable (sometimes with an adapter), and Windows handles the rest automatically in most cases. This guide covers every step, from identifying the right port on your laptop to arranging multiple displays in Windows settings.
What Ports Does My Laptop Have for a Second Monitor
Before buying any cable, check what video output ports your laptop has. Most laptops made in the last few years include at least one of the following: HDMI, USB-C, Thunderbolt, Mini DisplayPort, or DisplayPort. Older models may still have VGA or DVI, though these are increasingly rare in 2026.
Look at the sides and back of your laptop. HDMI ports are the most common and easiest to identify. They have a trapezoid shape, wider at the top than the bottom. USB-C ports are small and oval-shaped, but not every USB-C port carries a video signal. Thunderbolt ports look identical to USB-C but have a small lightning bolt icon next to them.
Check your laptop’s spec sheet or the manufacturer’s website if you are not sure whether a USB-C port supports video output. A USB-C port that only handles data and charging will not send a signal to a monitor, no matter what cable or adapter you use.
| Port Type | Max Resolution | Common On | Notes |
|---|---|---|---|
| HDMI 2.0 | 4K at 60Hz | Most laptops | Most widely available port for external displays |
| HDMI 2.1 | 4K at 120Hz / 8K at 60Hz | Newer gaming laptops | Higher bandwidth for gaming monitors |
| USB-C (DisplayPort Alt Mode) | 4K at 60Hz | Ultrabooks, business laptops | Must support DisplayPort Alt Mode for video |
| Thunderbolt 3 / 4 | Dual 4K at 60Hz | Premium and business laptops | Carries video, data, and power over one cable |
| Mini DisplayPort | 4K at 60Hz | Older Surface devices, some workstations | Less common on new laptops |
| VGA | 1080p at 60Hz | Legacy business laptops | Analog signal, lower image quality |
How to Choose the Right Cable or Adapter
Once you know what port your laptop has and what port your monitor has, picking the right cable is straightforward. If both devices share the same port type, a single cable does the job. If they differ, you need an adapter or an adapter cable that has a different connector on each end.
The most common scenario in 2026 is a laptop with HDMI connecting to a monitor with HDMI. A standard HDMI cable handles this. For laptops with only USB-C or Thunderbolt, a USB-C to HDMI cable or a USB-C to DisplayPort cable works well. These adapter cables are inexpensive and widely available.
If your laptop has USB-C but your monitor only accepts HDMI, a USB-C to HDMI adapter is the simplest solution. Make sure the adapter supports the resolution and refresh rate of your monitor. A cheap adapter rated for 1080p will not push a 4K signal properly.
| Laptop Port | Monitor Port | Cable or Adapter Needed |
|---|---|---|
| HDMI | HDMI | Standard HDMI cable |
| USB-C / Thunderbolt | HDMI | USB-C to HDMI cable or adapter |
| USB-C / Thunderbolt | DisplayPort | USB-C to DisplayPort cable or adapter |
| Mini DisplayPort | HDMI | Mini DisplayPort to HDMI cable or adapter |
| VGA | VGA | Standard VGA cable |
| HDMI | DisplayPort | Active HDMI to DisplayPort adapter (direction matters) |
One important detail: HDMI to DisplayPort adapters are directional. An adapter that goes from HDMI output to DisplayPort input is different from one that goes the other direction. Make sure the adapter matches the direction of your signal flow, which is always from the laptop to the monitor.
How to Physically Connect a Second Monitor to a Laptop
The physical connection is the simplest part of the process. Follow these steps to plug everything in.
- Place the external monitor on your desk and connect its power cable. Turn the monitor on.
- Connect one end of your video cable (HDMI, USB-C, DisplayPort, or adapter cable) to the laptop’s video output port.
- Connect the other end to the monitor’s video input port.
- Windows should detect the monitor automatically within a few seconds. The screen may flash or go black briefly while it establishes the connection. If the monitor stays black, press the input/source button on the monitor and select the correct input (HDMI 1, DisplayPort, etc.).
You do not need to shut down your laptop before connecting a monitor. Both HDMI and USB-C support hot-plugging, meaning you can connect and disconnect while the laptop is running. Windows detects the new display immediately.
How to Set Up Dual Monitors in Windows Display Settings
Once the monitor is physically connected and detected, Windows gives you control over how the two screens work together. Right-click on an empty area of the desktop and select “Display settings.” On Windows 11, you can also go to Settings, then System, then Display.
You will see two numbered rectangles at the top of the Display settings page, representing your laptop screen and the external monitor. If only one rectangle appears, click the “Detect” button. Windows will scan for any connected displays it may have missed.
The fastest way to switch display modes is pressing Win + P on your keyboard. This opens a quick menu on the right side of the screen with four options.
| Display Mode | What It Does | Best For |
|---|---|---|
| PC screen only | Uses laptop screen only, external monitor off | Disconnecting without unplugging |
| Duplicate | Shows the same content on both screens | Presentations, meetings, mirroring to a TV |
| Extend | Creates one continuous desktop across both screens | Productivity, multitasking, general use |
| Second screen only | Uses external monitor only, laptop screen off | Using a larger display with the laptop lid closed |
How to Extend Your Display Across Two Monitors
Extend mode is what most people want. It turns your two screens into one large workspace. You can drag windows from the laptop screen to the external monitor and back. Each screen operates independently, so you can have different apps open on each one.
- Open Display settings (right-click the desktop and select “Display settings”).
- Scroll down to the “Multiple displays” dropdown.
- Select “Extend these displays.”
- Click “Apply.” Windows will ask you to confirm the change within 15 seconds. If you do not confirm, it reverts to the previous setting automatically. This prevents you from getting stuck with a configuration you cannot see.
If this is the first time connecting the monitor, Windows often defaults to Extend mode automatically. You can verify the mode by pressing Win + P and checking which option is highlighted.
How to Arrange Monitors in Windows Display Settings
After extending the display, the next step is telling Windows where each monitor sits on your desk. This determines which direction your cursor moves when it crosses from one screen to the other.
- In Display settings, look at the two numbered rectangles at the top.
- Click the “Identify” button. Each monitor will briefly display a large number (1 or 2) so you know which rectangle corresponds to which physical screen.
- Drag the rectangles to match your physical layout. If the external monitor is to the left of your laptop, drag rectangle 2 to the left of rectangle 1. If the monitor is above the laptop, drag it above.
- Click “Apply.”
Getting the arrangement right matters. If Windows thinks the external monitor is on the right but it is actually on the left, your cursor will move in the wrong direction when you try to drag it between screens. You will have to move the mouse to the right edge of the laptop screen to reach a monitor that is physically on the left, which is disorienting.
You can also align the monitors vertically. If one monitor is higher or lower than the other on your desk, drag the rectangles so their top or bottom edges match the actual physical alignment. This prevents the cursor from “jumping” when it crosses between screens at certain heights.
How to Change Resolution on Each Monitor Separately
Each monitor should run at its native resolution for the sharpest image. Windows usually detects and applies the correct native resolution automatically, but it is worth checking.
- In Display settings, click on the rectangle representing the monitor you want to adjust. A blue highlight indicates which one is selected.
- Scroll down to “Display resolution.”
- Select the native resolution from the dropdown. The recommended option (labeled “Recommended”) is almost always the native resolution.
- Click “Keep changes” when prompted.
Running a monitor at anything other than its native resolution makes text and images look blurry. A 1920 x 1080 monitor should run at 1920 x 1080. A 2560 x 1440 monitor should run at 2560 x 1440. If your laptop screen and external monitor have different native resolutions, set each one to its own native resolution independently.
You may also want to adjust the scaling setting, especially if one monitor is significantly larger than the other. On a 4K display, 100% scaling makes text extremely small. Setting it to 150% or 200% keeps icons and text readable. Each monitor can have its own scaling percentage in Display settings.
How to Show the Taskbar on Both Monitors
By default, Windows 11 shows the taskbar on all connected displays. Windows 10 also supports this feature, but you may need to enable it manually.
- Right-click on an empty area of the taskbar.
- Select “Taskbar settings” (Windows 11) or “Taskbar settings” (Windows 10).
- On Windows 10, scroll down and toggle on “Show taskbar on all displays.” Then use the dropdown below it to control which buttons appear on each taskbar. “All taskbars” shows every open app on every screen. “Taskbar where window is open” shows app buttons only on the monitor where that app is running.
- On Windows 11, expand the “Taskbar behaviors” section and toggle “Show my taskbar on all displays.” A similar dropdown controls which app icons appear on which taskbar.
Having the taskbar visible on both screens makes it easier to open apps and switch windows without dragging your cursor back to the primary display. If you prefer a cleaner look on the second monitor, you can turn this feature off and keep the taskbar on the laptop screen only.
Why Is My Second Monitor Not Detected
A second monitor that stays black or does not appear in Display settings is one of the most common dual-monitor problems. The fix is usually simple, but the cause can be any of several things. Work through these steps in order.
- Check the cable connection. Unplug the cable from both the laptop and the monitor, then reconnect firmly. A loose connection is the most frequent cause, especially with HDMI cables that do not click into place.
- Verify the monitor’s input source. Press the input or source button on the monitor and make sure it is set to the correct input. If the cable is plugged into HDMI 2 but the monitor is set to HDMI 1, the screen will stay black.
- Press Win + P and select Extend. Windows may have defaulted to “PC screen only,” which disables the external display entirely.
- Click Detect in Display settings. Open Settings, go to System, then Display, and click the “Detect” button. This forces Windows to scan for connected monitors.
- Update your graphics driver. Open Device Manager (right-click the Start button and select it from the menu). Expand “Display adapters,” right-click your graphics card, and select “Update driver.” Choose “Search automatically for drivers.” Outdated drivers are a common cause of detection failures.
- Try a different cable or port. If the cable or adapter is faulty, no amount of software troubleshooting will fix it. Swap in a different cable if you have one. If your laptop has multiple USB-C ports, try the other one.
- Restart the laptop. A reboot forces Windows to re-initialize all display connections from scratch. This resolves many detection problems that persist through the steps above.
How to Fix Wrong Resolution on a Second Monitor
Sometimes Windows detects the second monitor but sets it to the wrong resolution. Text looks blurry, the image does not fill the screen, or everything appears stretched. These are resolution or scaling mismatches.
- Open Display settings and click on the rectangle for the monitor showing the wrong resolution.
- Check the “Display resolution” dropdown. If the current setting does not match the monitor’s native resolution, change it to the option marked “Recommended.”
- If the recommended resolution is not listed, your graphics driver may need updating. Follow the driver update steps in the previous section, then check the resolution options again.
- For monitors that appear zoomed in or show black bars around the edges, look for an “Overscan” or “Screen fit” setting in the monitor’s own on-screen menu (accessed through the physical buttons on the monitor). Adjusting this setting to “Just scan” or “Screen fit” usually fixes the problem.
If the native resolution still does not appear in the dropdown after updating drivers, the issue may be a cable limitation. Older HDMI cables or low-bandwidth adapters may cap the output at 1080p even if the monitor supports 1440p or 4K. Replacing the cable with one rated for the resolution you need should resolve it.
How to Use a Laptop with the Lid Closed and an External Monitor
Many people connect a larger external monitor and want to use it as their only display, keeping the laptop closed. Windows supports this, but the laptop must be plugged into a power source. On battery power, closing the lid puts the laptop to sleep by default.
- Connect the external monitor and make sure it is working.
- Open the Control Panel (search “Control Panel” in the Start menu).
- Go to Hardware and Sound, then Power Options, then “Choose what closing the lid does” in the left sidebar.
- Change the “When I close the lid” dropdown to “Do nothing” for the “Plugged in” column. You can leave the “On battery” setting as “Sleep” if you prefer.
- Click “Save changes.”
Now when you close the lid, the laptop keeps running and the external monitor stays active. Connect an external keyboard and mouse for a full desktop experience. Press Win + P and select “Second screen only” if you want to turn off the laptop screen entirely without closing the lid.
Dual Monitor Setup FAQs
Can I use any monitor as a second display for my laptop?
Yes. Any monitor with a compatible video input works as a second display. It does not need to match your laptop’s brand, screen size, or resolution. A Dell laptop can use an LG monitor, and a 1080p laptop screen can extend to a 4K external monitor without problems. Windows handles different resolutions and sizes across monitors natively. Just set each monitor to its own native resolution in Display settings.
Does a second monitor slow down my laptop?
For everyday use like browsing, email, documents, and video calls, a second monitor has virtually no performance impact. The GPU load from driving a second display at idle or with office applications is negligible. You may notice a slight decrease in performance if you are running graphically demanding tasks like gaming or 3D rendering on the extended desktop, because the GPU is pushing pixels to both screens. But for standard productivity work, no slowdown.
Can I connect a second monitor through a USB docking station?
Yes. USB-C and Thunderbolt docking stations are a popular way to add an external monitor, especially on laptops with limited ports. A single cable from the dock to the laptop carries video, data, and power. Many docks include HDMI, DisplayPort, and USB-A ports. If your dock uses DisplayLink technology (common with USB-A docks), you will need to install the DisplayLink driver for the monitor to work. Native USB-C docking stations that support DisplayPort Alt Mode work without extra drivers.
Why does my cursor get stuck between monitors?
This happens when the two monitors are not aligned properly in Display settings. If the rectangles representing your monitors are offset vertically, the cursor can only cross between screens at the overlapping portion. Open Display settings, drag the two rectangles so their edges align where you expect the cursor to move, and click Apply. The cursor will then cross smoothly from one screen to the other.
What is the difference between Duplicate and Extend display modes?
Duplicate mode mirrors the same content on both screens. Whatever you see on the laptop screen also appears on the external monitor, at the same resolution. This is useful for presentations and meetings where the audience sees the same thing you do. Extend mode creates one continuous desktop across both screens. Each monitor displays different content, and you can drag windows between them. Extend is what most people use for productivity.
Can I set the external monitor as my main display?
Yes. In Display settings, click on the rectangle representing the external monitor, then scroll down and check the box labeled “Make this my main display.” The taskbar, desktop icons, and new windows will default to the external monitor instead of the laptop screen. This is helpful when the external monitor is larger and you want it to be your primary workspace.
Sources
Microsoft – Connect to a projector or external display – support.microsoft.com, Microsoft – Set up dual monitors on Windows – support.microsoft.com, Intel – How to Set Up Dual Monitors – intel.com, Microsoft – Change display settings in Windows – support.microsoft.com
How we verify what we publishLast checked October 10, 2026Report an error