When you purchase through links on our site, we may earn an affiliate commission. Here’s how it works.
How to Shoot Portrait Photos with Canon 5D Mark II?
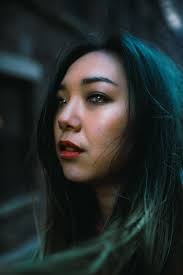
The Canon 5D Mark II is celebrated as a top-tier landscape and nature photography DSLR and excels in portrait photography due to its advanced settings.
Its popularity stems from its cutting-edge technology and affordability compared to higher-priced competitors.
The camera’s lightweight design and ease of use make it ideal for capturing stunning portrait shots with the Canon 5D Mark II.
If you’re new to portrait photography, these steps and guidelines will help you fully leverage the Canon 5D Mark II’s capabilities.
Portrait Photography Settings for Canon 5D Mark II
Portrait Lens for Canon 5D Mark II – EF 24-105mm
Step 1. Mastering the Focus in Portraiture
The subject’s eyes must be the sharpest focus point for portraiture, especially when looking directly at the camera.
Utilize the autofocus function to maintain focus on your subject confidently.
The 5D Mark II allows for shooting through the viewfinder with moving subjects, making it perfect for capturing dynamic shots, such as children’s.
Focusing on the desired object is foundational for achieving high-quality portrait shots with the Canon 5D Mark II.
Step 2. Finding Great Subjects for Portraits
Begin at home. Family members and friends make excellent subjects for practice.
If you’re hesitant to approach models or strangers, starting with people you’re comfortable with is a great way to build confidence.

Patience and cooperation from both the photographer and subject are key to successful portrait photography.
Step 3.
Shooting Backlight Images
If you’re dealing with harsh light or lack of shade, position the sun directly behind the model or outside the frame to capture a soft, glowing outline.
Shooting during the golden hour, near sunset, is ideal for achieving optimal lighting and shadowing for portraits.
This technique is especially recommended for capturing the beauty and depth of portrait photography.
Step 4.
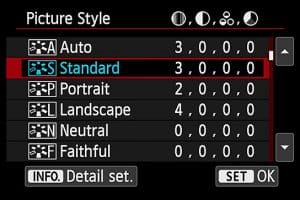
Choosing the Picture Style Settings
Portrait Style
Landscape Style
Monochrome Style
Canon’s picture styles maximize image quality customization, including sharpening, contrast, and color rendition.
You can adjust these styles directly in the camera menu or with Canon’s Digital Photo Professional (DPP) software.
Initially, settings are optimized for warmer skin tones, offering plenty of creative flexibility within the Portrait Picture Style.
Step 5.
Taking Advantage of the Image Processing Facility
The Canon EOS 5D Mark II’s sensor is supported by a powerful DIGIC 4 Image Processor, enhancing HD video recording, Face Detection Live Mode, and Lens Peripheral optimization.
It also offers 14-bit A/D conversion, ensuring finer tonal gradation for impressive prints.

With the Canon 5D Mark II, achieving dream-like portraits is within reach.
See Also