How to Adjust Canon 80D Landscape Settings
Getting the right Canon 80D landscape settings can make a big difference in your outdoor photography. The Canon 80D is a capable APS-C DSLR with a 24.2-megapixel sensor and the DIGIC 6 processor, and it handles landscape work well when you know how to set it up.
Landscape photography is one of the most accessible genres out there. You don’t need fancy lighting rigs or a studio. Just your camera, a wide-angle lens, and some patience. For the Canon 80D, a lens with a focal length shorter than 50mm works best for capturing wide, expansive scenes. Something like the EF-S 10-18mm f/4.5-5.6 IS STM or the EF-S 17-55mm f/2.8 IS USM gives you the coverage you need.
That said, there’s more to sharp landscape photos than pointing at a mountain and pressing the shutter button. Ordinarily, landscape scenes benefit from a very deep depth of field that keeps everything from the foreground to the background in sharp focus. Here’s how to set up your Canon 80D for the best results.
Steps to Adjust Canon 80D Landscape Settings
Step 1: Set Your White Balance Manually
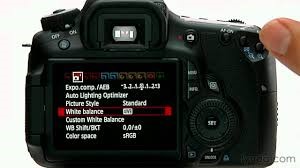
Auto White Balance (AWB) does a decent job most of the time, but it can strip out the warm tones that make sunrise and sunset shots special. The camera tries to “correct” the color temperature toward neutral, which kills the golden glow you’re trying to capture.
Instead, pick a white balance preset that matches your lighting. Use Daylight for midday shoots. Switch to Cloudy or Shade when you want to warm up the tones. For sunrise and sunset, the Daylight or Cloudy preset preserves those warm oranges and reds that AWB would tone down. Getting this right in-camera saves you time in post-processing.
Step 2: Shoot in RAW Format
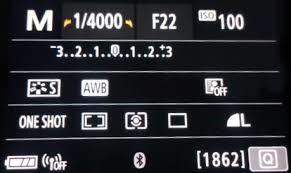
RAW files capture all the data from the Canon 80D’s sensor, giving you much more room to work with in post-processing. You can pull back highlights in an overexposed sky, lift shadow detail in a dark foreground, and fine-tune colors without the quality loss you’d get from editing a JPEG.
The trade-off is file size. RAW files from the 80D run around 25-30MB each, compared to 5-10MB for JPEGs. Bring a high-capacity SD card (64GB or 128GB) so you don’t run out of space in the field. The extra flexibility in editing makes RAW the clear choice for serious landscape work.
Step 3: Use a Graduated ND Filter
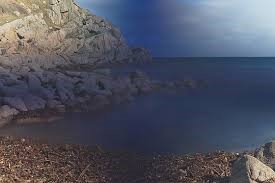
One of the biggest challenges in landscape photography is the brightness gap between the sky and the ground. The sky is often two or three stops brighter than the foreground, which means either the sky blows out or the ground goes dark.
A graduated neutral density (GND) filter solves this by darkening the top half of the frame while leaving the bottom untouched. Slide one onto the front of your lens (or use a filter holder system) and align the transition zone with the horizon. This lets you capture detail in both the sky and the landscape in a single exposure. GND filters reduce the sky’s brightness while leaving the foreground unaffected, creating a more balanced final image.
Step 4: Use These Baseline Manual Settings
Start with these settings as a foundation and adjust from there:
- Exposure mode: Manual (M)
- Drive mode: Single shot
- ISO: 100 for the cleanest image with minimal noise
- Shutter speed: Varies with lighting conditions (use a tripod for anything slower than 1/60s)
- Aperture: f/11 for deep depth of field
- White balance: Daylight, Cloudy, or Shade depending on conditions
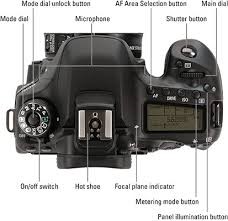
Manual mode gives you full control. In landscape work, the scene isn’t moving, so you have time to dial in your settings. Use Live View and the histogram to check your exposure before shooting. The Canon 80D’s flip screen makes it easy to compose from low angles or when the camera is mounted on a tripod at an awkward height.
Step 5: Nail the Depth of Field
In landscape photography, you usually want everything sharp from the rocks in the foreground to the mountains in the background. That means a narrow aperture. Start at f/11, which gives you a wide depth of field while keeping the image sharp. Going narrower (f/16 or f/22) increases depth of field further but introduces diffraction, which slightly softens the overall image on the 80D’s sensor.
If you have a strong foreground element very close to the camera, look into hyperfocal distance focusing. This technique tells you exactly where to focus so that both the nearest and farthest points in your scene are acceptably sharp. There are free apps that calculate it for any lens and aperture combo on the Canon 80D.
Use a tripod whenever possible. At f/11 and ISO 100, your shutter speed will often drop below what you can safely handhold, especially during golden hour or blue hour. A sturdy tripod and a remote shutter release (or the camera’s built-in self-timer) get rid of camera shake entirely, which is exactly what you need for tack-sharp landscape images.