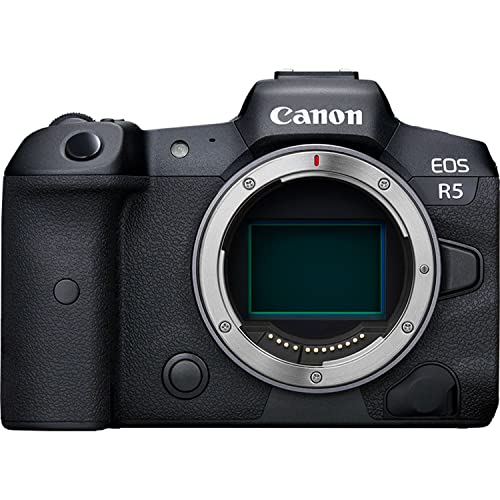
Canon R5 Settings For Bird Photography
Bird photography is one of the trickiest genres to master. Birds are fast, unpredictable, and rarely sit still for the camera. The Canon R5, though, handles these challenges extremely well. Its advanced autofocus system and high-speed burst shooting make it one of the best cameras a bird photographer can own right now.
In 2026, the Canon R5 continues to be a top pick among wildlife shooters, largely because of its animal eye detection AF and 20 fps electronic shutter. Whether you are photographing backyard songbirds or raptors in flight, the right settings will make a noticeable difference in your keeper rate.
Here are the Canon R5 settings I’d recommend for getting sharper, more consistent bird photos.
Recommended Canon R5 Settings for Bird Photography
1. Always Shoot in RAW Format
If you’re shooting birds, go RAW. RAW files keep all the data your sensor captures, giving you much more flexibility when editing highlights and shadows in post. JPEG compresses your images and throws out information you can’t get back. If you’re new to RAW, try shooting in RAW + Fine JPEG. That way, you get the quick convenience of JPEG with the full editing power of RAW.
RAW files are larger, so make sure you have fast, high-capacity memory cards. A CFexpress card is the best choice for the Canon R5, especially when shooting at 20 fps in burst mode. A slow card will bottleneck your buffer and cause the camera to lock up mid-sequence, which is the last thing you want when a bird is in flight.
Post-processing RAW bird photos in software like Adobe Lightroom or DxO PhotoLab gives you control over sharpening, noise reduction, and color grading that JPEG simply cannot match. You can also recover blown-out skies or lift shadow detail in feathers without introducing visible artifacts.
2. Use Auto ISO
Pairing Auto ISO with a fast shutter speed is one of the simplest ways to sharpen up your bird shots. Higher ISOs can introduce some noise, sure, but setting a max sensitivity cap (like ISO 800) keeps things manageable. The Canon R5 also lets you set a minimum shutter speed in Auto ISO mode, so the camera keeps ISO as low as possible while still maintaining proper exposure.
For the Canon R5 specifically, you can push the max ISO higher than 800 without much worry. The camera’s sensor handles noise well up to ISO 3200, and in many cases ISO 6400 is perfectly usable after applying some noise reduction in post. Set your minimum shutter speed to at least 1/2000th of a second for birds in flight, or 1/500th for perched birds.
The beauty of Auto ISO is that it removes one variable from the equation. You set your aperture and shutter speed based on the creative result you want, and the camera adjusts ISO on the fly to maintain proper exposure. This lets you focus entirely on composition and timing rather than constantly adjusting settings.
3. Apply Auto White Balance (AWB)
Outdoor lighting changes constantly when you’re tracking birds. One moment you’re in direct sunlight, the next you’re under a canopy. AWB adjusts for these shifts automatically and does a good job keeping colors accurate. Since you’re shooting RAW, you can always fine-tune the white balance later in post-processing if something looks off.
This is one of those settings you can basically set once and forget. AWB on the Canon R5 is reliable, and since RAW gives you full control in post, white balance is the least of your worries in the field. Spend your mental energy on tracking the bird and nailing the shot instead.
4. Choose Evaluative Metering Mode
Evaluative metering reads the entire frame to balance exposure across the whole scene. This is really helpful in bird photography, where your subject might appear against a bright sky one second and dark foliage the next. Spot metering only reads a small area, but evaluative metering accounts for the subject, background, and surrounding elements to deliver a well-exposed shot.
There are situations where spot metering makes sense, like when a small bird sits against a very bright or very dark background and evaluative metering gets confused. But for general bird photography, evaluative metering works more consistently.
If you find that evaluative metering is consistently overexposing or underexposing, use exposure compensation to dial it in. A setting of minus 1/3 to minus 2/3 stops often works well for birds against bright skies, preventing the camera from blowing out the highlights to compensate for the dark subject.
5. Check the Histogram
Don’t rely on your LCD screen to judge exposure. Screen brightness can be misleading, especially under direct sunlight. The histogram gives you an accurate, objective read on your exposure. Aim for a centered distribution, avoiding spikes at either end that signal blown highlights or crushed shadows.
A technique called “exposing to the right” (ETTR) works particularly well for bird photography. The idea is to push your exposure as bright as possible without clipping the highlights. This gives you the cleanest image data with the least noise, and you can pull the exposure back down in post. The histogram is your guide here. Push the data toward the right edge but don’t let it slam into the wall.
Get in the habit of checking the histogram after your first few shots in a new lighting situation. Once you have a feel for the exposure, you can shoot confidently without checking every frame.
6. Use Animal Eye Detection AF
The Canon R5’s animal eye detection is one of its biggest strengths for bird photography. When enabled, the camera automatically finds and locks onto the bird’s eye, even in busy backgrounds with branches, leaves, and other distractions.
To enable it, go to the AF menu and set the detection subject to “Animals.” The camera will prioritize eyes when they are visible. If the bird is too far away or facing away, the AF system falls back to body detection, which still does a good job of tracking the overall shape of the bird.
Pair this with Servo AF (continuous autofocus) so the camera keeps adjusting focus as the bird moves. For birds in flight, Servo AF combined with eye detection gives you a dramatically higher hit rate compared to manual focus or single-shot AF.
In the custom AF settings, set the tracking sensitivity to a value around minus 1 or minus 2. This tells the camera to hold onto your subject even if something briefly passes between you and the bird, like a branch or another bird. Without this adjustment, the AF might jump to the obstruction and lose your target.
7. Select the Right Lens
This isn’t technically a camera setting, but lens choice matters just as much for bird photography. Reach is king in this genre, because most birds won’t let you get close. A focal length of at least 400mm is the starting point, and 600mm or more is better for smaller or more skittish species.
Here are some solid options for the Canon R5:
- Canon EF 100-400mm f/4.5-5.6L IS II USM
- Canon RF 100-500mm f/4.5-7.1L IS USM
- Sony FE 200-600mm f/5.6-6.3 G OSS (with adapter)
- Sigma 150-600mm f/5-6.3 DG OS HSM
The Canon RF 100-500mm is the best all-around option for the R5. It’s a native RF mount lens, so autofocus performance is optimized. The extra reach compared to the EF 100-400mm makes a real difference when photographing small or distant birds.
If budget is a concern, the Sigma 150-600mm offers excellent reach at a fraction of the price. Image quality is very good, and the autofocus, while not as fast as Canon’s native lenses, is reliable enough for most bird photography situations.
Teleconverters are another option. A 1.4x extender turns a 500mm lens into a 700mm, giving you extra reach without carrying a second lens. Keep in mind that you lose one stop of light with a 1.4x extender and two stops with a 2x, which can affect autofocus performance in lower light.
Putting It All Together
Get comfortable with these Canon R5 settings and you’ll see a real improvement in your bird photography. It’s all about practice and knowing your gear inside and out.
Head out to a local park or nature reserve and spend time with each setting. Try different shutter speeds for perched birds versus birds in flight. Experiment with ISO ranges to find your comfort zone for noise. And pay attention to how the animal eye detection AF performs in different conditions.
The more time you spend shooting, the more automatic these adjustments become. Eventually, you will be dialing in settings without thinking, and your full attention will be on finding and framing the perfect shot.
See Also:
Best Landscape Lens for Sony A7iii