When you purchase through links on our site, we may earn an affiliate commission. Here’s how it works.
How to Set Up Canon R5 Autofocus for Sharp Photos
Getting your Canon R5 autofocus settings dialed in makes a real difference in your photography. These settings let you quickly adjust composition, switch between modes, and tweak aperture, ISO, and shutter speed on the fly.
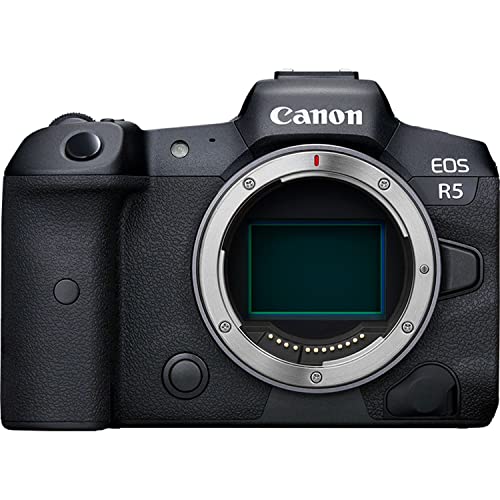
The Canon R5 uses a Dual Pixel CMOS AF II system that covers the entire sensor area, giving you 1,053 automatically selectable AF points. That kind of coverage means you can place your subject almost anywhere in the frame and still get a sharp lock. In 2026, this camera continues to be one of the most capable options for photographers who need fast, accurate autofocus.
AF Methods Available on the Canon R5
The Canon R5 gives you several autofocus methods to work with: Face + Tracking, Spot AF, 1-point AF, and Zone AF. Each one works best in different shooting situations.
Face + Tracking
This is the go-to for portraits and wildlife. The camera detects faces (people or animals) and places an AF point right on them for tracking. If it can’t find a face, it switches to auto-selection across the entire AF area. When you’re in Servo AF mode, you can pick a starting point for the camera to begin monitoring from.
Face + Tracking is also the mode to pick when you are handing the camera to someone else at a family event. Because the camera handles all the focus decisions, even an inexperienced shooter will get sharp faces in the frame. The eye detection is accurate enough that it consistently picks the nearest eye, which is exactly where you want critical sharpness in a portrait.
For best results with Face + Tracking, make sure the subject’s face takes up a reasonable portion of the frame. The detection works at a distance, but it gets more reliable as the face gets larger in the viewfinder.
Spot AF
Spot AF is your best friend when you need pinpoint accuracy. It focuses on a very small area, which is great when you’re trying to lock onto a specific part of your subject, especially when there’s something blocking part of the frame.
This method shines when you are shooting through fences, foliage, or glass. Because the focus area is so small, the camera ignores obstacles at the edges and locks onto whatever falls inside that tiny square. Wildlife photographers shooting through chain-link enclosures at zoos or through dense branches will find Spot AF far more reliable than wider AF area modes.
The downside is speed. Since the target area is tiny, the camera needs a precise aim from you. Moving subjects can drift out of the Spot AF area quickly, so this mode is best suited for subjects that are relatively still.
1-point AF
Single-point AF figures out whether your subject is standing still or moving, then picks either AF-S or AF-C automatically. It uses just one focus point, so you’ve got full control over where the camera focuses.
This is the workhorse mode for many photographers. You move the single point around the frame with the joystick or touchscreen, place it on your subject, and half-press the shutter. It is faster to acquire focus than Spot AF because the focus area is slightly larger, but still precise enough for most situations.
For street photography and candid shooting, 1-point AF with back-button focus is a popular combination. You can pre-focus on a spot where you expect action, then fire the shutter without the camera re-focusing.
Zone AF
Zone AF lets the camera automatically select from a small cluster of AF points within the viewfinder. It works in both One-Shot AF and AI Servo AF. You also get Large Zone AF options (Vertical and Horizontal) for more flexible framing.
Zone AF is the best choice for unpredictable action. If you are shooting a basketball game or a dog running toward you, Zone AF gives the camera enough room to track the subject even if your framing shifts slightly. The camera picks the closest subject within the zone, so it works well when your subject is the nearest thing in the frame.
Large Zone (Vertical) is useful for subjects moving up and down, like a rock climber. Large Zone (Horizontal) works better for subjects moving side to side, like a cyclist passing in front of you.
Subject Detection Options on the Canon R5
The Canon R5 has three subject detection modes: People, Animals, and No Priority. Picking the right one can noticeably improve your focus accuracy.
People
This mode looks for human faces and heads first. If it can’t find either, it’ll track the entire body instead.
In practice, the R5’s people detection is remarkably sticky. It holds onto a face even when the subject turns sideways or looks down briefly. For wedding and event photography, switching to People detection means you rarely need to manually place the focus point. The camera just locks on.
Animals
Switch to Animals mode and the camera will focus on animal and bird faces. If it can’t see a face, it tries to detect their body instead.
This mode received significant firmware improvements through 2024 and 2025, and by 2026 it handles a wide range of animals, including dogs, cats, horses, and various bird species. The eye detection is strong enough to pick out a raptor’s eye from a surprising distance.
No Priority
The camera detects subjects on its own without giving preference to any type. It’s a good option when you’re shooting mixed scenes or aren’t sure what your subject will be.
No Priority mode uses the camera’s general subject recognition, which looks for shapes and contrast patterns that suggest a subject. It works well for things like vehicles, architecture details, or any scene where neither people nor animals are present.
Customizing AF Settings on the R5
Beyond the main AF modes and detection options, the Canon R5 offers several customization options that are worth exploring.
Case settings let you fine-tune how the AF system behaves during tracking. Canon provides several preset cases, numbered Case 1 through Case 4, each optimized for different types of movement. Case 1 is the default balanced setting. Case 2 ignores obstacles that briefly pass through the frame. Case 3 reacts instantly to sudden subject changes. Case 4 is for subjects that accelerate and decelerate quickly.
You can also adjust the AF speed for Servo AF to be faster or slower depending on your preference. Slowing it down slightly can reduce the chance of the system jumping to the wrong subject during busy scenes.
Tips for Getting the Most from Canon R5 Autofocus Settings
- Press the shutter button halfway again to refocus, even after achieving initial focus.
- Manually adjust image brightness, since it can shift before and after focusing.
- Autofocus speed changes depending on the subject and environment, which can affect continuous shooting speed.
- Screen flickering or autofocus problems can happen in uneven lighting. Try restarting the camera if this occurs.
- Switch to manual focus if autofocus isn’t giving you the results you need.
- For subjects near the edge of the frame, use an AF point or Zone AF frame to lock focus, then recompose your shot.
- Some lenses work better with the Canon R5 than others. If you run into compatibility issues, try a different lens.
- Keep your firmware updated. Canon has released several AF performance updates since the R5 launched, and running the latest version gives you the best tracking behavior.
- Assign AF mode switching to a custom button so you can jump between Face + Tracking and single-point AF without digging into menus.
Wrapping Up
Take some time to learn the Canon R5 autofocus settings before your next shoot. The more familiar you are with each mode and detection option, the faster you’ll be able to react in the field. The R5’s AF system is one of the strongest on the market in 2026, and spending a few minutes setting it up properly pays off every time you pick up the camera. Check the camera’s user manual for full details on every setting.
