The Canon 7D Mark II as a Landscape Camera
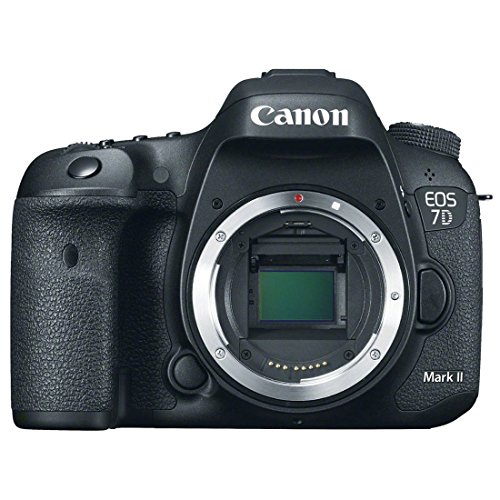
The Canon 7D Mark II is best known as a sports and wildlife camera, but its build quality, sensor performance, and advanced controls make it a very capable landscape tool. Its 20.2-megapixel APS-C sensor is driven by dual DIGIC 6 processors. The 65-point all cross-type autofocus system is overkill for static landscapes, but the camera’s weather sealing, magnesium alloy body, and full manual control set put it in a different class than entry-level bodies.
If you already own a 7D Mark II for action work and want to take it out for landscape photographers‘ style shooting, here’s how to configure it for the best results.
Core Exposure Settings
Aperture Priority (Av) Mode
Set the mode dial to Av. You pick the aperture, the camera handles shutter speed. For landscapes, set aperture between f/8 and f/11. This range produces the sharpest results from most Canon EF and EF-S lenses on this body. The 7D Mark II’s sensor resolves fine detail well, so you’ll see a real difference between f/8 and f/16 in pixel-level sharpness.
Avoid going narrower than f/16 unless you need extreme depth of field for a very close foreground subject. Diffraction softening becomes visible past f/14 on the 20.2-megapixel sensor.
ISO 100
Set ISO to 100 for all tripod-based landscape work. The 7D Mark II produces its cleanest files at base ISO with strong color depth and minimal grain. The camera handles ISO 100 to 400 very well. Above ISO 1600, noise becomes more apparent, but you’ll rarely need high ISO for landscape photography.
Evaluative Metering
Use Evaluative metering, which reads the entire frame and calculates a balanced exposure. It’s linked to the 150,000-pixel RGB+IR metering sensor, which is the same unit that tracks subjects in the autofocus system. For landscapes, it does an excellent job reading sky-to-ground brightness ratios.
When shooting toward the sun or dealing with a very bright sky, dial Exposure Compensation down by -0.3 to -1.0 stops. This keeps highlight detail intact. You can recover shadow detail in post-processing, but blown highlights are gone for good.
Focusing Strategy
Live View for Mirror Lock
Shooting in Live View locks the mirror in the up position, which eliminates the tiny vibration caused by mirror slap during exposure. On a tripod, this makes a measurable difference in sharpness, especially at shutter speeds between 1/4 second and 1/30 second where mirror vibration has the most impact.
In Live View, use the magnify button to zoom in 5x or 10x on your focus area. Check that edges and textures are crisp, then take the shot. This method is slower than using the viewfinder, but it’s far more precise for static scenes.
Manual Focus for Control
Switch the lens to MF and use Live View magnification to nail focus manually. This is especially useful in low-contrast conditions like fog, haze, or flat overcast light where autofocus may hunt back and forth without locking.
Weather Sealing Advantage
The 7D Mark II’s weather-sealed body and shutter assembly handle rain, mist, dust, and cold temperatures. This is a real advantage for landscape work. Morning fog, coastal spray, desert dust, and mountain weather are all part of the landscape photographer’s world. Where lighter cameras need a rain sleeve or bag cover, the 7D Mark II keeps shooting. Pair it with a weather-sealed L-series lens for full protection.
That said, weather sealing is resistant, not waterproof. Wipe down the camera after exposure to heavy moisture and keep a microfiber cloth handy for the lens front element.
Picture Style and Custom Functions
Picture Style
Select the Landscape picture style in the shooting menu. It increases saturation in greens and blues while bumping sharpness slightly. For JPEG shooters, this is a good baseline. RAW shooters can apply any picture style in post-processing, so the in-camera setting only affects the LCD preview and embedded JPEG.
Custom Functions Worth Setting
Mirror Lockup (C.Fn III-13): Enable mirror lockup so the first shutter press raises the mirror and the second fires the shutter. This two-step process eliminates mirror vibration without needing Live View. Pair it with the 2-second self-timer for a fully hands-free, vibration-free exposure.
Long Exposure Noise Reduction: Turn this on for exposures longer than 1 second. The camera takes a second “dark frame” after the exposure and subtracts sensor noise from the image. The downside is that a 30-second exposure takes 60 seconds total. For star trails and very long exposures, some photographers prefer to handle noise reduction in software to save time in the field.
Lens Recommendations
The 7D Mark II’s EF mount accepts the full range of Canon EF and EF-S lenses. For landscapes, the EF-S 10-18mm f/4.5-5.6 IS STM is an affordable ultra-wide option that’s sharp at f/8. The EF-S 10-22mm f/3.5-4.5 USM offers faster autofocus and a constant build quality. For the highest optical performance, the EF 16-35mm f/4L IS USM pairs beautifully with the 7D Mark II, though it gives a tighter field of view on the APS-C sensor (about 25 to 56mm equivalent).
Check out our full guide to the Best Canon lens for landscape photography for more options and comparisons.
HDR Bracketing
The 7D Mark II supports Auto Exposure Bracketing with 2, 3, 5, or 7 frames. For landscape HDR, a 3-frame bracket at +/- 2 stops covers most scenes. Use the camera’s high-speed continuous drive (up to 10fps) to fire the bracket sequence quickly, minimizing any shift between frames from wind or moving clouds.
Merge the bracketed frames in Lightroom, Photomatix, or Aurora HDR. Three frames at +/- 2 EV capture roughly 12 stops of dynamic range, which is enough for even the most extreme sunrise and sunset conditions.
Long Exposure Techniques
Switch to Manual mode for long exposures. Set ISO 100, aperture to f/11, and attach an ND filter. A 6-stop ND filter extends a 1/30 second exposure to about 1 second. A 10-stop ND turns it into roughly 30 seconds. These slow speeds blur moving water into silk and stretch clouds across the sky.
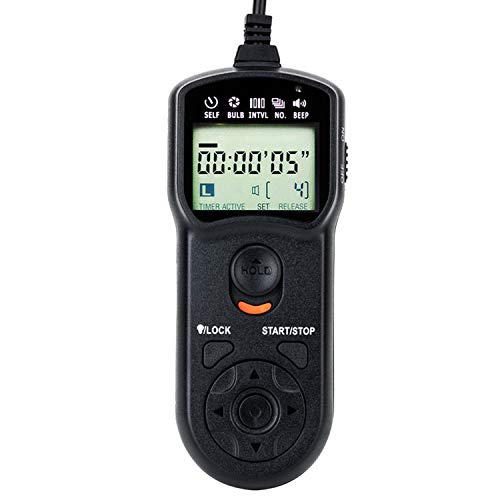
The 7D Mark II offers shutter speeds up to 30 seconds plus Bulb mode for exposures beyond that limit. In Bulb mode, the shutter stays open as long as you hold the button (or the remote release). Use a locking cable release to hold the shutter open for minutes at a time without touching the camera.
Composition Principles
Rule of Thirds: Enable the grid overlay in the viewfinder or Live View. Place horizons and key subjects along the grid lines and intersections. Avoid dead-center compositions unless a reflection or symmetrical subject calls for it.
Foreground Anchor: Wide-angle landscapes need a foreground element to create depth. Rocks, flowers, textures, waterlines, or fence posts in the bottom third of the frame pull the viewer into the scene.
Leading Lines: Roads, rivers, ridgelines, and rows of trees guide the eye from foreground to background. Position them to start near a corner and flow through the composition.
Golden Hour Timing
The most dramatic landscape light falls in the first hour after sunrise and the last hour before sunset. During these windows, the sun sits low and casts long shadows, warm color, and directional light that reveals texture in terrain. Arrive early, set up your tripod, compose your shot, and wait for the light to peak. The 7D Mark II’s bright viewfinder and responsive controls make it easy to adjust settings quickly as conditions change.
If you’re just getting started with camera gear, our guide to the Best DSLR Cameras for Beginners covers options at every price point.