When you purchase through links on our site, we may earn an affiliate commission. Here’s how it works.
Food Processor vs Blender: Which One Do You Need?
Food processor vs blender is a common debate among kitchen equipment enthusiasts, and it makes sense. At first glance, both appliances seem to do the same thing: you put ingredients in a container with blades and the machine processes them.
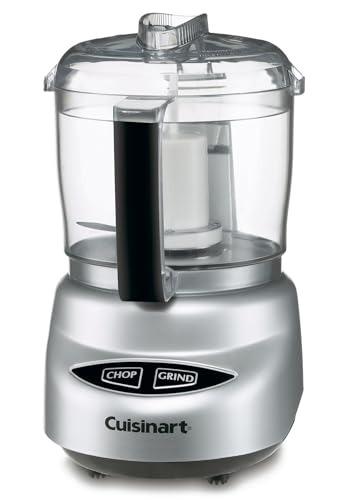
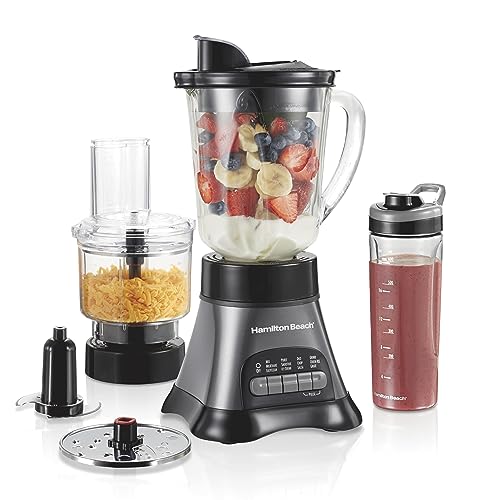
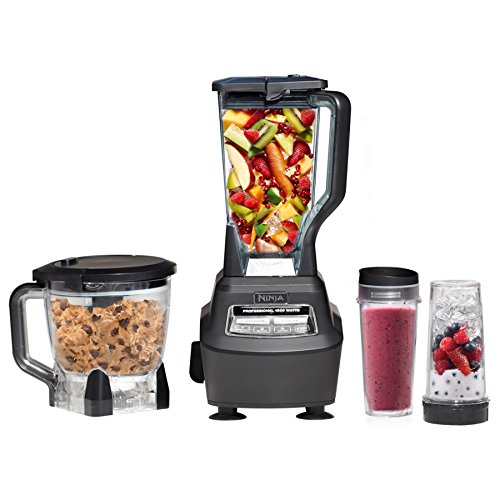
But once you spend some time getting to know each appliance, you will notice they have distinct characteristics and strengths (unless you use a blender-food processor combo).
What might surprise you is that food processors and blenders were not invented for the same purpose at all. They were developed to solve different kitchen problems, and understanding those differences will help you decide which one belongs on your countertop.
In this article, you will learn the key differences between food processors and blenders, what each one does best, and how they occasionally overlap in function.
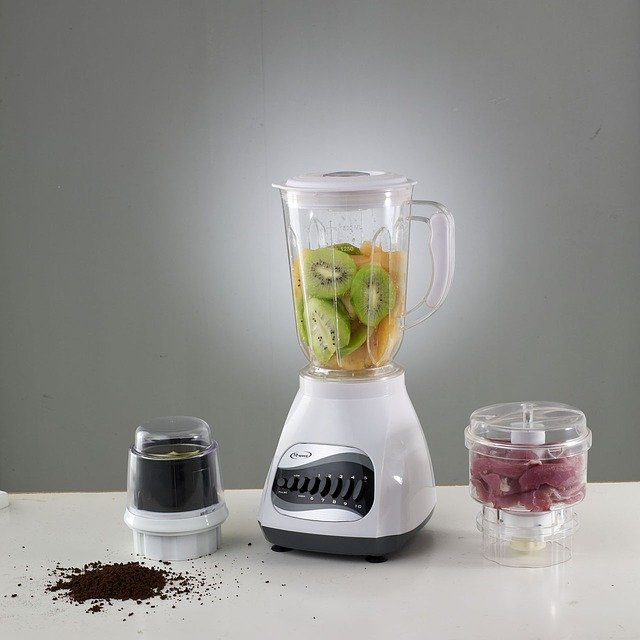
Food Processor vs Blender – Find the Differences
What is a Food Processor?
A food processor is a multi-functional electric kitchen appliance built to handle a wide variety of food preparation tasks. Chopping vegetables, shredding cheese, making dough, and slicing ingredients are just a few of the jobs a food processor can knock out in seconds.
Every food processor has four main parts: a motorized base, a transparent plastic work bowl, a set of interchangeable blades or discs, and a lid. Speed controls and a pulse button are typically located on the base.
The wide, flat design of a food processor’s work bowl gives it plenty of room for large batches. The tall feed chutes built into the lid let you add ingredients while the machine is running, which is a real time-saver during meal prep.
One major advantage food processors have over blenders is the variety of attachments they support. While blenders usually come with just one blade, food processors often include separate discs and blades for shredding, slicing, grating, chopping, and mixing. Some models even come with secondary bowl inserts so you can handle different tasks at the same time.
What is a Food Processor Used for?
A food processor is a true all-rounder in the kitchen. It shines when you need to process a large volume of food at once or handle tasks that would take forever by hand.
Want to make nut butter? Just toss the nuts in with a splash of oil and let the processor do its thing. The possibilities really are wide open when you have a food processor on your counter:
- Preparing dough for bread, pizza, or pastries
- Chopping and slicing vegetables quickly
- Grinding meats and nuts
- Grating cheese in bulk
- Pureeing baby food
How to Use a Food Processor
If you are thinking about buying a food processor or just brought one home, here is a simple step-by-step guide to getting started.
Step 1: Plug in the Food Processor
Start by connecting the food processor to a power outlet. Make sure the outlet is easily accessible and that the cord is not stretched across a walkway.
Step 2: Attach the Bowl to the Base
Place the work bowl onto the base unit. Most models require you to twist the bowl counter-clockwise until it clicks and locks into position.
Step 3: Choose Your Blade or Attachment
Pick the blade or disc that matches the task you want to do. For chopping, mincing, or pureeing, attach the S-shaped chopping blade to the center spindle. For slicing or shredding, use the appropriate disc.
Step 4: Secure the Lid
Once your blade or attachment is in place, close the bowl with the lid. Most food processors will not start unless the lid is properly locked, which is a safety feature.
On a similar note, our twin gear juicer article has more practical tips.
Step 5: Add Your Ingredients
If you are using a slicing or shredding disc, push ingredients through the feed tube in the lid using the food pusher. For chopping tasks, you can add ingredients directly to the bowl before putting the lid on.
Step 6: Turn It On
Press the appropriate speed button or use the pulse function. Processing time depends on the ingredients and the result you want, but most tasks are done in under a minute.
Step 7: Clean Up
After you are finished, turn off the processor, unplug it, and disassemble the parts for cleaning. Washing the blades, bowl, and lid promptly will keep everything in good condition and extend the life of your appliance.
What is a Blender?
A blender is an electric kitchen appliance designed to combine solid and liquid ingredients into a smooth mixture. Like food processors, blenders have four main parts: a motorized base, a pitcher (or jar), a set of blades, and a lid.
Most blender pitchers are conical or tapered, with a handle and a pouring spout for convenience. Speed controls and blend settings are found on the base. The rotating blades screw into the bottom of the pitcher, making them easy to remove when it is time to clean up.
What is a Blender Used for?
Blenders are at their best when working with liquids and soft ingredients. Smoothies, soups, sauces, and gravies are the classic blender tasks. The appliance mixes, emulsifies, and purees food into liquid or semi-liquid forms, which is why blenders are sometimes called liquidizers.
Any standard blender can handle soft fruits, vegetables, and frozen ingredients. However, if you plan to crush ice, blend frozen fruits, or process other hard materials regularly, you will want a high-powered model.
Blenders have become more capable over the years, but they still cannot match the range of tasks a food processor handles. If your primary goal is making drinks, soups, or smooth sauces, a blender is the right tool. For everything else, you will probably want a food processor too.
One thing worth keeping in mind is wattage. A standard blender with 300-500 watts will handle most soft ingredients and basic smoothies just fine. But if you regularly work with ice, frozen fruit, or tough vegetables, look for a model with 700 watts or more. High-performance blenders from brands like Vitamix and Blendtec push well above 1,000 watts and can handle almost anything you throw in.
How to Use a Blender
Using a blender is straightforward, but there are some important steps to follow for safety and best results.
Step 1: Plug It In
Before connecting the blender to a power source, make sure it is clean and dry. Keep your hands dry when handling electrical appliances near water.
Step 2: Remove the Lid and Add Ingredients
Do not overload the pitcher with solid ingredients. Start with soft items like a peeled banana, then add liquid. The liquid helps the blades move freely. Always make sure the liquid covers the solid ingredients at least partially. Avoid putting very hot foods directly into the blender, as steam pressure can pop the lid off.
Step 3: Secure the Lid Tightly
We walk through masticating juicer step by step in a separate post.
Make sure the lid is locked in place before blending. If the lid is not tight, it can pop off during blending and send ingredients flying across your kitchen. Some blenders have a removable cap in the lid for adding ingredients while blending, but it is generally best to keep everything sealed until you are done.
Step 4: Start Blending
Begin on a low speed to get things moving, then gradually increase to your desired speed. The high-speed setting is usually on the far right of the control panel. Never put utensils inside the blender while it is running. If you need to stir the contents, turn the blender off first.
Step 5: Pour Out the Contents
Once blending is complete, carefully remove the lid and pour the mixture into your serving container using the spout.
Step 6: Clean the Blender
Wash all parts thoroughly after each use. Be careful when cleaning the blades, as they are sharp. Detach the blade assembly from the pitcher and wash them separately. Do not submerge the motorized base in water; just wipe it down with a damp cloth.
Step 7: Store Safely
Once everything is clean and dry, reassemble the blender and store it in a safe, dry place. Keep it out of reach of young children.
Know the DifferencesFood Processor vs. Blender: The Differences
It is easy to confuse a food processor with a blender, especially since both machines chop up ingredients. But there are real differences in design and function that determine which one is right for the job.
Food processor designs have evolved significantly in recent years. Models like the Braun 12-cup have introduced new form factors, though traditional designs still dominate the market. Let’s break down the key differences by looking at their functions and components.
1. Use
Blenders are built primarily for smooth liquid mixtures, whether hot or cold. Think smoothies, soups, dips, and sauces. Everything about a blender, from the blade angle to the motor power, is optimized for turning things into liquid. When you turn a blender on, gravity pulls ingredients down into the spinning blades, creating a vortex that processes everything evenly. This works best when there is enough liquid in the mix.
Food processors, on the other hand, are designed for dry and semi-dry foods. With the right attachment, they can chop, slice, shred, and grate. Newer models include even more accessories and can handle an impressive range of tasks. Some food processors can even work with liquid ingredients, though the work bowl is usually not sealed as tightly as a blender pitcher, so you need to be careful with large amounts of liquid.
2. Cutting Blades
The blade system is where food processors and blenders really differ. Blenders typically have a single fixed blade assembly at the bottom of the pitcher. Food processors, by contrast, often include multiple blade and disc options.
A standard food processor comes with a chopping blade (the S-blade), a slicing disc, and a shredding or grating disc. Each one serves a specific purpose. Higher-end models may also include whisking discs, citrus attachments, dough paddles, and peeling discs.
The S-blade in a food processor looks and works very differently from the blade assembly in a blender. Blender blades are designed to create a liquid vortex; food processor blades are designed to cut and chop with precision.
3. Capacity and Bowl Shape
Blender pitchers are typically tall and narrow, which helps create the vortex effect needed for smooth blending. Most standard blenders hold between 40 and 64 ounces. Food processor bowls are wide and flat, giving you more surface area for chopping, slicing, and mixing. Work bowls usually range from 7 to 14 cups, with some large models going up to 16 cups. If you regularly cook for a crowd or like to meal prep in bulk, a food processor with a big bowl will save you time.
Food Processor vs Blender – Frequently Asked Questions
#1 – Can a blender be used as a food processor?
Answer – Yes, a blender can stand in for a food processor in a pinch. You may need to adjust some settings and techniques, but you can handle some food processing tasks with a blender. Keep in mind, though, that a food processor is more versatile and handles a wider range of jobs.
#2 – Can you grind coffee beans in a food processor?
Answer – You can technically grind coffee beans in a food processor if you do not have a dedicated grinder. However, the grind will not be as consistent or fine as what you get from a proper coffee grinder. For the best results, it is worth investing in a grinder or buying pre-ground beans.
#3 – Can you make smoothies in a food processor?
Answer – Yes, you can make smoothies in a food processor, but the process is a little different than using a blender. You will need to add ingredients in the right order rather than all at once, and it may take a bit longer. The end result will be similar, but a blender is still the better tool for the job.
